
Welcome to the wonderful world of the pizza making process, a tantalizing journey through the pizza elements. This age-old culinary craft turns simple ingredients into delicious symphonies, all happening right in your own kitchen.
Dive into the art and science of creating the perfect crust, simmering a rich sauce, and mastering the melty wonder of cheese, not forgetting those unique toppings that give each pizza its personality.
Whether you’re a first-time dough handler or an experienced home chef, there’s always a new secret to be discovered in the pizza making process.
So why wait?
Get ready to explore the elements of pizza making and create your mouthwatering masterpiece. Let’s delve into this delicious adventure.
Let’s get started!
Here’s What You Will Find:
Pizza is a simple word that immediately conjures images of golden crusts, vibrant sauce, melted cheese, and many toppings. A word that holds the power to bring a smile to your face, no matter where in the world you are. But beyond the ecstasy of tasting this universally adored dish lies an equally gratifying journey — the journey of the pizza making process.
The process of crafting a pizza is an enchanting dance of ‘pizza elements,’ where each component plays a unique role, creating a harmony of flavors and textures. The beauty of pizza lies not just in its taste but also in the artisanal craft of its creation, one that turns humble ingredients into a piece of edible art.
Every element matters, whether it’s the pillowy dough, the vibrant sauce, the creamy cheese, or the vibrant toppings.
Every choice you make affects the final masterpiece, and the options are endless. The pizza making process offers a playground for your culinary creativity, where you can experiment, learn, and ultimately savor the fruit of your labor.
Through the course of this post, we’ll delve deep into each of these ‘pizza elements,’ guiding you in mastering the art of pizza making right in your own kitchen. So tighten your apron and fire up the oven because we’re about to embark on a mouthwatering journey into the heart of pizza creation.
What is the Pizza Making Process?
The pizza making process is a culinary journey that involves creating a dough, which serves as the foundation, and crafting a sauce that adds a layer of flavor. This is topped with cheese for a creamy texture and other toppings for added taste and character.
The pizza is then baked at a high temperature for a crispy crust and bubbly, melted cheese. This process also involves carefully considering time, particularly for the fermentation and proofing of the dough and the baking duration, to ensure the pizza is cooked to perfection.
Pizza Making Process
Creating a pizza is not just about tossing some dough and spreading toppings. It’s a thoughtful, methodical process that can be broken down into several key steps. Understanding these steps is the first step towards mastering pizza making.
Step 1: Preparing the Dough
This is the foundation of your pizza and one of the most critical aspects of the pizza making process. Start by choosing the right ingredients, then combine flour, yeast, water, oil, salt, and sugar into a smooth and pliable dough. Once mixed, it needs to be kneaded until it’s elastic.
After kneading, the dough needs time to ferment and proof, allowing the yeast to work its magic and giving it a light, airy texture.
Step 2: Making the Sauce
While your dough is proofing, preparing your pizza sauce is the perfect time. Traditional pizza sauce is tomato-based and includes ingredients like garlic, oregano, and basil for a robust flavor. However, feel free to get creative and experiment with other types like white sauce, barbecue sauce, or even pesto.
Step 3: Prepping the Toppings
You can start prepping your toppings while your dough is proofing and your sauce is simmering. This could include grating cheese (usually mozzarella, but the cheese world is your oyster), slicing vegetables, cooking any meat, or even prepping more unconventional toppings like fruit or eggs.
Step 4: Assembling the Pizza
Once your dough has properly risen, it’s time for assembly. Start by stretching your dough into the desired shape, then spread your sauce, sprinkle your cheese, and add your chosen toppings.
Step 5: Baking the Pizza
The pizza is now ready to go into the preheated oven. The ideal temperature and baking time depend on your specific dough and the thickness of your pizza. However, a good starting point is a very hot oven—around 475 to 500 degrees Fahrenheit for about 10-15 minutes.
Step 6: Slicing and Serving
After your pizza comes out of the oven, give it a couple of minutes to cool down before you slice it. This waiting period allows the cheese to set slightly, making the slicing process easier and the pizza easier to handle.
Now that you have a bird’s eye view of the pizza making process, let’s delve deeper into each element, starting with the base of any great pizza—the dough.
Elements of Pizza
Embarking on a pizza-making process isn’t just about blending ingredients and popping them in the oven. It’s about understanding and appreciating each component’s unique role, collectively forming what we refer to as the ‘pizza elements.’
From the dough that forms the foundation to the sauce that imparts a burst of flavor, the cheese that adds a layer of creamy texture, and the toppings that provide character, each element is crucial to your pizza’s final masterpiece.
Let’s delve deeper into these vital components, to better understand their roles and learn how to perfect them.
Dough
The pizza dough serves as the canvas for your edible masterpiece. It’s a vessel for the sauce and toppings and a critical player in your pizza’s overall flavor and texture.
- Types of Pizza Dough: There are several types of pizza dough to choose from, each contributing to a unique pizza experience. From thin and crispy Neapolitan-style dough to the thicker and chewier New York-style, and even the deep, focaccia-like crust of the Sicilian pizza, your choice of dough sets the tone for your pizza. Gluten-free options are also available for those with dietary restrictions.
- Making Pizza Dough from Scratch: Creating your pizza dough is a simple process involving mixing flour, yeast, water, and a touch of salt and sugar. The magic happens when the yeast ferments, converting the sugars in the dough into carbon dioxide, which raises the dough. The process of kneading the dough helps develop the gluten strands in the flour, making the dough elastic and giving your pizza crust its structure.
- Proper Dough Fermentation and Proofing: After the dough is made, it needs to rest and proof. This period allows the yeast to continue fermenting, developing complex flavors in the dough, and causing it to rise. The longer the dough ferments, the more flavor it will have. A good rule of thumb is to let your dough proof at room temperature for at least 1-2 hours or in the fridge for up to 24 hours for a deeper flavor.
Sauce
The sauce is the first layer of flavor that interacts with your palate when biting into a pizza. It should complement the dough and balance the flavors of your toppings.
- Traditional Tomato Sauce: A classic tomato-based pizza sauce is a simple blend of ripe tomatoes, garlic, olive oil, salt, sugar, and herbs like basil and oregano. It’s important to cook this mixture into a concentrated sauce, allowing the flavors to meld together and the excess moisture to evaporate.
- Alternative Pizza Sauces: While the tomato sauce is traditional, you can experiment with other varieties. Alfredo, pesto, or even a simple olive oil and garlic base can uniquely flavor your pizza. Your choice of sauce should harmonize with your chosen toppings.
Cheese
The right cheese can take your pizza from good to great, offering a creamy, salty element that holds all the other toppings in place.
- Commonly Used Cheeses in Pizza: Mozzarella is the most common choice due to its mild flavor and excellent melting properties. However, other cheeses like provolone, cheddar, gouda, or even a sprinkle of parmesan can add depth to your pizza’s flavor profile.
- Applying Cheese: When applying cheese, less is more. Too much cheese can make your pizza greasy and overpower the other flavors. It’s also important to evenly distribute the cheese to ensure every slice gets an equal share.
Toppings
Toppings are a great way to customize your pizza and add color, texture, and additional flavors.
- Traditional Pizza Toppings: This includes ingredients like pepperoni, bell peppers, mushrooms, onions, olives, and anchovies. These toppings have been time-tested and are popular for a reason—they complement the pizza’s base elements well.
- Creative and Unusual Pizza Toppings: Don’t be afraid to experiment with less traditional toppings like pineapple, figs, smoked salmon, capers, or even eggs. Different and unexpected toppings can make your homemade pizza truly unique.
Temperature
The temperature at which you bake your pizza is crucial to achieving the desired texture and coloration.
- Ideal Baking Temperature: Pizza is best baked in a very hot oven. Traditional wood-fired pizza ovens can reach temperatures over 900°F, but in a home setting, set your oven to the highest temperature it allows—typically between 475-500°F. High heat ensures a crisp, well-browned crust and bubbling caramelized cheese.
- Preheating the Oven: Preheating your oven before baking is essential. This allows the oven to reach a consistent temperature throughout, resulting in even baking. If you’re using a pizza stone or steel, preheat it in the oven for at least an hour. The stone absorbs the heat and then transfers it evenly to the pizza, helping to achieve a crispy crust.
Time
Time plays a significant role in various pizza-making stages, affecting the preparation and baking process.
- Fermentation and Proofing Time: As discussed earlier, once you’ve prepared the dough, it needs time to rest, ferment, and proof. This period allows the yeast to create gases, causing the dough to rise and develop flavor. Depending on your schedule and flavor preferences, the dough can be proofed at room temperature for a shorter period (1-2 hours) or in the fridge for a longer slow fermentation (up to 24 hours).
- Baking Time: The exact baking time for your pizza depends on a few factors, including the thickness of your crust, the heat of your oven, and the type and amount of toppings. However, at a high heat of around 475-500°F, most pizzas will be perfectly baked within 10-15 minutes. Keep a close eye on the pizza to avoid burning it. The crust should be golden, and the cheese should be melted and slightly browned.
Now that we understand each pizza element better let’s move on to assembling and baking your pizza.
When you learn how to master these elements combined, you will achieve the maximum level of pizza proficiency, resulting in every pizza maker’s most desired skill, and that is consistency.
Choosing the Right Ingredients
Before we begin assembling our pizza, we must emphasize the importance of selecting quality ingredients. The flavor of your pizza is largely determined by the components you choose, so opt for the freshest and highest quality ingredients whenever possible. Fresh vegetables, high-quality cheeses, and premium meats can elevate your pizza from good to extraordinary.
Choosing the right ingredients is a crucial part of the pizza making process, as it directly impacts the taste and quality of your pizza. The core elements of a pizza — the dough, sauce, cheese, and toppings — all deserve careful consideration.
- Dough: The choice of flour is vital when making your dough. As mentioned earlier, bread flour is often favored due to its higher protein content, leading to better gluten formation and a chewier crust. However, all-purpose flour can also be used if bread flour is not available. Additionally, yeast is needed for the dough to rise; active dry yeast is a common choice, but instant yeast can also be used.
- Sauce: The most common type of pizza sauce is tomato-based, typically made from high-quality canned crushed tomatoes or tomato puree, garlic, a dash of salt, and various herbs such as oregano and basil. You could choose a white sauce (bechamel), pesto, or barbecue sauce if you prefer a different flavor profile. Homemade sauces often have a fresher taste, but some excellent store-bought options are also available.
- Cheese: Mozzarella is the gold standard for pizza cheese due to its excellent melting properties and subtle, milky flavor that complements other ingredients. For an authentic Italian-style pizza, you might use fresh mozzarella. Other cheeses like cheddar, gorgonzola, or fontina can also be used either in combination with mozzarella or on their own, depending on the flavor profile you’re aiming for.
- Toppings: The choice of toppings can vary immensely based on personal preference. Traditional Italian pizzas often feature simple, high-quality toppings like fresh basil leaves, tomatoes, and prosciutto. Other popular toppings include various vegetables (like bell peppers, onions, mushrooms, and olives), meats (like sausage, pepperoni, and chicken), and even fruits like pineapple. Fresh ingredients generally provide the best flavor.
- Olive Oil: A good quality extra virgin olive oil is often used in both the pizza dough and as a finishing drizzle on the baked pizza. Its rich flavor complements the other ingredients and contributes to the overall taste of the pizza.
- Herbs and Spices: Herbs and spices can elevate the flavor of your pizza. Dried oregano and fresh basil leaves are classic choices. Crushed red pepper flakes can provide a bit of heat, and freshly ground black pepper can add a touch of spice.
Choosing high-quality ingredients that work well together is key to making a delicious pizza. While these are some common choices, feel free to experiment with different ingredients based on your taste preferences. The beauty of homemade pizza is that you can customize it exactly to your liking.
Making the Dough
Making the dough is arguably the most important part of the pizza-making process. It’s the foundation of your pizza and will greatly affect the overall taste and texture of the final product. Let’s expand upon this crucial step:
- Choosing the Right Flour: The type of flour you use can significantly impact your dough. Bread flour is commonly used for pizza dough due to its higher protein content, leading to more gluten formation and a chewier crust. However, all-purpose flour can also work if bread flour is not available.
- Hydration: The amount of water you use to hydrate your flour also plays a critical role in your dough. This is often expressed as a percentage of the weight of the flour. Most pizza dough recipes will have a hydration level of around 60-70%. More water can make a more sticky dough and harder to handle, but it can also produce a lighter, airier crust.
- Mixing and Kneading: After combining your flour, water, yeast, and salt, it’s time to mix and knead. This process develops the gluten in the flour, creating a strong network of proteins that gives the dough its structure and allows it to stretch without breaking. You’re looking for a smooth, elastic dough that’s slightly tacky but not too sticky.
- Fermentation and Proofing: Once your dough is kneaded, it needs time to rest and ferment. During this process, the yeast consumes the sugars in the flour, producing carbon dioxide gas and alcohol. The gluten network traps the gas, causing the dough to rise. The alcohol and other byproducts of the yeast add flavor to the dough. After the initial rise, the dough is divided and shaped into balls, then allowed to proof until it has doubled in size. This can take anywhere from 1-2 hours at room temperature for a quick proof up to 24-48 hours in the refrigerator for a slow, cold ferment, which can develop more complex flavors.
- Shaping: Shaping your pizza dough into a disc is a skill that takes a little practice. The goal is to stretch the dough into a thin layer without tearing it or pushing out all the gas bubbles that have formed during fermentation and proofing. This often involves a combination of pressing, stretching, and rotating the dough by hand. Some people even toss the dough in the air, but that’s more for show than anything else.
- Resting Before Baking: After shaping, it’s a good idea to let your dough rest for a few minutes before adding your toppings. This allows the gluten to relax, making the dough easier to work with and helping it maintain its shape during baking.
As you can see, making the dough involves several stages and various factors contributing to your pizza crust’s final texture and flavor. By understanding these factors and how they interact, you can begin to master the art of pizza dough.
Assembling the Pizza
- The Base: Start by placing your shaped dough on a pizza peel or an inverted baking sheet dusted with flour or cornmeal. This makes it easier to transfer the pizza into the oven later.
- Sauce: Spread a thin layer of your chosen sauce over the dough, leaving the edges clear for the crust. Remember, less is more when it comes to sauce. Too much can make your crust soggy.
- Cheese: Sprinkle your cheese evenly over the sauce. This helps create a barrier that prevents the other toppings from making the crust soggy. Again, moderation is key to avoiding an overly greasy pizza.
- Toppings: Now for the fun part. Add your selected toppings, but be careful not to overload the pizza. Too many toppings can weigh down the crust and extend the baking time.
Did you Know?
Did you know the soul of the pizza-making process is the pizza maker and not the ingredients?
Get Ready to Become a Homemade Pizza PRO!
Baking the Pizza
Once your pizza is fully assembled, it’s time for the final and perhaps most transformative stage – baking.
- Preheating the Oven: Before you start assembling your pizza, make sure to preheat your oven to the highest temperature it can go, usually between 475-500°F. If you’re using a pizza stone or steel, place it in the oven during preheating. These tools absorb heat and will help achieve a crispy, restaurant-style crust at home.
- Transferring the Pizza: If you’ve assembled your pizza on a peel or an inverted baking sheet, you can slide it directly onto your preheated pizza stone or onto a baking sheet in the oven. Be quick and careful with this transfer to maintain the shape of your pizza and prevent any toppings from shifting.
- Baking Time: The time your pizza needs to bake will depend on the thickness of your crust, the temperature of your oven, and the quantity and type of your toppings. However, at a high heat of around 475-500°F, most pizzas will be ready within 10-15 minutes. You’ll know your pizza is done when the crust is golden brown, and the cheese is melted and slightly caramelized.
- Rotating the Pizza: If you notice that one side of the pizza is cooking faster than the other, you might need to rotate the pizza halfway through the baking time to ensure even cooking. This is especially important if your oven has hot spots.
Once your pizza is beautifully baked, resist the urge to slice it immediately. Let it rest for a few minutes to allow the cheese to set, making it easier to slice and eat. Now, all that’s left is to enjoy the fruits of your labor, a perfectly baked homemade pizza.

Time
The element of time plays a vital role in several stages of the pizza-making process, impacting both the preparation and the final result in terms of flavor, texture, and overall quality. Let’s delve deeper into the significance of time in various aspects of pizza making.
- Time in Dough Preparation: The process of making the pizza dough includes two significant periods where time is key: fermentation and proofing. Fermentation is the process where yeast consumes the sugars in the dough and produces carbon dioxide gas, leading to the dough’s rise. This step also helps develop complex flavors in the dough. Proofing is the rest period after the dough has been formed and before it’s shaped and baked. The yeast continues to ferment during proofing, further developing the dough’s flavor and texture. Depending on your flavor preferences and schedule, the dough can be proofed at room temperature for a shorter period (1-2 hours) or in the fridge for a slower fermentation process (up to 24 hours).
- Time in Baking: Time is an essential factor in baking the pizza. The precise baking duration depends on various aspects, including the thickness of your pizza crust, the heat of your oven, and the type and amount of toppings you’ve chosen. However, generally speaking, most pizzas baked in a home oven preheated to the highest temperature (usually between 475-500°F) will be perfectly cooked within 10-15 minutes. The goal is to achieve a golden-brown crust and melted slightly caramelized cheese.
- Resting Time: Once the pizza is out of the oven, give it some time to rest before slicing it. This allows the cheese to set slightly, making the pizza easier to handle and the slicing process smoother. It also gives the flavors time to meld together, which can enhance the overall taste of your pizza.
Time is a critical element in pizza making, contributing significantly to the development of flavor, the creation of the perfect crust, and the final presentation and taste of your homemade pizza. Understanding and managing the element of time in pizza making can help ensure that your pizzas are always delicious and satisfying.
Temperature
The element of temperature is another key player in the pizza-making process, influencing both the preparation and baking stages. Understanding its importance can distinguish between an average pizza and a great one. Let’s explore this in more detail:
- Temperature in Dough Preparation: The temperature of the water used to activate the yeast is crucial when preparing the pizza dough. The water should ideally be warm, around 105-110°F. Water that is too hot can kill the yeast, while water that is too cool may not properly activate it. The room temperature can also affect the dough’s fermentation and proofing stages. Warmer temperatures can speed up these processes, while cooler temperatures slow them down, potentially impacting the flavor and texture of your dough.
- Temperature in Baking: Baking temperature significantly impacts how your pizza turns out. Pizza is traditionally baked at very high temperatures. In wood-fired ovens, this can be as high as 900°F. However, the highest setting in a typical home oven is usually around 475-500°F. Baking pizza at a high temperature ensures a well-browned, crispy crust and beautifully melted, slightly caramelized cheese. It also helps to preserve the freshness and flavor of the toppings.
- Preheating the Oven: Preheating your oven before baking the pizza is vital. This ensures a consistent, high temperature throughout, which results in even baking. If you’re using a pizza stone or steel, it should be placed in the oven during preheating. These tools absorb heat and help achieve a perfectly crisp crust by evenly transferring that heat to the pizza.
- Temperature of the Toppings: The temperature of your toppings can also affect the final result. Toppings that are too cold may not cook properly in the time it takes for the pizza to bake. Therefore, it’s usually a good idea to bring ingredients like cheese and meats to room temperature before placing them on your pizza.
Maintaining and managing the correct temperatures at all stages of pizza-making is crucial for achieving the best possible result. From the preparation of your dough and the baking process to the final quality and taste of your pizza, the temperature is an element that requires careful consideration.
Finishing Touches
Even after your pizza comes out of the oven, you can take a few additional steps to enhance its flavor and appearance. These finishing touches can turn your homemade pizza into a truly gourmet experience.
- Resting: Before you slice your pizza, let it rest for a few minutes. This allows the cheese to be set and makes it easier to cut and serve.
- Fresh Herbs: Sprinkle fresh herbs, such as basil or oregano, over your hot pizza. The heat will release the herbs’ aromatic oils, adding a burst of freshness to your pizza.
- Extra Virgin Olive Oil: A drizzle of good quality extra virgin olive oil over the finished pizza can add a layer of richness and depth of flavor.
- Freshly Grated Parmesan: A sprinkle of freshly grated Parmesan cheese can enhance the flavor profile of your pizza, adding a nutty, slightly salty element that complements many traditional pizza toppings.
- Chili Flakes or Hot Sauce: If you like a bit of heat, add some chili flakes or a dash of your favorite hot sauce.
Cleaning Up
One less glamorous yet essential part of the pizza-making process is cleaning up after your culinary creation is complete. However, it doesn’t have to be a chore. Here are a few tips to help streamline the process.
- Clean as You Go: Try to clean utensils and bowls as you finish with them. It makes the task less daunting than facing a mountain of dirty dishes at the end.
- Scrape the Dough: If you have bits of dough stuck to your work surface, use a dough scraper to remove them easily. You can also sprinkle some flour over the stuck-on dough to help lift it.
- Caring for Your Pizza Stone: Remember never to wash it with soap if you use a pizza stone. The stone is porous and will absorb the soap, affecting the taste of your future pizzas. Simply scrape off any stuck-on food with a brush or plastic scraper, and let the stone dry completely before storing it.
With these steps, the process of creating homemade pizza is complete, from crafting the dough to savoring the final product and cleaning up afterward. By understanding the pizza-making process and each of the pizza elements in depth, you’re well on your way to creating your own gourmet pizza at home. Enjoy the journey!
The Last Slice
Pizza-making is an art form, a culinary journey combining creativity and science. By understanding each step of the pizza making process and the unique role of each pizza element, you can transform simple ingredients into a gastronomic masterpiece.
Every aspect contributes to the final result, from choosing the right ingredients, mastering the dough, and fine-tuning the temperature and time to applying those finishing touches. The journey may seem detailed, but remember, the beauty of pizza is in its versatility and the freedom it allows for personal expression.
So, whether you’re a seasoned home cook or a novice in the kitchen, embrace the process, experiment with flavors, and, most importantly, enjoy the delicious fruits of your labor. With the right knowledge, tools, and a dash of passion, you’re well-equipped to bring the art of gourmet pizza making into your own kitchen.
Happy pizza making!
Additional Resources

Baker’s Percentage Charts for Pizza Dough: Unlock the Secret Formula for Perfect Pizzas Every Time!
the PROs
This baker’s percentage chart will give you a starting point to develop your own recipe. These are the four main base recipes that can be adapted to any other pizza style.

Bakers Percentage Calculator for Pizza Dough: Is as Easy as 123
the PROs
This Baker’s Percentage Calculator will allow you to you calculate the baker’s percentage for any given pizza recipe in a few seconds.
Baker’s Percentage for Pizza: Mastering the Science of Pizza Dough
the PROs
In this article, we are going to uncover the math behind making great pizza at home. At first, it will appear a little intimidating, but don’t worry. Let us do the numbers; the only thing you need is your imagination!
Check Amazon’s Pizza-Making Must-Haves

Why have two pizza peels when you can only have one. This pizza peel surpasses the benefits of wood peels with the convenience of a metal peel. It's made entirely from anodized aluminum for a lightweight design that's incredibly durable, too. It's designed to be used frequently in high-heat pizza ovens.

The Etekcity Lasergrip 800 Digital Infrared Thermometer is a versatile and reliable tool for accurate temperature measurements. Its non-contact design allows you to measure temperatures from a distance, making it safe and hygienic for various applications. With a wide temperature range of -58°F to 1382°F (-50°C to 750°C), this infrared thermometer is perfect for both everyday cooking needs and professional uses.
The built-in laser pointer helps you target the specific area you want to measure, ensuring precision and consistency. Whether you're grilling, cooking, or performing household maintenance, the Etekcity Lasergrip 800 provides fast and accurate temperature readings with ease.
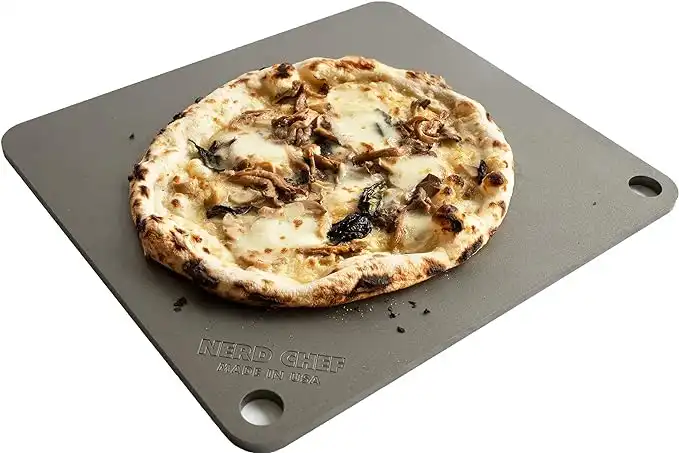 NerdChef Steel Stone
Making great crusts traditionally requires a 700-1000F wood-fired oven. Nerdchef Steel Stone replicates that performance in a home oven with its super-high heat transfer ability - transferring heat energy 20 times faster than ceramic. It creates beautiful and crispier crusts, gorgeous blistering throughout, and it cooks faster.
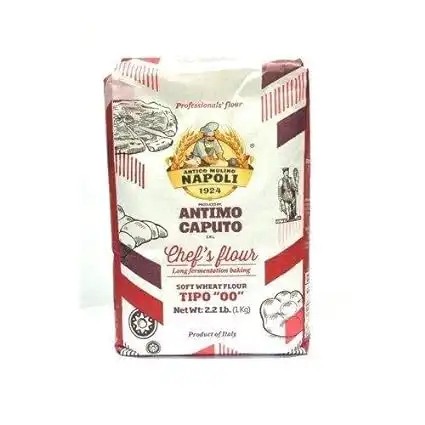
The Chef's flour is a general-purpose, high gluten flour that works well for many recipes. "Tipo 00" refers to how refined the flour is. Chef's Flour is best for those who want to bake in their traditional home oven up to 500 degrees Fahrenheit!
Enjoy!
Not a PRO? Not a Problem!
Take a pizza class to bring your pizza skills to the next level,
so you can be a PRO!
Related Posts

Costco Pizza Delivery: Find How You Can Get It Now!
the PROs
People go to Costco’s food court for many different reasons, but the cheesy slice of pizza they serve is among …
Pizza for Beginners: Don’t Buy Pizza, Make It! Here’s How to Get Started!
the PROs
You have this idea that you want to make pizza at home as opposed to ordering it, but where do you start? Don’t worry! Here you will find answers and directions to all your questions.

Pizza Toppings Under Cheese or Over Cheese? [Why the Order Matters]
the PROs
Is Pizza Cheese on Top or Bottom? Hey pizza lovers, are you wondering if you should layer pizza toppings under …

Newsletter
Subscribe to our Recipe of the Week newsletter and receive our partners’ latest recipes, tips, and discount offers.
Keep in Touch!