
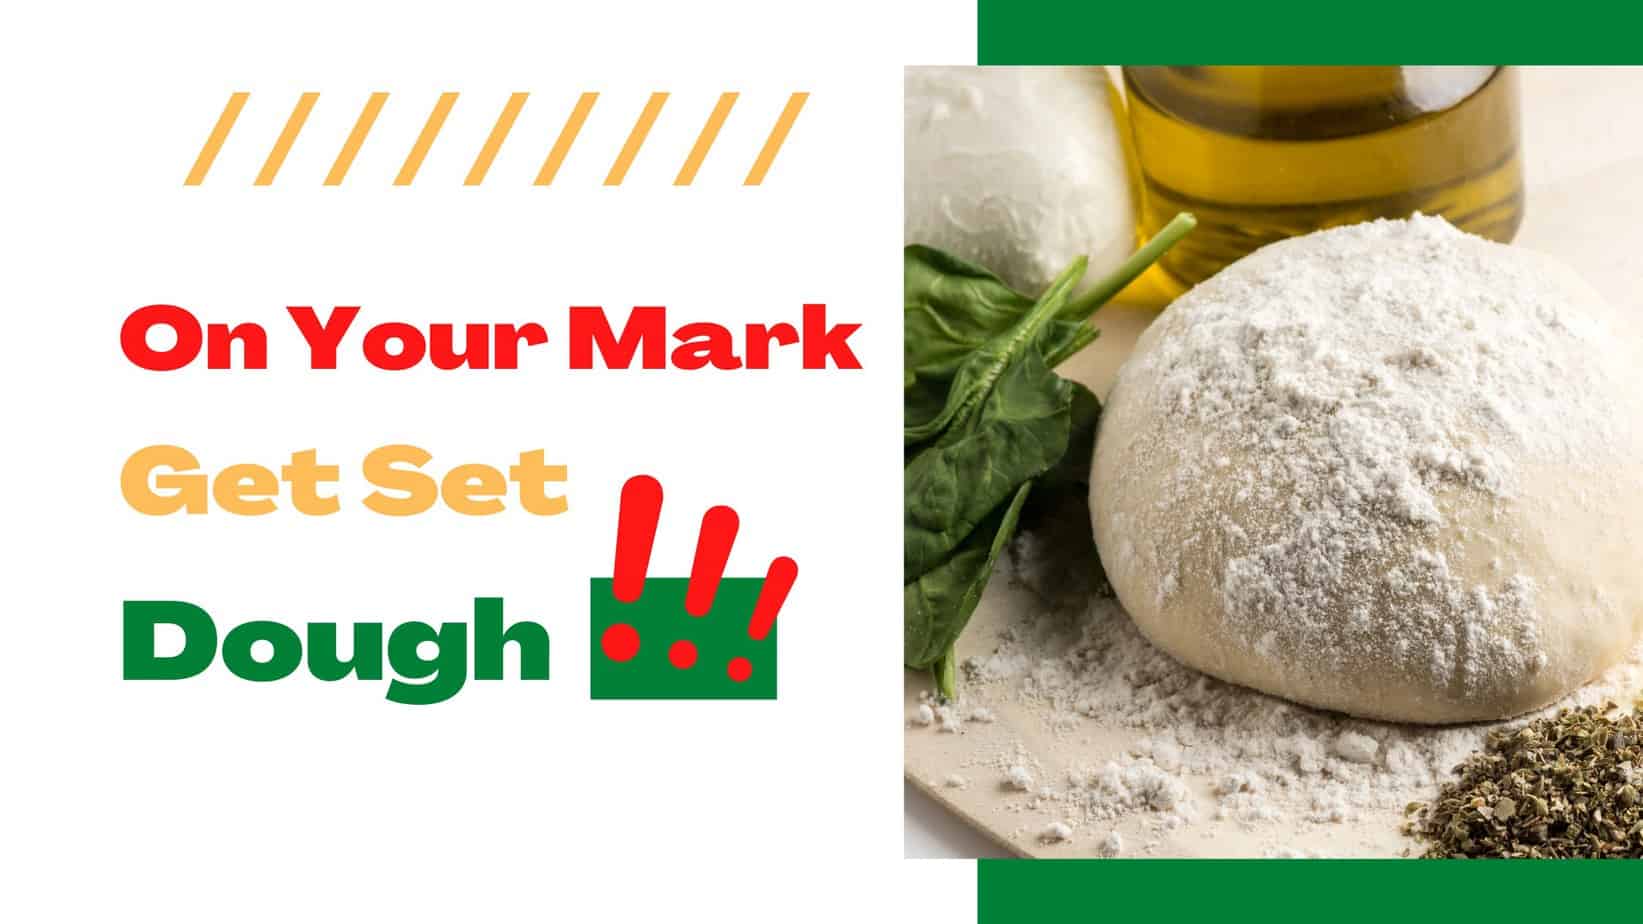
Imagine this: The scent of freshly baked dough wafting through your kitchen, the sizzling sound of melting cheese, and the vibrant colors of your favorite toppings coming together in a beautiful, mouth-watering symphony. That, my friend, is the magic of creating your very own homemade pizza.
You might think, “Sure, that sounds great, but isn’t pizza-making a mysterious art reserved for Italian nonnas and expert pizzaiolos?” Well, let’s slice that myth right here, right now.
You don’t need a culinary degree or a flight ticket to Naples to enjoy a perfect pie. With the right ingredients, a sprinkle of patience, and a dash of love, you can whip up a pizza that would make even the snobbiest of pizza connoisseurs nod in approval.
We’re not promising it will be a walk in the park – but hey, the best things in life rarely are, right? What we can promise, though, is a flavorful adventure that’ll take your taste buds straight to pizza paradise.
So, tie on that apron, roll up your sleeves, and get ready to dive deep into the delicious world of homemade pizza. From the secret science of yeast fermentation to achieving that dreamy, crispy crust, we’re about to embark on a journey to transform you into a true home pizzaiolo.
Ready to make some dough? Read on. Trust us; it’s going to be great!
Here’s What You Will Find:
Buy Pizza Dough or Make It Yourself?
We’re a little biased here, but making your own dough is truly rewarding. It gives you control over every aspect, from the ingredients to the fermentation time. But if you’re in a pinch, there’s no shame in buying pre-made dough. Just promise us you’ll give the homemade dough a try, okay?
It’s super easy; let’s get started!
Understanding the Ingredients
Let’s talk about the real MVPs of pizza making – the ingredients. Each one brings something unique to the table (quite literally), so understanding their role is paramount in your journey to pizza greatness.
Water
It’s not just for hydration, folks! Water activates yeast, helps distribute heat evenly through the dough during baking, and controls the consistency of your dough. The ratio of water to flour (known as the hydration level) can significantly affect your dough’s texture, so keep an eye on it!
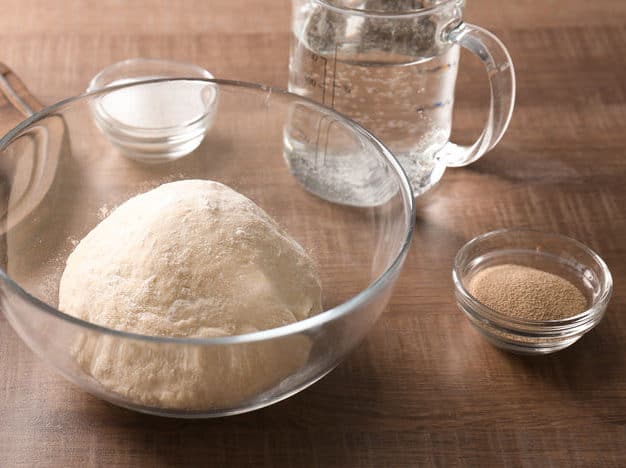
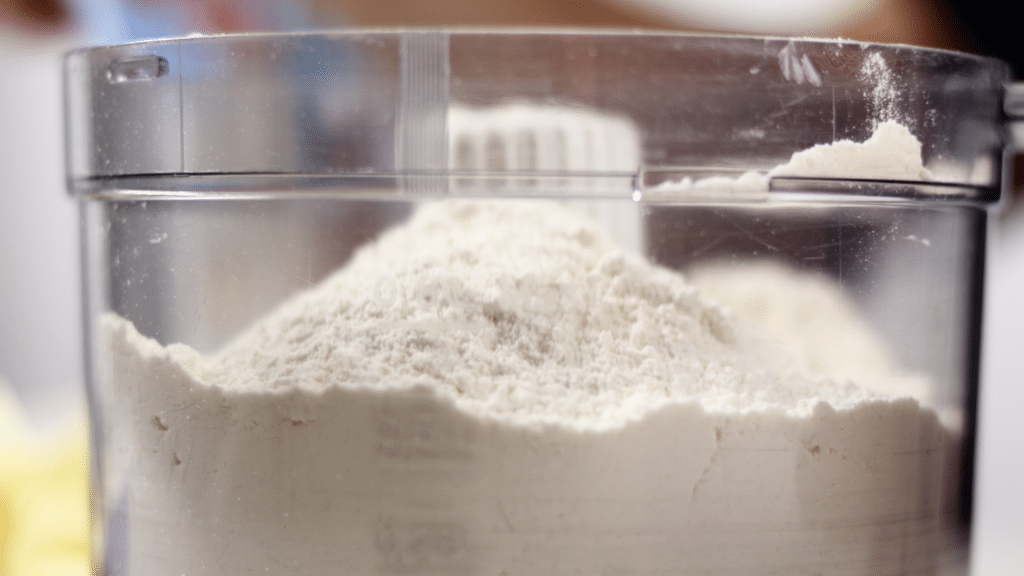
Flour
The backbone of your pizza dough. There are different types of flour, but for a traditional pizza, high-protein bread flour is a fantastic choice. It creates a sturdy yet tender crust that’s just begging for a slathering of sauce and a heap of shredded cheese.
When it comes to selecting the best flour for pizza, high-protein bread flour is often the top choice. Its higher gluten content gives the dough the desirable elasticity and structure. Additionally, understanding flour absorption is crucial for achieving the perfect pizza dough consistency, as it determines the amount of water needed to hydrate the flour properly. Finding the right balance of flour and water is key to a successful dough that’s neither too dry nor too sticky, allowing you to roll and shape it with ease.
Yeast
The tiny fungi that could! Yeast is responsible for fermentation, which makes your dough rise and gives it that delightful, slightly tangy flavor. There’s active dry yeast and instant yeast. Active dry yeast must be dissolved in water before use, while instant yeast can be mixed directly with dry ingredients. Both will work for your pizza dough, so use whichever you have on hand or prefer.
Yeast and gluten are the dynamic duos of pizza making, with yeast providing the leavening power and gluten giving the dough its stretchy, elastic texture.
Salt
It’s not just for flavor – salt strengthens the dough’s gluten structure and regulates yeast activity. Too little salt, and your dough could turn into a yeast party. Too much, and you might prevent the dough from rising properly. Balance is key here.
Olive Oil
This is what gives your crust that delectable, slightly crispy exterior. It also helps keep the interior moist. A little goes a long way!
Cheese
Ah, the crowning glory of any pizza! Mozzarella is a classic choice, but don’t be afraid to experiment. Just remember, cheese does more than add flavor; it also contributes to the texture and moisture of your pizza.
Using fresh mozzarella in homemade pizza can be a bit tricky due to its higher moisture content, as it can release excess moisture during baking, potentially leading to a soggy pizza crust.
Sauce
Whether you’re a fan of classic tomato pizza sauce, creamy white, or something a bit more avant-garde, your sauce should complement your toppings without overpowering them.
Now that we’ve whipped up your pizza-making enthusiasm, it’s time to roll up those sleeves and dive into the dough. I’m sure your taste buds are doing a happy dance already just thinking about the delicious pie you’re about to create. But first, we need to gather our all-star line-up of ingredients.
Here’s what you’ll need to embark on this homemade pizza adventure:
For the Dough:
- 500 g 00 Type Flour You can also use Bread Flour
- 325 g Water
- 10 g Fine Salt
- 5 g Dry Active Yeast
- 25 g Olive Oil
- 20 g Honey
For the Sauce:
- 120 ml Tomato Sauce
- 1 can San Marzano Diced Tomatoes Optional
- 1 tbsp. Butter
- 10 g Salt
- 1 tbsp. Olive Oil Extra Virgin
- 1 pinch Sugar
- A handful of fresh basil leaves chopped
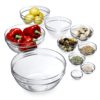
For the Topping:
- 300 g Low-Moisture Mozzarella Cheese cheese (You can also experiment with different kinds of cheese.)
- Your favorite toppings (think pepperoni, Italian sausage, bell peppers, mushrooms, onions, olives, anchovies – the sky’s the limit!)
Tools you’ll need:
- a stand mixer
- a scale
- prepping bowls
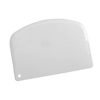
- a bowl scraper
- a pizza stone or flat baking sheet,
- a pizza peel or large spatula, and
- a pizza cutter or sharp knife.
- a timer
- a digital thermometer
Now that we have everything we need let’s get started. Ready to become a homemade pizza maestro? Let’s knead, roll, and bake pizza our way to pizza heaven!
Order of Ingredients
Now, about the order of ingredients. In the world of pizza making, this isn’t something we take lightly. You see, how you layer your pizza can dramatically affect the end result. The traditional order is sauce, cheese, then toppings, but feel free to switch things up! Remember to keep moisture-heavy ingredients towards the top to prevent a soggy crust.
And finally, a quick word on baker’s percentage, hydration, and absorption. Baker’s percentage is a method of expressing each ingredient’s quantity in relation to the amount of flour (which is always 100%).
Hydration refers to the amount of water in the dough; absorption is how well the flour incorporates that water. These might sound like fancy pizzaiolo terms, but they’re just tools to help you achieve consistency in your homemade pizza endeavors.
Got all that? Great! Now you’re ready to take these ingredients and create some pizza magic. Let’s roll!
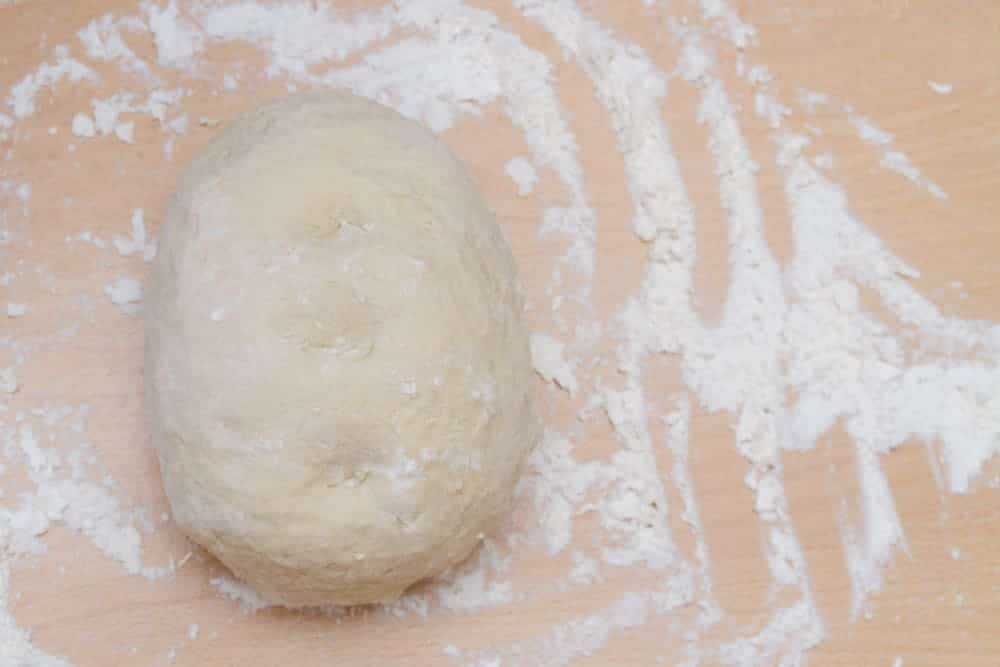
Making the Dough
Let’s get our hands dirty and dive into the dough! Your dough is the canvas upon which all your pizza masterpieces will be built, so let’s ensure it’s good.
Making the Dough:
You can go three routes here: a stand mixer, the high-tech food processor way, or the old-school by-hand method. Using a food processor is quicker and can give you a more uniform dough, but there’s something undeniably satisfying about kneading dough by hand. It’s therapeutic, like a stress ball that turns into dinner. Plus, you get major bragging rights.
Let’s dive into the dough-making process! You can make your pizza dough by hand, with a stand mixer, or using a food processor. Here are the steps for each method:
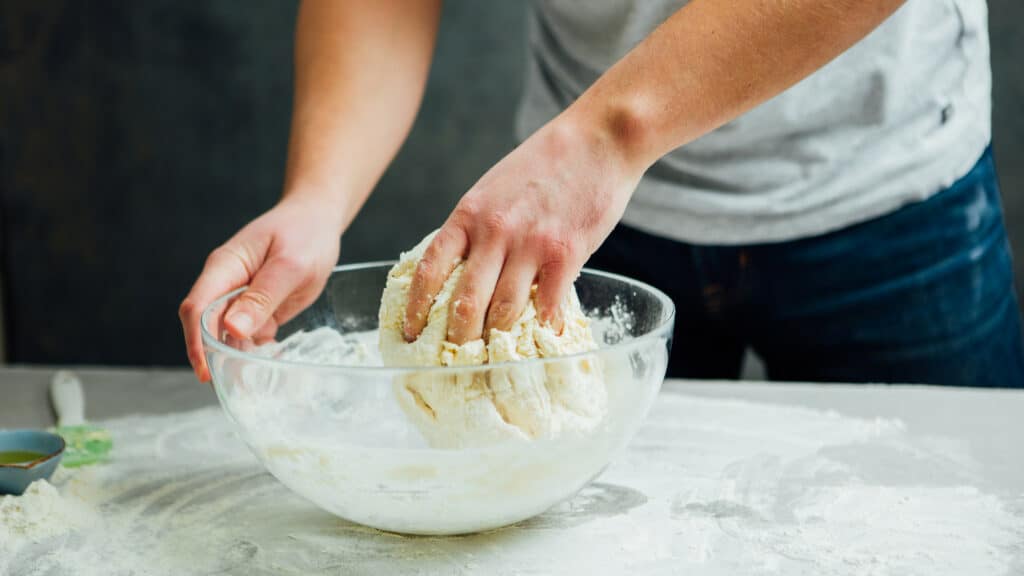
By Hand:
- In a large bowl, combine the warm water and sugar, stirring until the sugar is mostly dissolved.
- Sprinkle the yeast over the water and let it sit for about 5 minutes until the mixture is frothy.
- Add in the flour, olive oil, and salt. Mix the ingredients with a spoon or your hands until they come together.
- Transfer the dough onto a floured surface and knead it for about 10 minutes or until it becomes smooth and elastic. Add more flour if the dough is too sticky.
- Place the dough back in the bowl, cover it with a damp cloth, and let it rise until it doubles in size, about 1 to 1.5 hours.
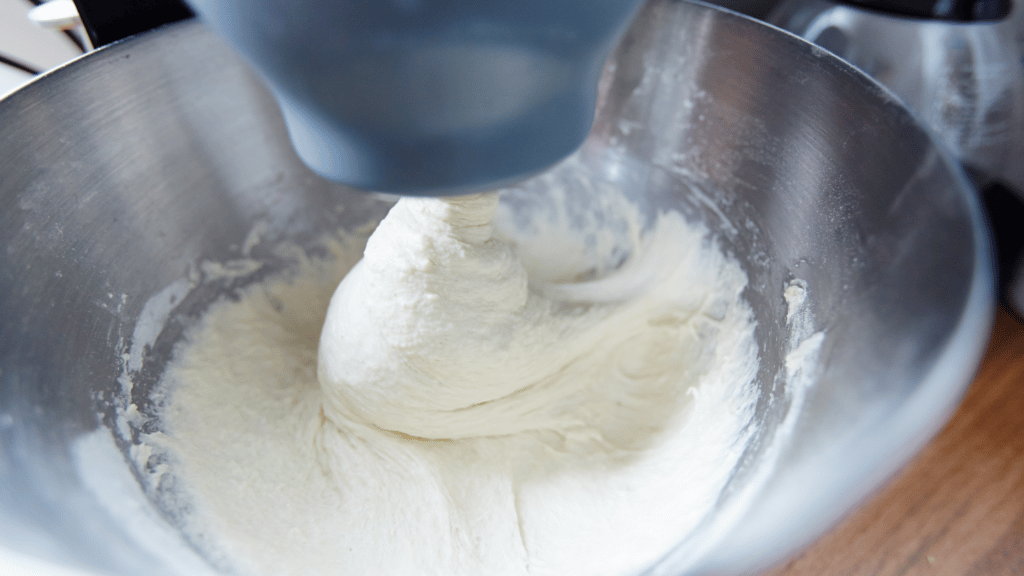
Using a Stand Mixer:
- Combine the warm water and sugar in the bowl of your stand mixer. Stir until the sugar is mostly dissolved.
- Sprinkle the yeast over the water and let it sit for about 5 minutes until frothy.
- Add in the flour, olive oil, and salt. Mix on low speed using the dough hook attachment until the dough starts to come together.
- Increase the speed to medium and let the mixer knead the dough for about 5-7 minutes until it’s smooth and elastic.
- Remove the dough from the mixer, shape it into a ball, place it back in the bowl, cover it with a damp cloth, and let it rise until it doubles in size, about 1 to 1.5 hours.
Using a Food Processor:
- In a small bowl, combine the warm water and sugar. Stir until the sugar is mostly dissolved. Sprinkle the yeast over the water and let it sit for about 5 minutes until frothy.
- In the bowl of your food processor, combine the flour and salt. Pulse a few times to mix.
With the food processor running on low, gradually pour the yeast mixture and olive oil through the feed tube. - Continue processing until the dough forms a ball and spins around the bowl.
- Remove the dough from the food processor, shape it into a ball, place it in a large bowl, cover it with a damp cloth, and let it rise until it doubles in size, about 1 to 1.5 hours.
Regardless of your chosen method, the result should be a smooth, elastic dough ready to be shaped into your perfect pizza base. Now, let’s let that dough rise to the occasion!
Doughball Weight and Thickness
This is all about personal preference. Like a thin, crispy crust? Go for a lighter dough ball and roll it out thin. Prefer a hearty, bread-like crust? You’ll want a heavier dough ball and a thicker roll. A good starting point is a weight of about 250g for a 12-inch pizza, but feel free to tweak to your heart’s content!
When you’re ready to shape your dough, aim for a thickness of about 1/4 inch if you’re a fan of thin crust pizza, or go for a more substantial 1/2 inch thickness if you’re team thick crust.
It’s your pizza, your rules!
Fermentation and Proofing
Here’s where our friend Yeast takes the spotlight. Fermentation starts as soon as you mix your dough, with the yeast chowing down on the sugars in the flour and releasing carbon dioxide (which makes your dough rise) and alcohol (which adds flavor).
Proofing is the final rise after shaping the dough and before baking. Both steps are crucial for developing your crust’s texture and flavor.
Ah, fermentation – the secret sauce of pizza dough making! It’s a magical process where the yeast in your dough gets to work, creating gas (which gives us those lovely air bubbles in the crust) and developing flavor.
While you can technically let your dough ferment for as little as 8 hours, if you really want to take your homemade pizza to the next level, try extending that fermentation period. Allowing your dough to ferment for up to 36 hours might require a bit more planning, but the reward is dough with a depth of flavor that will truly make your pizza sing.
Just remember to keep it in the fridge during this long fermentation period. It’s a game-changer; trust us!
The Poke Test and Degas:
Not sure if your pizza dough has risen enough? Give it a gentle poke. If it springs back quickly, it needs more time. If it springs back slowly, it’s ready to go. And “degas” is just a fancy term for knocking some of the air out of your dough after it’s risen, which creates a denser, chewier texture.
The poke test and degassing are two techniques in pizza making that may seem small, but they can have a big impact on the final product.
The poke test is a simple yet effective way to check whether your pizza dough has proofed enough. After the dough has first risen, simply poke it with your finger. The dough is ready to use if the indentation springs back slowly and leaves a small visible mark. It needs more time to rise if it springs back quickly and completely. If the dough deflates, it’s over-proofed and you might need to start again.

The windowpane test is a valuable technique used to determine the gluten development in your pizza dough. To perform the test, take a small piece of dough and gently stretch it between your fingers. If the dough stretches easily without tearing and you can see a thin, translucent “windowpane” when you hold it up to the light, congratulations!
Your gluten development is on point. This means your dough is well-kneaded, and it will result in a light and airy pizza crust. If the dough tears easily without forming a windowpane, it needs more kneading to strengthen the gluten structure. The windowpane test helps ensure that your dough is ready to rise and will produce that perfect, chewy texture we all love in a great pizza.
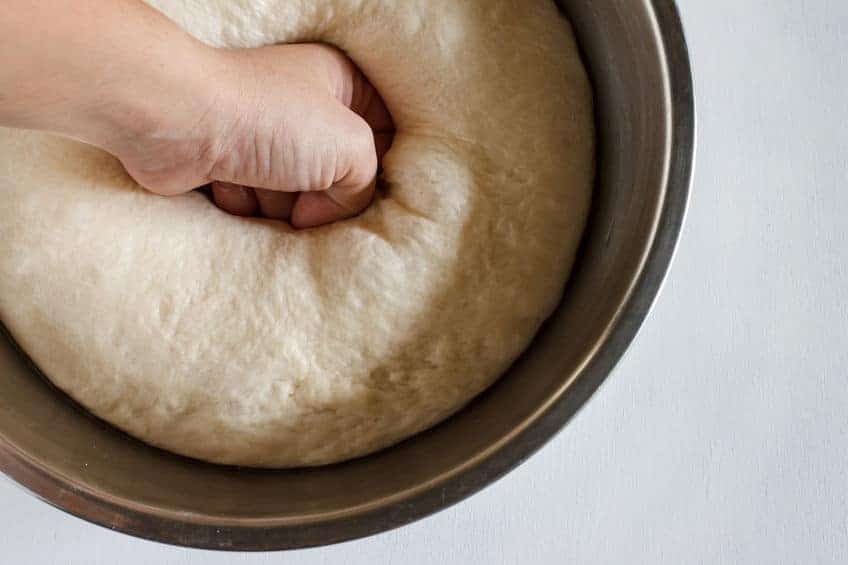
Conversely, degassing is the process of gently deflating the dough after it has risen, usually done right before shaping it into pizzas. You might wonder why we’d want to deflate something we’ve spent hours waiting to rise. The reason is simple: balance.
While the gases produced during fermentation help to create a light, airy pizza crust, too much gas can lead to large, uneven bubbles in your dough. By gently degassing – either by pushing down softly with your fingertips or doing a gentle knead – you’re ensuring a more consistent, manageable dough that will still puff beautifully in the oven without going overboard.
Both the poke test and degassing are easy techniques that, once mastered, will help you on your journey to becoming a true homemade pizza pro!
Retardation:
It sounds technical, but it slows yeast activity by chilling the dough. This allows for a longer fermentation period, which can lead to more complex flavors.
“Dough retardation” might sound like a fancy term, but it’s really quite straightforward. It’s essentially a process of slowing down the fermentation of your pizza dough. This is done by placing the dough in a cooler environment, typically the refrigerator, after it’s been mixed and kneaded.
Why retard your dough, you ask?
Well, the slow, cold fermentation does wonders for the flavor and texture of your pizza. The yeast has more time to feed on the sugars in the dough, resulting in a more complex, developed flavor – think of it as the difference between a quick snack and a gourmet meal. On the texture front, the slow rise can contribute to a lighter, airier crust with those delightful, chewy bubbles we all love in a good pizza.
Retarding your pizza dough is simple: once you’ve kneaded it, just place it in a covered bowl and pop it into your fridge. You can let it sit for as little as 24 hours or as long as 72 hours. The longer it ferments, the more flavorful your crust will be. Just take it out of the fridge about an hour or two before you bake to let it return to room temperature.
Ultimately, the extra time and planning required for pizza dough retardation is a small price to pay for the big payoff in flavor and texture. It’s a pro move that will elevate your homemade pizza from good to “mamma mia, that’s amazing!”
If you’re not in a rush, give it a try!
And there you have it!
Dough-making may seem daunting but remember: even if it doesn’t come out perfect, you’re still making pizza. And pizza is always a good idea, no matter the yeast type – active dry, instant, or fresh. Ultimately, it’s all about the journey (and the mouth-watering destination).
Let’s keep rolling!
Shaping the Pie
Okay, dough-kneading warriors, it’s time to shape your pie. Start by dusting your work surface with a bit of flour, then take a dough ball and gently flatten it into a disc, leaving the edges slightly thicker. This rim will puff up in the oven to form your crust, or “cornicione,” if you want to impress your friends with your pizza lingo.
Roll and Stretch:
This is where your inner Pizzaiolo really gets to shine. Start from the center of your dough and work your way out, leaving the edges slightly thicker for your crust (or “cornicione,” if you’re feeling fancy). And remember, be gentle!
This isn’t a piece of old chewing gum you’re trying to stretch into a world record.
Now comes the fun part – stretching your pizza dough. Hold it by the cornicione and let gravity do its thing, turning the dough as it stretches. If you’re feeling adventurous, you can even try tossing it in the air like they do in those fancy pizzerias! Just make sure to catch it.
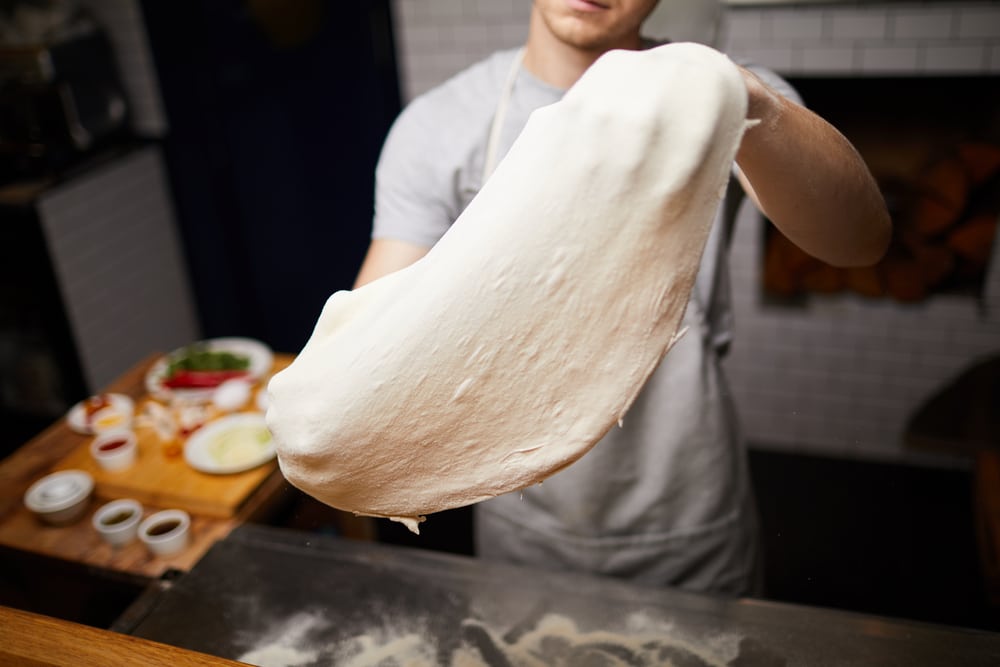
Of course, in the name of convenience or preference, you might be tempted to reach for that rolling pin for an extra-thin crust. And yes, it will do the job. However, a word of caution: while the rolling pin might make the process easier, it can also cause the dough to lose some of its magic.
As you roll, you’re effectively degassing the dough, which means you might miss out on those lovely air pockets that give pizza its characteristic chewy texture and structure. So, while it’s an option, for the best homemade pizza experience, we recommend stretching your homemade pizza dough by hand. It’s a bit more work, but your taste buds will thank you!
And the secret to a crispy crust?
When it comes to achieving that much-coveted crispy crust, you might think pre-baking the crust is the secret. But hang on a minute; let’s bust that myth right here. The real magic lies not in pre-baking but in the hydration of your pizza dough.
Adding more water to your homemade pizza dough recipe aims for a higher hydration dough. This allows the dough to develop those beautiful, crispy, charred spots when it hits the heat of your oven. It might feel a bit more challenging to handle a wetter dough, but trust us, that added bit of difficulty is well worth it when you bite into your homemade pizza and hear that satisfying crunch!
Now, let’s get saucy!
Toppings and Pizza Sauce
Now, let’s dress that pizza up! When it comes to pizza toppings, less is often more. You want a balance of flavors and textures, not a battleground of competing ingredients. And remember to slice your toppings thinly – they’ll cook more evenly, and your pizza won’t be weighed down.

As for the sauce, whether you’re team tomato, team white, or team BBQ, the key is to keep it light. Too much sauce can lead to a soggy crust, and nobody wants that. If you’re making your own (which we highly recommend), remember that it’s all about the tomatoes.
Go for high-quality canned tomatoes; add some salt, garlic, a hint of sugar to balance the acidity, and some basil for that classic pizza flavor.
And here’s a PRO tip: a
Pro Tip
Heat your tomato sauce before spreading it on your pizza. It’ll help kickstart the cooking process of your toppings and contribute to a perfectly baked pie.
Alright, are you ready to take your pie from flat to fabulous?
Let’s do it! Remember, the pizza is your canvas, and you are the artist. Create, experiment, and, most importantly, have fun with it. Because in the end, the best pizza is the one you enjoy making (and eating!).
Alright, it’s showtime, folks!
Cooking your pizza is more than just a step; it’s a performance, and you’re the star. As the pizzaiolo (that’s pizza maker to you and me), you’re in charge of this delicious dance.
If you’re using a pizza oven, you’ll want to preheat it for at least 15-20 minutes to get it nice and hot. Remember, pizza loves a hot oven. Slide your pizza in (a pizza peel can be a lifesaver here), and then watch it closely.
You’re looking for a golden crust and bubbling cheese. If you notice one side is cooking faster, don’t be shy about giving it a spin.
Alright, we’ve got our ingredients, and our dough looks divine, now let’s turn up the heat and talk about the oven. Because, believe it or not, your oven isn’t just a giant heat box – it’s a key player in your pizza-making journey.
Pizza Oven
The role of the oven in pizza making is as crucial as the dough itself. A good pizza oven will provide the high, consistent heat needed to achieve a perfectly baked crust and beautifully melted cheese. It’s all about the right balance between the top and bottom heat sources to ensure an even bake.
But if you’re ready to go all-in, the Ooni oven is a backyard pizzaiolo’s dream. It can reach those super-high temperatures that are the secret to a truly authentic pie.
Pizza Stones:
A pizza stone can be a game-changer for your homemade pizza. These nifty tools absorb heat from your oven and then release it evenly onto your pizza, mimicking the effect of a professional pizza oven.
Ah, the pizza stone – a true friend to any home pizzaiolo aiming for that perfect, crispy crust.
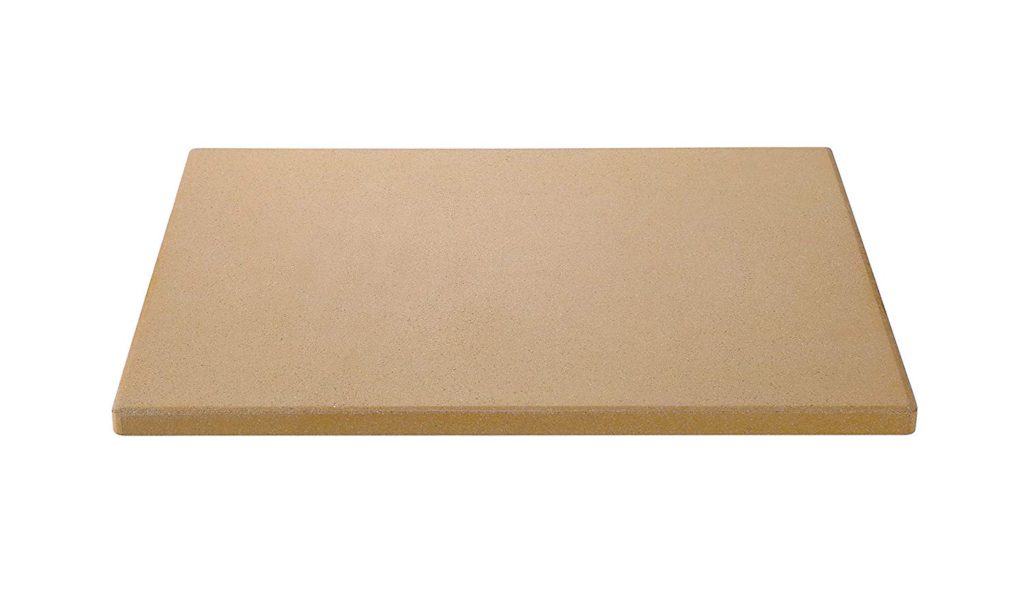
A pizza stone is a flat, usually round, or rectangular piece of ceramic or stone that is used to evenly distribute the heat in your oven to your pizza. This magical piece of cookware absorbs the heat and then releases it evenly onto the pizza, mimicking the effects of a traditional brick pizza oven. It’s one of the secrets to getting that golden, crispy crust that’s the hallmark of a truly great pizza.
One of the key benefits of a pizza stone is its thermal mass. This means it retains heat incredibly well, which is ideal when you’re aiming for a high-temperature cook – essential for achieving that pizzeria-style crispier crust. The stone also absorbs any moisture from the dough, further promoting a crispy base.
To use a pizza stone, place it in your oven and preheat it to the highest temperature setting. Give it a good hour to heat up thoroughly. Then, carefully transfer your pizza onto the hot stone and bake. That’s all there is to it!
Remember, a pizza stone is not just limited to pizzas. It’s fantastic for baking bread, pastries, and other baked goods that could benefit from that intense, even heat.
In the world of homemade pizza, a pizza stone is a game-changer. It’s an investment that will pay off in crusty, cheesy, delicious dividends. Embrace the power of the stone and elevate your pizza game!
Temperature Control
Speaking of high temperatures, let’s chat about why that’s important. A higher temperature means a quicker bake, which leads to that drool-worthy combo of a crispy, slightly charred crust and a perfectly cooked topping.
It also allows the pizza dough to puff up quickly, creating those delicious air bubbles in the crust. The ideal pizza baking temperature is around 475-500°F (245-260°C) for a home oven, but if you’re using a pizza oven like the Ooni, you can go as high as 900°F (480°C).
So remember, when it comes to pizza, your oven isn’t just a heat source – it’s your secret weapon. Treat it with respect, learn its quirks, and it’ll repay you with a perfect pie every time.
Now, are you ready to bring the heat?
Let’s bake some pizza magic!
Time
When it comes to cooking your homemade pizza, time is of the essence! A hot oven and a quick bake are the secrets to a great pizza.
If you’re using a pizza stone in a home oven preheated to its highest temperature (usually between 450-500°F or 230-260°C), a homemade pizza typically takes about 10-15 minutes to cook. You’re looking for a beautiful golden-brown crust and bubbling, slightly browned cheese.
Pizza Temperature and Time
| Pizza Style | Temperature | Cooking Time |
|---|---|---|
| Neapolitan | 950°F (510°C) | 2 Minutes |
| New York Style | 700°F (370°C) | 7 Minutes |
| Thin & Crispy | 500°F (260°C) | 5 Minutes |
| Pan Pizza | 450°F (230°C) | 18 Minutes |
| Frozen Pizza | 375°F (190°C) | 15 Minutes |
| Reheat Pizza | 350°F (175°C) | 10 Minutes |
For those fortunate enough to have a specialized pizza oven or an Ooni, which can reach much higher temperatures (around 900°F or 480°C), your pizza could be done in as little as 60-90 seconds! Yes, you read that right. When it takes to pour a glass of Chianti, you could have a perfectly cooked, mouthwatering pizza ready to devour.
Remember, cooking times can vary depending on the thickness of your crust, the number and type of toppings, and the exact temperature of your oven. Always keep a close eye on your pizza to prevent overcooking. The goal is a pizza that’s crispy, golden, and drool-worthy. So, don your oven mitts and prepare to watch the magic happen!
Once your pizza is cooked to your liking, remove it from the oven and let it rest for a few minutes. This allows the cheese to set a bit and makes for easier (and less messy) eating.
And speaking of eating, let’s talk about slicing. Sure, you can hack into it anyway, but for a truly authentic experience, try slicing your pizza “like a pro.” That means cutting it into wedges if it’s round or rectangles if it’s a square or rectangular pizza. A good-quality pizza wheel can make this job a breeze.
Exploring Pizza Styles
Now that you’re a bona fide home pizzaiolo let’s take a quick tour around the world of pizza styles. You’ve got your classic Neapolitan with its thin, soft, and chewy crust. Then there’s the New York-style pizza, known for its large, foldable slices and crispy, chewy crust.
Fancy something a bit different?
Why not try a Roman-style pizza, which is traditionally thin and crispy, or a Chicago-style deep-dish, where the pizza is baked in a deep pizza pan and the toppings are stacked in reverse order, with cheese on the bottom and sauce on top?
And let’s not forget about the Detroit-style pizza, a rectangular pizza with a thick, crisp crust, or the Sicilian-style pizza, another rectangular variety but with a spongier crust.
The beauty of making your own homemade pizza is that you can try all these different styles and see which one you like best. Experiment with different thicknesses, toppings, and cooking methods. In the end, the best pizza style is the one that makes you happiest. And that, my friend, is the true art of pizza.
So, there you have it. Your journey to becoming a pizza maestro starts now.
Ready, set, bake!
Cost of Homemade Pizza
Let’s talk dough – and no, not the kind you bake. One of the perks of donning the pizzaiolo hat is the cost savings. While the initial investment in a good pizza stone or oven might make your wallet wince, making pizza at home can be a real money saver in the long run.
The average cost of a takeout pizza can range anywhere from $10 to $20, depending on where you live and your choice of toppings.
On the other hand, the ingredients for a homemade pizza – flour, water, yeast, salt, olive oil, cheese, and sauce – can cost just a few dollars per pie.
Factor in the freshness of ingredients, the pleasure of the process, and the priceless joy of pulling your creation from the oven, and homemade pizza becomes priceless.
Okay, it still has a price, but it’s a darn good deal.
Homemade Pizza Recipe
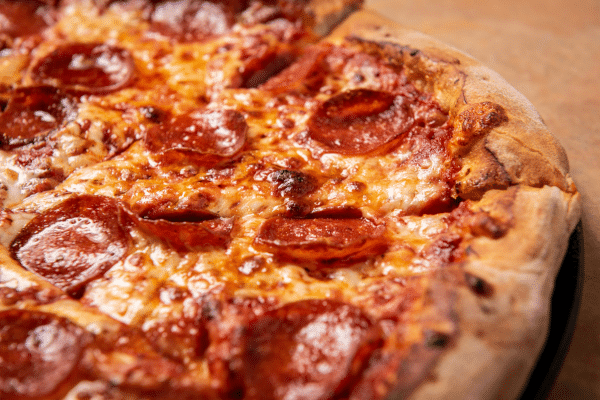
Homemade Pizza
Equipment


Ingredients
Dough
- 500 g 00 Type Flour You can also use Bread Flour
- 325 g Water
- 10 g Fine Salt
- 5 g Dry Active Yeast
- 25 g Olive Oil
- 20 g Honey
Sauce
- 120 ml Tomato Sauce
- 1 can San Marzano Diced Tomatoes Optional
- 1 tbsp. Butter
- 10 g Salt
- 1 tbsp. Olive Oil Extra Virgin
- 1 pinch Sugar
Toppings
- 300 g Low-Moisture Mozzarella Cheese
- Additional toppings of your preference
- Olive Oil for Garnishing
Instructions
Prepare the Dough
- Activate Yeat – Separate 20 grams of water from the total water and heat it up to 95°F –105°F.
- Mix the lukewarm water with the yeast together and whisk them in a small bowl and let it sit for10 to 15 minutes.
Mix the Dough
- In the bowl of the electric mixer, mix the flour with the yeast mixture, and the remainder of the water and mix on low speed until the dough comes together, about 1 minute.
- Add the Oil and the Honey and mix for 1 minute.
- Add the salt to the mixture and mix for 1minute.
Knead the Dough
- Knead the dough in the mixer on low speed for 5- 7 minutes. Switch to medium-low speed and mix for another 2- 3 minutes.
- Detach the mixture from the dough hook and the walls of the mixing bowl and form one big mass of dough.
First Fermentation
- Cover tightly and let the dough ferment in the refrigerator until it proofs and almostdoubles in size, for about 1 to 1 ½hrs. The ideal temperature for the first fermentation is 80°F.
Degas Dough
- With your fist, push down on the mixture and deflate the mixture. *This will release all the accumulated gas from the dough.
- Once you flatten the dough, bring it together into a big ball again.
Shape into Balls
- Divide the dough into 3 equal pieces with a bench scraper, about 280 grams each.
- Make a tight ball out of each piece of dough and make the smooth side the top, tucking the rough bottom side into itself to swell up the top.
- Firmly squeeze the balls near the bottom to get out any air pockets.
- Gently roll the bottom under your palm on a dry work surface, using a circular motion to close the bottom and smooth it out.
Second Fermentation
- Place the dough balls evenly in a proofing box or on a wide tray, making sure they are separated and not touching.
- Cover tightly and refrigerate for 8 to 24 hrs.
- Remove the balls from the refrigerator and let them sit for about 1 hr. to take the chill out.
Make the Sauce
- In a sauce pan, combine all sauce ingredients and simmer for 20-minutes.
Pre-Heat the Oven
- Place two baking stones or steels in the oven racks with a 6 to 8-inch separation from each other. If you only have one stone/steel place it in the middle rack of your oven.
- Set the oven to 500°F and pre-heat for about 1 hr.
- Prepare the toppings for the pizza and have everything in its place.
Shaping of the dough
- Using your fingertips, dimple the dough a few times.
- Take it up in your hands, turning it with your fists, gently pulling with each rotation to stretch out the dough.
- Dip the dough into a little flour, shaking off the excess, and set on a clean, lightly floured surface.
- Start stretching out the dough with your hands, turning the ball as you press down the center.
Laying of the pizza
- Leave a little bit of board to the edge of the dough, give the right thickness and the right shape to the pizza. Be careful not to make holes.
- Alternatively, if your find stretching by hand is difficult, use a rolling pin to work the dough until you form a 12-inch circle.
- With a dough docker, dock the dough throughout the entire circumference. This will prevent the dough from forming bubbles during the baking process. Resulting in a nice even thin crust.
Top the dough
- Grab a large, preferably flat spoon and disperse the sauce onto the center of the dough.
- Use the back of the spoon to spread the sauce outward from the center in a spiral motion. Leave about ¾” inch around the rim of the pizza. Shake the pizza peel to make sure the dough isn’t sticking.
- Pour the cheese onto the center of the pizza and spread it with your fingers. Do not go all the way up the rim.
- Arrange the rest of your toppings evenly over the cheese.
- Give it a final shape by adjusting the rim as necessary to give the pizza a perfectly round shape.
Transfer the pizza to the oven
- Shake the pizza back and forth again to make sure it isn’t sticking. If it sticks to the peel, lift the edge and add flour, cornmeal, or a mixture of both.
- Slide the prepared pizza onto the hot pizza steel, stone, or baking sheet. The pizza peel and the stone or steel should be at the same level, not angled or sloped.
- Bring the pizza to where you want to place it just slide it off the peel by moving the peel forward and backward. Once the dough touches the stone or steel, it will stick to it.
- Look at the shape; you will only have a few seconds to make any adjustments with the peel. You must be incredibly careful as it would be scorching to touch with your bare hands.
Bake the pizza
- Check the oven as it should be at 500F.
- Set a timer for at least 5 to 6 minutes so you can check the progress. If you see any large bubbles in the pizza, just poke them with a knife and add additional cheese on top. Try not to open the oven door.
- Grab the peel and rotate the pizza 180° if you feel the back is cooking faster. Check the bottom of the pizza to make sure it has been cooked well. It should be rich brown and burnished. The total cooking time should be from 12 to15 minutes total depending on your oven. Bake until the crust is properly browned.
Finish
- You may want to add a small number of your finishes right before serving your pizza. If you like, drizzle the pizza with garlic oil, or add flaky salt, our favorite truffle salt or any other add-on that you may want.
- For additional flavor, add a sprinkle of Parmesan or Pecorino to give it an extra pungent flavor.
Recommended Products and Ingredients
Whether you’re a seasoned pizza lover or a beginner in the kitchen, we have gathered a list of recommended products and ingredients to help you create the perfect homemade pizza. We’ve covered you with our handpicked selection from crust to sauce, toppings to cheese.
Get ready to unleash your inner pizza chef and dive into the world of delicious, customizable homemade pizzas that will impress your family and friends.
-
 Check it Out
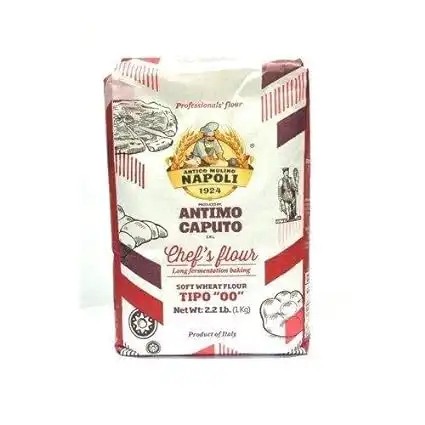
The Chef's flour is a general-purpose, high gluten flour that works well for many recipes. "Tipo 00" refers to how refined the flour is. Chef's Flour is best for those who want to bake in their traditional home oven up to 500 degrees Fahrenheit!
We earn a commission if you click this link and make a purchase at no additional cost to you!
-
Check it Out
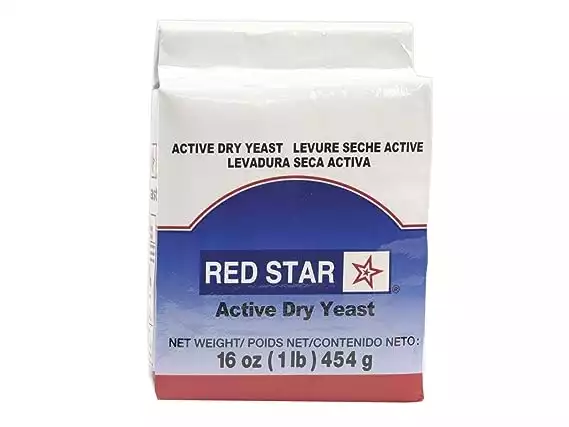
Red Star Active Dry Yeast is a trusted choice among bakers. It's known for its consistent performance, balanced fermentation speed, and subtly nuanced flavors it brings to pizza dough, contributing to a well-rounded and delicious crust.
We earn a commission if you click this link and make a purchase at no additional cost to you!
-
Check it Out
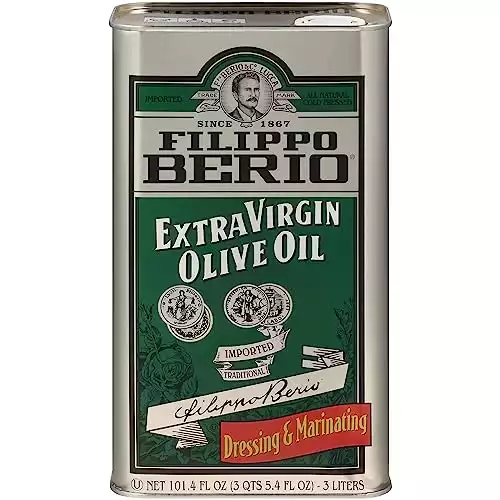
Filippo Berio Extra Virgin Olive Oil brings a well-balanced, yet rich taste to your dishes. Made from cold pressing the finest olives, this aromatic olive oil has a deep greenish-gold color.
We earn a commission if you click this link and make a purchase at no additional cost to you!
-
Check it Out
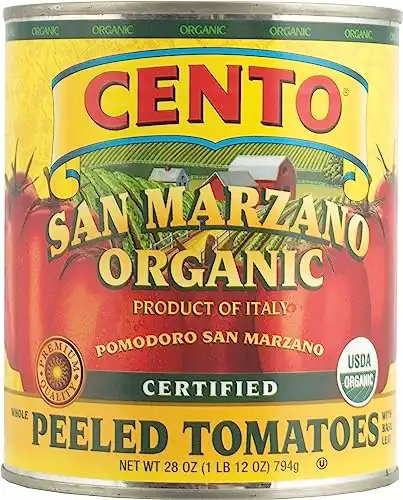
Cento Organico San Marzano Tomatoes are a true gem for any pizza enthusiast seeking the pinnacle of flavor and quality. Grown in the nutrient-rich volcanic soil of the Sarno River valley in Italy, these organic San Marzano tomatoes are meticulously cultivated, hand-picked at peak ripeness, and carefully canned to preserve their exceptional taste.
Cento Organico San Marzano Tomatoes lend an irresistible depth and authenticity to your homemade pizza sauce with its vibrant red color, dense flesh, and naturally sweet flavor. Their balanced acidity and low seed count make them a dream ingredient for creating a luscious, velvety texture that perfectly complements your choice of toppings. Elevate your pizza-making game with Cento Organico San Marzano Tomatoes, and experience the unparalleled taste of Italy in every bite.
We earn a commission if you click this link and make a purchase at no additional cost to you!
-
Check it Out
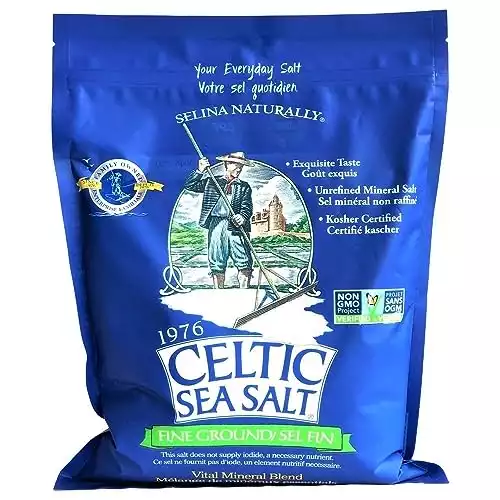
If you’re looking for a sea salt that is versatile enough for use both as table salt and in your favorite dishes and recipes, look no further than our fine-ground Celtic Sea Salt. With a subtle flavor and delicious taste, it’s a great all-purpose salt to keep on hand in your kitchen. It can also be used for recipes, baking, pickling, and much more. This fine ground sea salt comes in (1) pantry-friendly 5-pound bag. Celtic Sea Salt is authentic, unprocessed whole salt from pristine coastal regions.
We earn a commission if you click this link and make a purchase at no additional cost to you!
-
5.0Check it Out
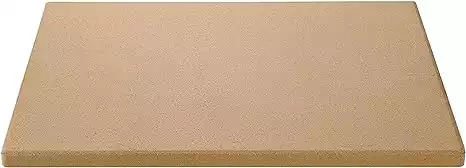
Unleash the hidden chef in you with the Unicook Heavy Duty Pizza Grilling Stone. This exceptional tool, crafted from durable cordierite material, promises to transform your homemade pizzas into culinary masterpieces. Its thermal shock resistance ensures that it can withstand extreme temperatures, from the high heat of your oven or grill to the cool countertop post-baking.
Heat resistant up to 1,450°F (787°C).
The Unicook Pizza Stone evenly distributes heat for a consistently crisp and beautifully browned crust every time, while its porous surface absorbs excess moisture, bidding goodbye to the dreaded soggy crust. Its considerable size makes it perfect for baking family-sized pizzas, bread, biscuits, and more. Step into a world of unmatched flavor and crispness with the Unicook Heavy Duty Pizza Grilling Stone—your gateway to a home pizzeria experience.
We earn a commission if you click this link and make a purchase at no additional cost to you!
-
5.0Check it Out
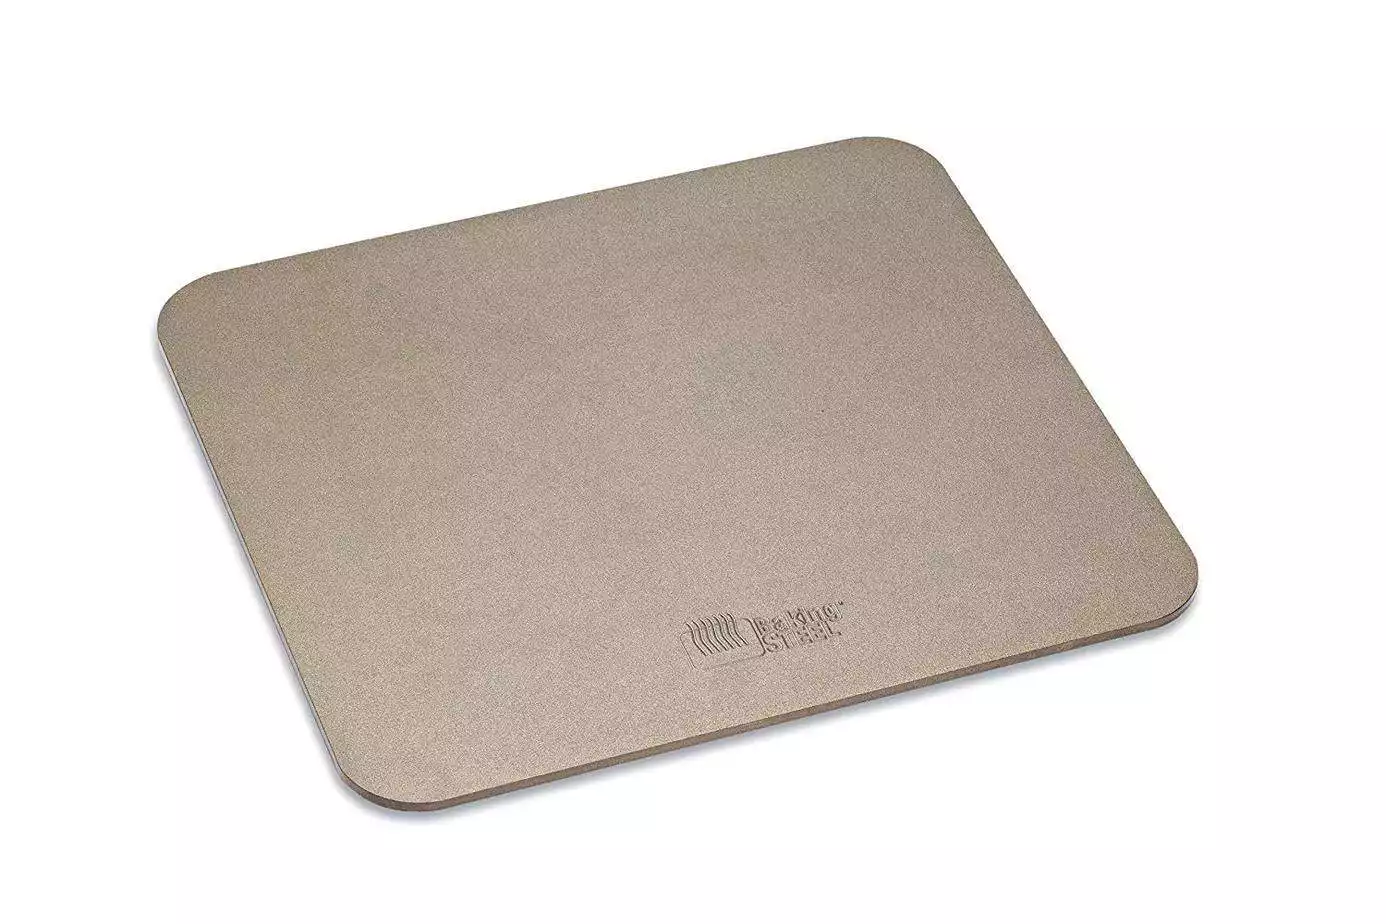
The Original Baking Steel is your secret weapon for recreating pizzeria-quality pizzas right in your home kitchen. Crafted from ultra-conductive steel, this game-changing tool captures and radiates heat with remarkable efficiency, ensuring a perfectly crisp, evenly baked crust every time.
It's not just for pizzas; use it for baking breads, roasting veggies, or even searing meats to culinary perfection. Durable, versatile, and easy to use, the Baking Steel is a true champion of home cooking that will elevate your baking game to professional heights.
Say goodbye to soggy, undercooked crusts and hello to the tantalizing taste of impeccably baked goods with The Original Baking Steel!
We earn a commission if you click this link and make a purchase at no additional cost to you!
-
5.0Check it Out
Take charge of your outdoor cooking experience with the dynamic Ooni Koda 16 to create epic stone-baked 16-inch pizzas and so much more. Blending the convenience of gas power with a showstopping, modern design, the innovative L-shaped flame and large cooking surface mean ultimate cooking control and versatility.
We earn a commission if you click this link and make a purchase at no additional cost to you!

The Last Slice
And there we have it, folks! The ins and outs, the ups and downs, the rolls and stretches of making homemade pizza. From understanding your ingredients to shaping your pizza dough, choosing your toppings, and mastering your oven, we’ve journeyed through the delicious landscape of pizza making.
But remember, the joy of pizza is in its versatility. It’s a food that encourages creativity, experimentation, and, most importantly, enjoyment. So don’t be afraid to step outside the (pizza) box and try something new.
Whether you’re a fan of the thin and crispy, the deep and doughy, or something entirely unique, the beauty of homemade pizza is that you can make it exactly how you like it. So try a new topping, play with different sauces, switch up your cheese game, and most of all, have fun with it.
So, what are you waiting for?
Put on that apron, dust off your hands, and get ready to dive into the world of homemade pizza. Because the only thing better than eating pizza is making it yourself.
Happy pizza making!
Enjoy!
Not a PRO? Not a Problem!
Take a pizza class to bring your pizza skills to the next level,
so you can be a PRO!
Related Posts

Costco Pizza Delivery: Find How You Can Get It Now!
the PROs
People go to Costco’s food court for many different reasons, but the cheesy slice of pizza they serve is among …
Pizza for Beginners: Don’t Buy Pizza, Make It! Here’s How to Get Started!
the PROs
You have this idea that you want to make pizza at home as opposed to ordering it, but where do you start? Don’t worry! Here you will find answers and directions to all your questions.

Pizza Toppings Under Cheese or Over Cheese? [Why the Order Matters]
the PROs
Is Pizza Cheese on Top or Bottom? Hey pizza lovers, are you wondering if you should layer pizza toppings under …

Newsletter
Subscribe to our Recipe of the Week newsletter and receive our partners’ latest recipes, tips, and discount offers.
Keep in Touch!