
In this article, we’ll talk about how making pizza at home is better than getting pizza from a restaurant and how you can make pizza like a pro at home without any hassle or problems.
We’ll talk about different types of pizza, the ingredients you’ll need, and the instructions for each component so you can master craft a professional pizza yourself.
When baking pizza that looks and tastes like a professional restaurant-style pizza, every baking and cooking enthusiast yearns for the perfect recipe and instructions.
But the problem is that there are so many different instructional videos and recipes on the internet that you don’t know which one would make the perfect pizza.
Well, that is precisely why we’re here for you.
So, let’s get started.
Here’s What You Will Find:
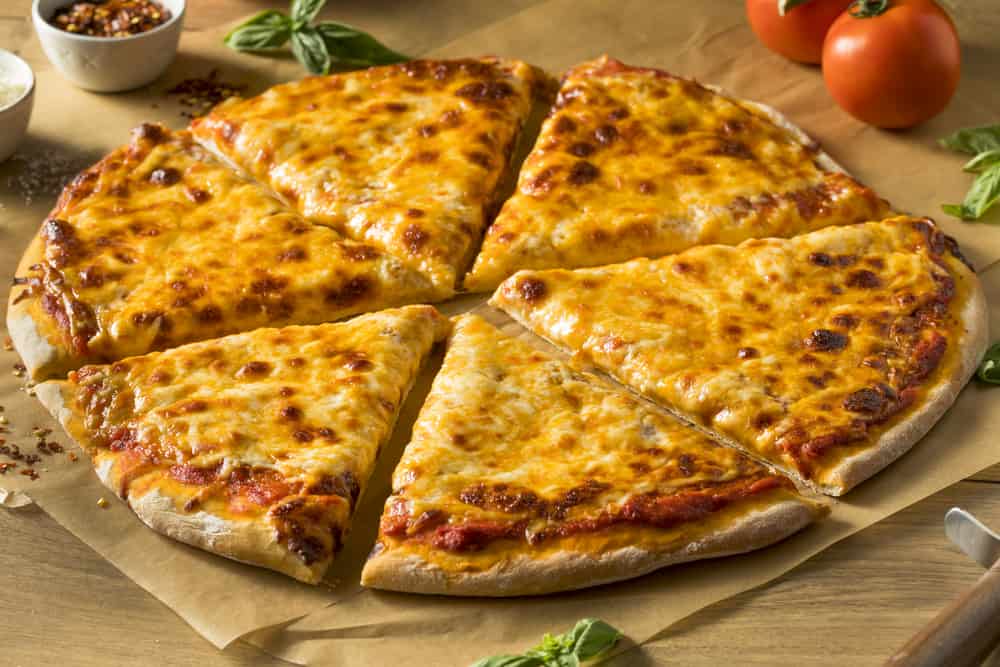
Make Pizza Like a PRO – Making Professional Pizza at Home
Making pizza at home is an art. Many people try making pizza at home but cannot get that perfection regarding the dough, the sauce, or the toppings.
With our recipe, which you can find at the end of this article, you’re not only going to make all the components correctly.
But you’re going to be able to combine and complement all the pizza components and create a beautiful symphony of pizza goodness without needing to spend a lot of money getting a not-so-perfect pizza from the restaurant.
Take Pride in Making Everything Yourself and Make Pizza Like a PRO
You might be wondering what helps start making a professional pizza at home. We’ll tell you. Creating everything from the sauce to the dough and the toppings yourself without using store-bought frozen and freeze-dried components defines a homemade pizza.
Once you’ve stepped into the pizza baking territory by making all the delicious components yourself, you’re not far away from eating the best pizza you’ve ever tasted. All you need to do is keep a straight head and follow our instructions properly.
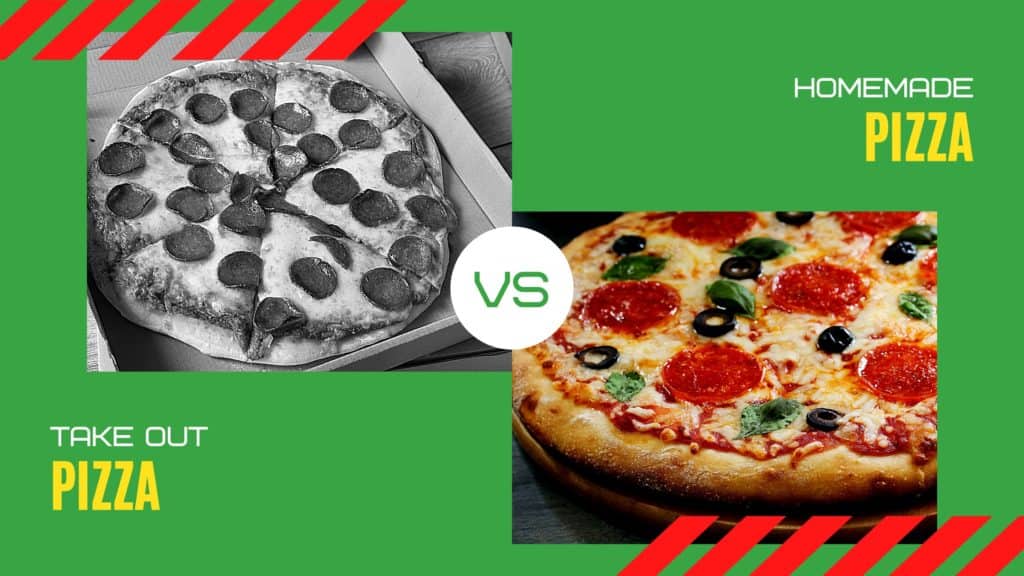
Know the Difference between Homemade and Restaurant Pizza
There are remarkable differences between ordering pizza and making your own. To put it into perspective, we’ve compiled some of the most notable differences between homemade and restaurant pizza.
Cost Difference
The most noticeable difference between homemade and restaurant pizza is the price difference.
If you order or take away a pizza from a famous pizza place, you don’t know what you’re getting at that high price.
However, if you make your pizza at home, you’ll get more high-quality, tasty, and healthy pizza than you’d be able to get for the same amount of money from the restaurant. So, that’s a big difference between homemade and restaurant pizza.
Ingredient Quality
Another big difference comes in the quality factor. The quality of the ingredients in homemade pizza and restaurant pizza is drastically different.
Restaurants usually use the cheapest and easiest-to-get components for their dishes, which would be the same for their pizza.
But when it comes to making delicious professional pizza at home, you can get high-quality ingredients from the market to ensure you’re eating the best of the best!
Effort
One thing that restaurant pizzas can offer better than homemade pizza is easy to access.
You don’t need excessive effort to get a large pizza from a restaurant.
But you’ll have to put in a lot of effort to make pizza dough like a pro, sauce perfectly, combine everything and bake the pizza. But the great thing about making homemade pizza is that the effort will pay off in the end, so don’t worry about that.
Pro Tip
In crafting a pizza there are no mistakes, just unique creations.
Let your creativity run free.
Make Pizza Like a PRO
Why is it Best to Make Pizza at Home?
Benefits of Making Pizza at Home
Other than the differences we mentioned above, there are many great benefits of making the perfect pizza at home compared to getting pizza from a restaurant.
Let’s take a look at some of the benefits individually.
Freedom of Creativity
The great thing about making pizza like a pro at home is that you’re not bound when it comes to signature ingredients and quantity.

Do you feel like loading your pizza with meats? Nobody’s stopping you.
You want to create harmony between different vegetables and cheese; you do you!
So, there’s a lot of room for the chef’s creativity regarding homemade pizza.
Better Ingredients
One of the most important benefits of making your pizza at home is that you will buy all the ingredients yourself.
Naturally, you will get only the highest quality ingredients for your pizza.
This process will ensure top-quality products and that your pizza is suitable for your health and has no sanitation issues.
Delicious Taste
Well, if you follow a great homemade pizza recipe, and of course, we suggest that you try e ours, there is no doubt that homemade pizza will taste more delicious than restaurant pizza.
That’s why to get the best pizza experience, making it at home is essential for you.
Chef’s Confidence
Baking pizza is an art, as we said before. And owning a craft can help you in sad times.
If you’re feeling low, you can turn up the oven and bake yourself an excellent homemade pizza, gaining that chef’s confidence to feel better about yourself.
Pizza anywhere, anytime
The great thing about knowing how to bake the perfect pizza at home is that you can make it at anyone’s home, outside, or even while camping.
If you’ve got the ingredients, even in a country area, you can bake the perfect pizza for yourself and your loved ones without any problem.
Pizza Pun
Why are pizzas round?
Who wants to be a square!
How to Make Pizza Like a Pro at Home
Now that you know that making pizza at home is the way to go let’s get into the process.
We’ve tried and tested our methods and recipe for a long time and have finally created the perfect homemade pizza recipe. So follow it entirely if you want to prepare a fantastic pie.
Make Pizza Like a PRO – How to Get Started
Step 1
Choose Your Pizza Style
First things first, you’re going to want to choose your pizza style.
There are many different pizza styles, all a variation of the classic Neapolitan pizza originating in Italy. These styles vary depending upon the toppings, dough, and crusts, but we will list only the leading four pizza style types.
In our recipe section, you can find all four base recipes you can adapt to your preference.
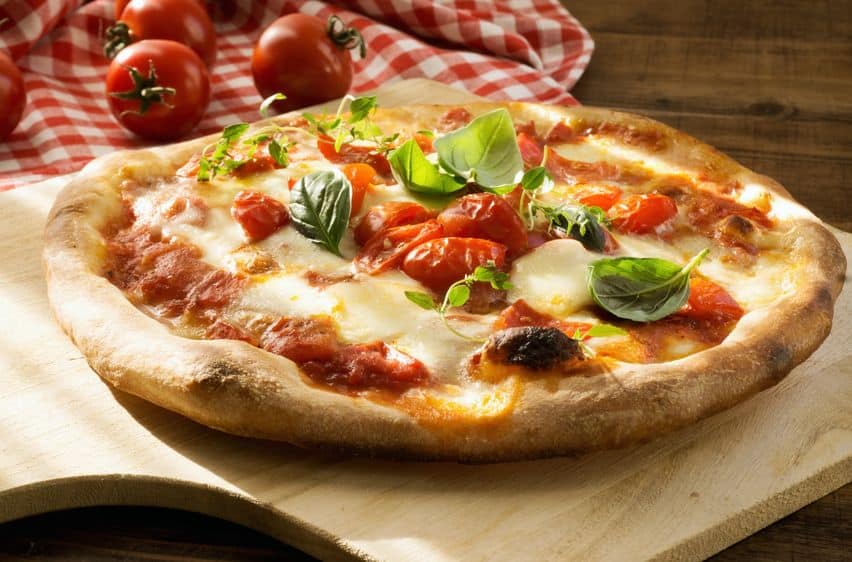
Neapolitan Pizza
This style of pizza uses Marzano tomatoes and mozzarella cheese for the toppings and a wheat flour crust, which gives it an elastic and soft crust.
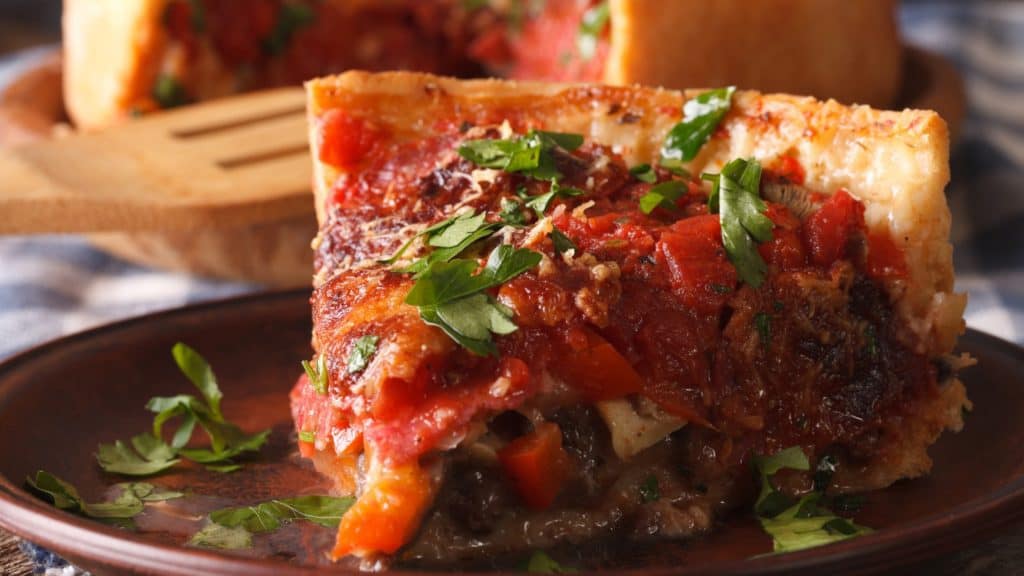
Chicago Deep Dish Style
Also known as the deep-dish pizza, this pizza style utilizes a deep pan in which the base is placed.
The pizza is loaded with cheese and stuffed with tomato sauce, kept in place with the signature hard-edge crust of the Chicago-style pizza.
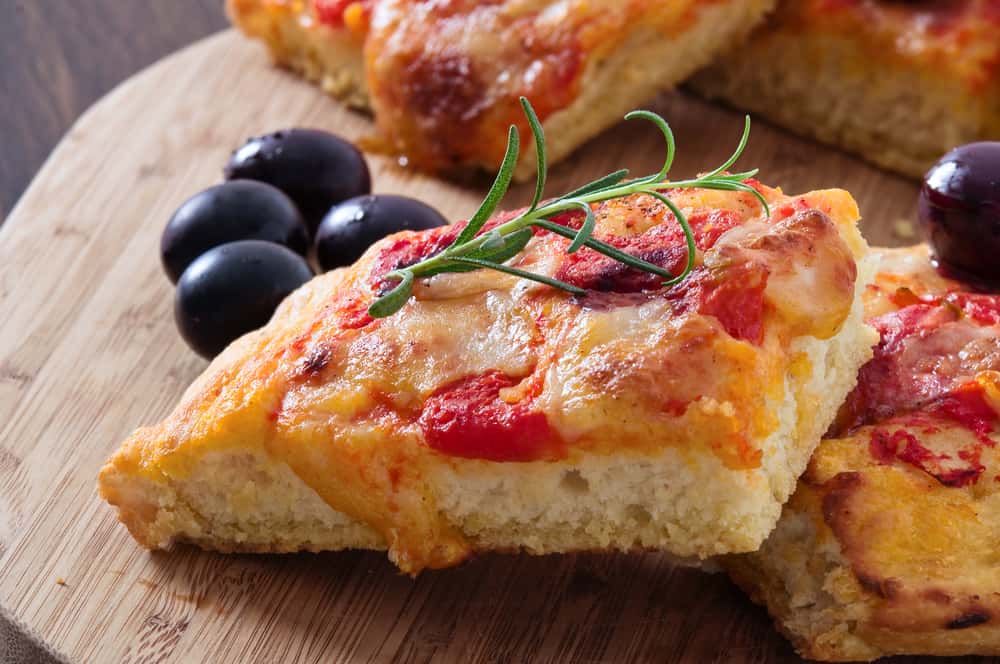
Sicilian (Sficione)
This pizza style is more on the thicker end when it comes to the crust. The pizza is rectangular and is usually loaded with a lot of cheese for flavor.
New York Style
Arguably, the most famous pizza style is the New York pizza style. It features a thin crust that is crispy and delicious on the edges and soft on the top, usually consisting of tomato sauce and mozzarella cheese.
It is hand-kneaded, so it is generally larger than other pizza types and can be folded while eating for ease.
Step 2
Learn the Baker’s Percentage Method
The best trick in a baker’s book is the baker’s percentage method. Using the baker’s percentage method, you can easily create recipes, change the ratios without creating imbalances, and bake the perfect pizza at home.
Baker’s Percentage = (Weight of Ingredient/Weight of flour) x 100
How it works
It works by comparing every ingredient other than the flour to 100% of the flour being used.
For example, if you’re using 1000gms of flour and using 20gms of salt, you’re using 2% baker’s percentage of salt in your recipe compared to the flour.
This way, you can create a balanced recipe that will finally equate to 100%.
You can use the above-written formula or check our calculators to help you with the math.
Step 3
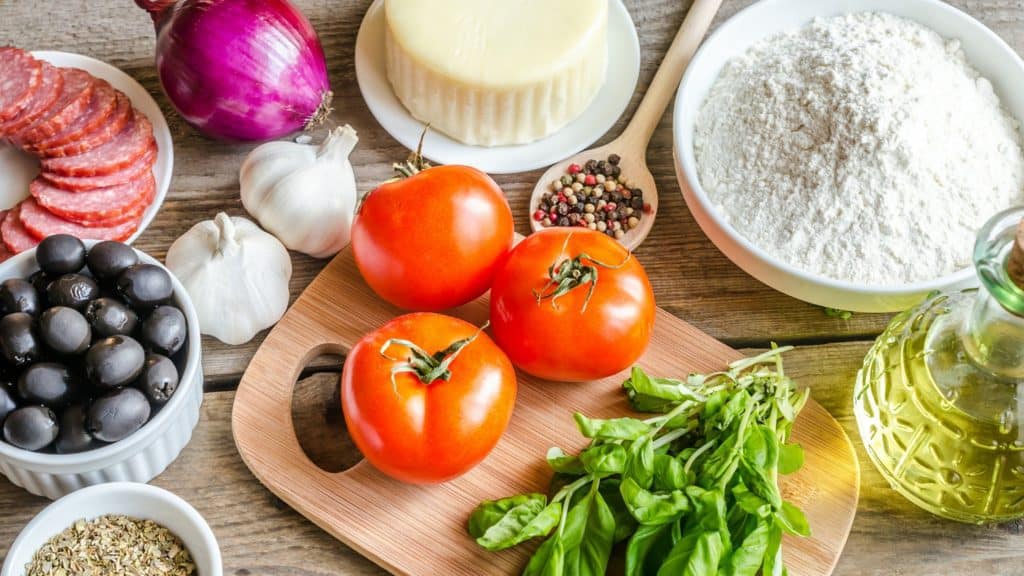
Use the Best Ingredients
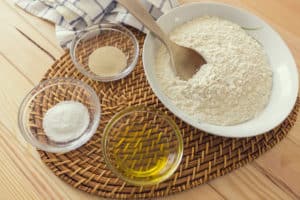
Quality is something we don’t want you to compromise. Make sure every major and minor ingredient is the best quality and the best tasting, from the sauce to the toppings, so that your pizza is perfect.
Best Ingredients for your Dough
Make sure to use flour that contains high-protein content unless you are making Chicago Deep Dish styles that require all-purpose flour.
Use the correct yeast according to the order of ingredients. Our preferred yeast is an active dry yeast. You also use instant yeast, but then the order of ingredients is different.
Mix the flour with the yeast for instant yeast, and then add the water. the remaining steps are the same.
Use fine grain salt to create a smooth and gorgeous dough.
Best Ingredients for your Sauce
Use high-quality San Marzano tomatoes, optimal for the perfect homemade pizza, so make sure you get those.
Best Cheese for your Pizza
If you’re making a Neapolitan pizza, ensure you get the fresh mozzarella cheese or the original Mozzarella di Buffalo; however, if you’re making any other style, you can use any high-quality and low-moisture cheese you find with delicious taste.

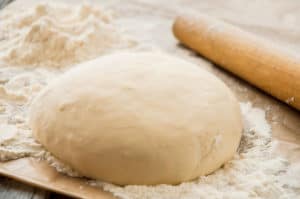
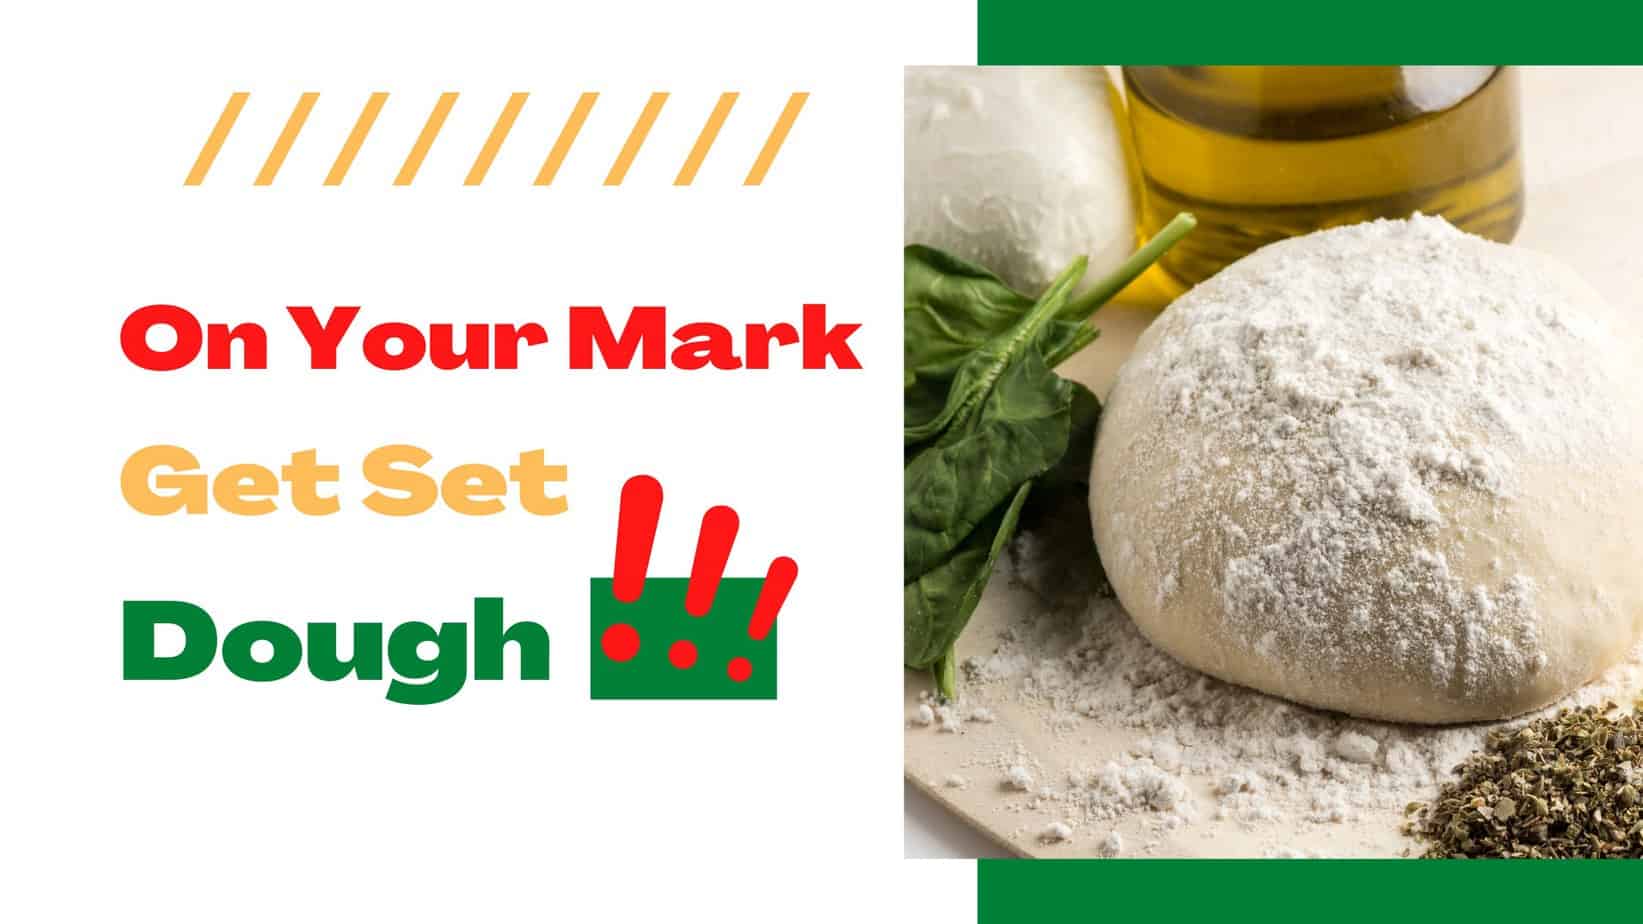
Making Pizza Dough like a Pro
According to our recipe, the essential part of making the perfect pizza is making the dough. Let’s go through the process of making the dough step by step so you can easily follow it.
Mix the ingredients in the correct order
Making Pizza Dough
Step 1
Activate the Yeast
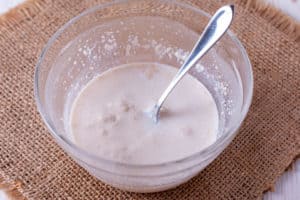
The first thing that you need to do is activate the yeast. Using lukewarm water, build up the foam over the yeast mixture, and it’ll be ready for use.
Step 2
Mix with the Flour
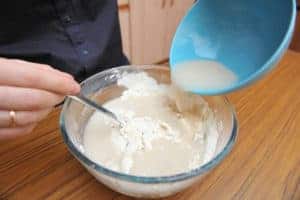
Add the appropriate amount of flour according to the recipe. Remember that flour is always 100% of your total ingredients. Make sure you have enough for your pizza party, yourself, and loved ones.
Add the yeast mixture into the flour.
Step 3
Add Water
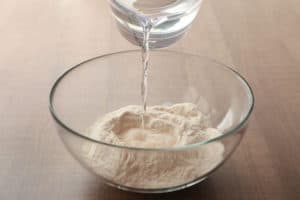
Add the right amount of water, on average a 65% hydration, into the mixture.
For example, if the recipe calls for 500g of flour, the water will be 325g. (500g flour x .65 hydration= 325g water).
The same math applies to all other ingredients at different ratios.
Step 4
Add Olive Oil, Honey, and other ingredients, if required.
Depending upon your style, add additional ingredients like olive oil or honey if you want to, or it is required by the recipe.
Do not add salt at this point. The salt should be last.
Mix for about 1 minute.
Step 5
Add Salt

After mixing, finally, add the salt and use a low-speed stand mixer to form the dough.
Make Pizza Like a PRO
Mixing the Dough
Step 1
Using the dough hook, mix the dough for 6 to 7 minutes in a stand mixer at low speed.
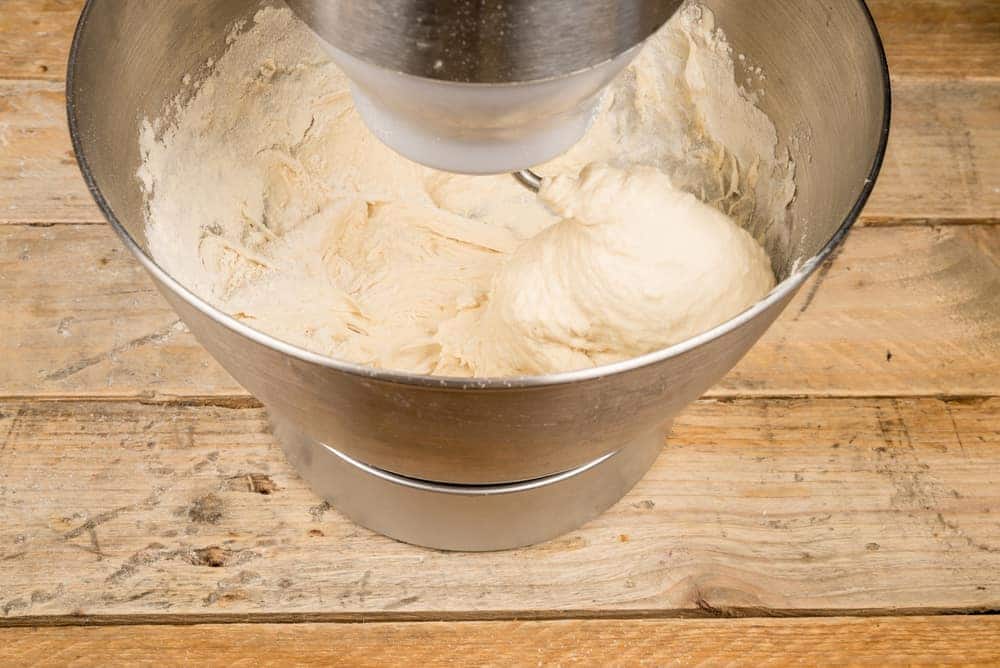
The total mixing time should not be more than 10 minutes. Otherwise, the mix will turn tough and difficult to handle.
Make Pizza Like a PRO – Kneading the Dough
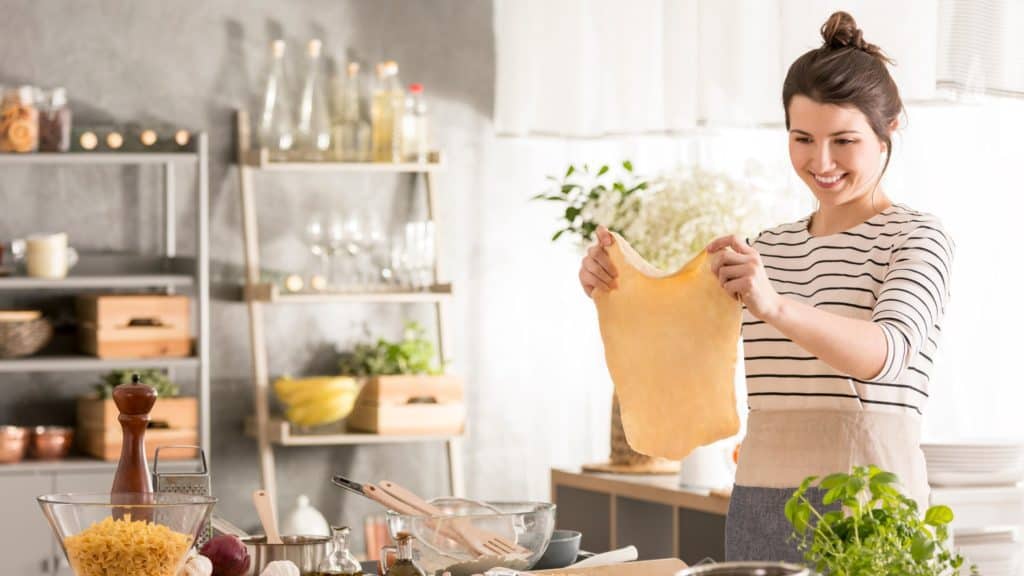
Step 1
Hand-kneading the dough is vital.
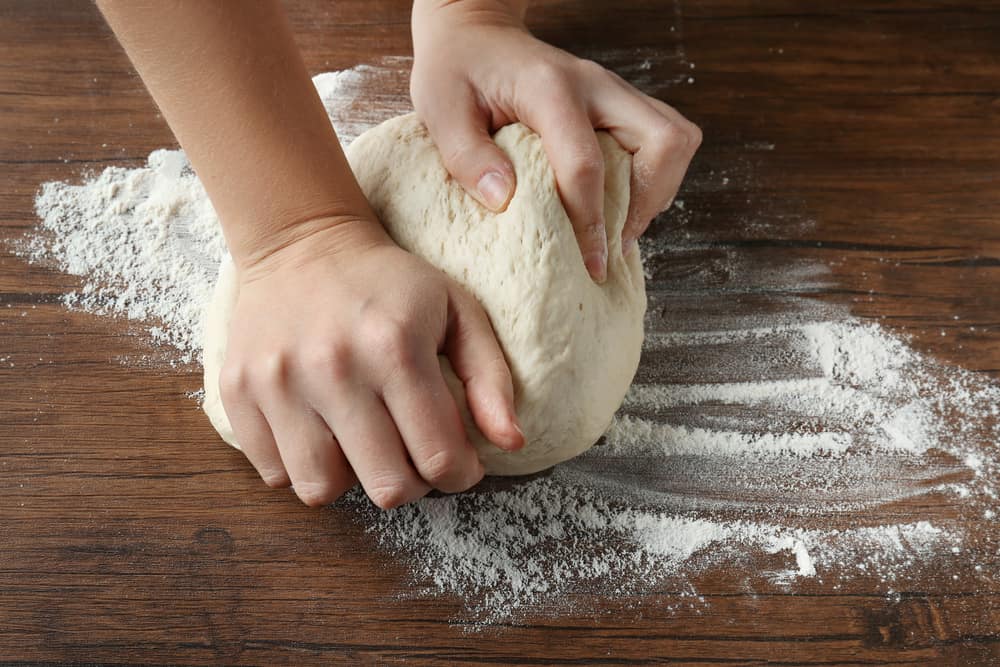
Make sure you don’t use a rolling pin and shape the dough into a ball using your hands.
Make Pizza Like a PRO – Making the Sauce
Another exhilarating and essential step is making the sauce. Using your delicious Marzano Tomatoes to cook a nice tangy and tasty sauce.
Step 1
Add all ingredients included in the sauce recipe into a saucepan.
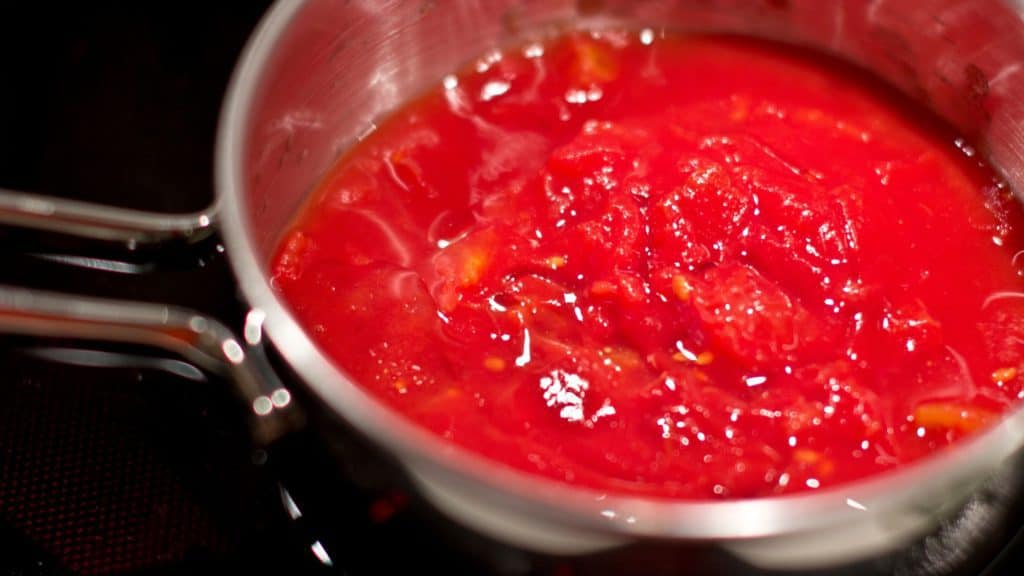
Let it simmer for at least 30 minutes on normal heat for the sauce’s best cook.
Using an immersion blender crush the tomatoes to your desired texture.
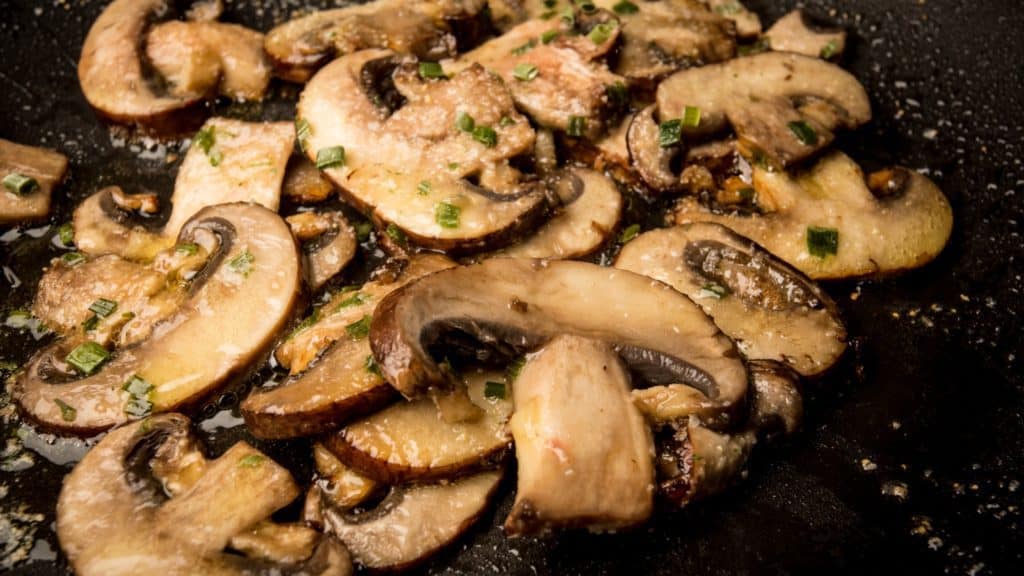
Make Pizza Like a PRO – Topping the Pizza
Step 1
Whatever you’re planning to put on the pizza, make sure you pre-cook that topping before you start putting the toppings on the pizza.
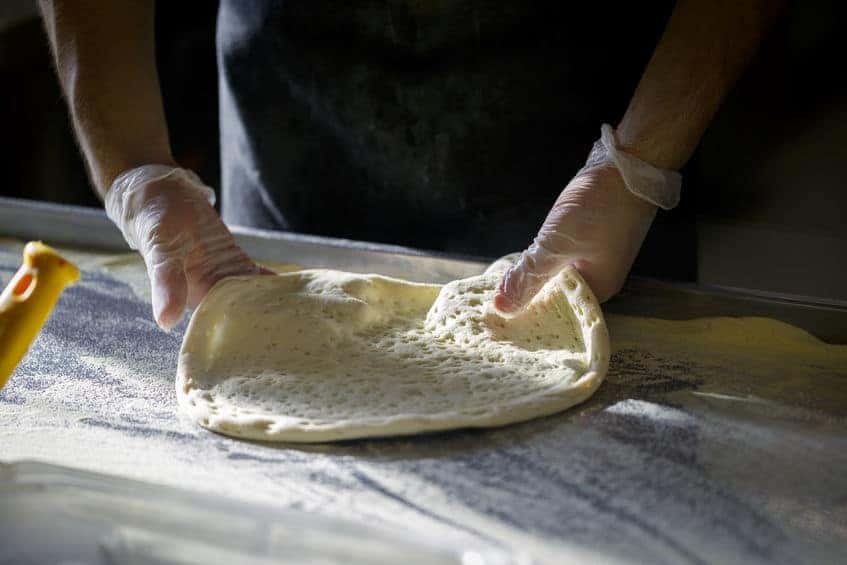
Step 2
Spread the dough out and shape it using your hands. Do not use a rolling pin unless you feel it is extremely necessary.
Step 3
Spread the sauce around the dough, leaving a 3/4 inch border all around.
When it comes to sauce, the less, the better.

Step 4
Another critical thing to note is that you shouldn’t overload your pizza; it takes away from the individual flavors.
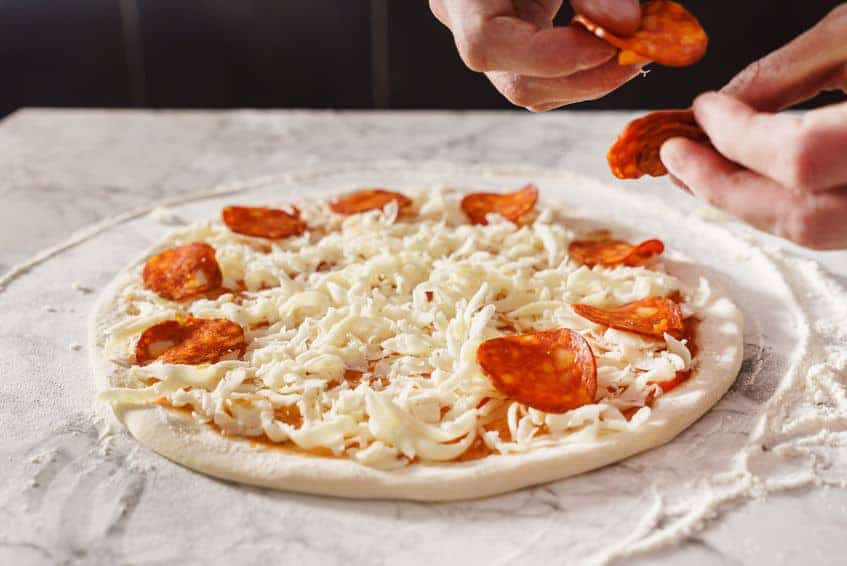
So, moderately top your pizza for the best flavor.
Make Pizza Like a PRO – Baking the Pizza
We know you’re already a pro at baking amazing pizzas, but just for a reference, we’ve created a guide for you that you can look at if you forget something.
Step 1
Preheat your oven to 500F for at least an hour before you put the pizza into it for baking.
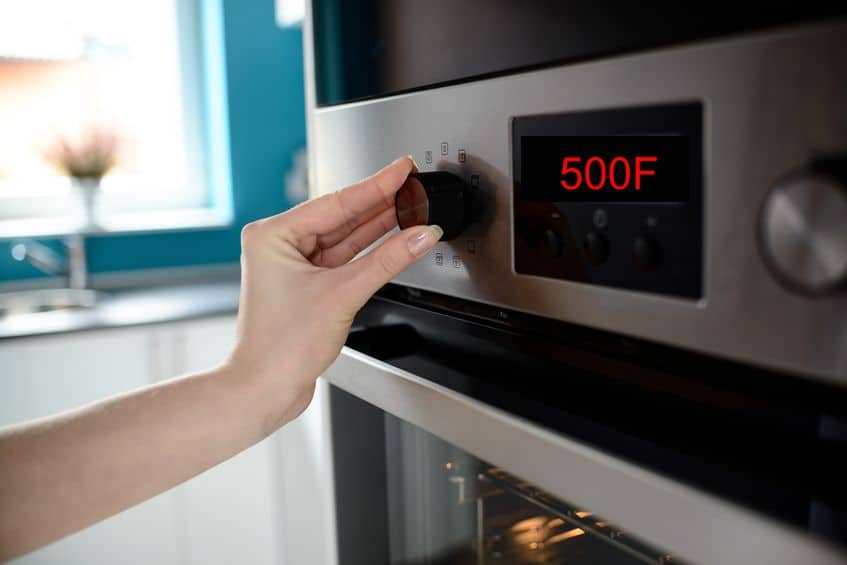
Step 2
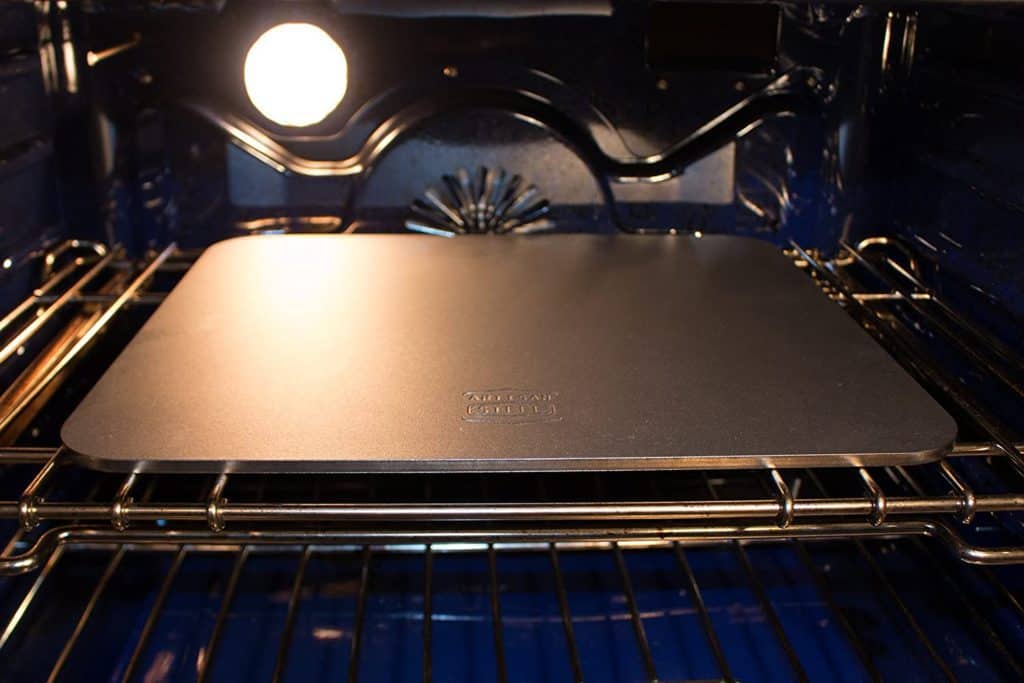
To get the best brown crust without burns, use pizza steel to bake the pizza evenly.
Step 3
To bake the pizza, the temperature needs to be perfect and consistent.
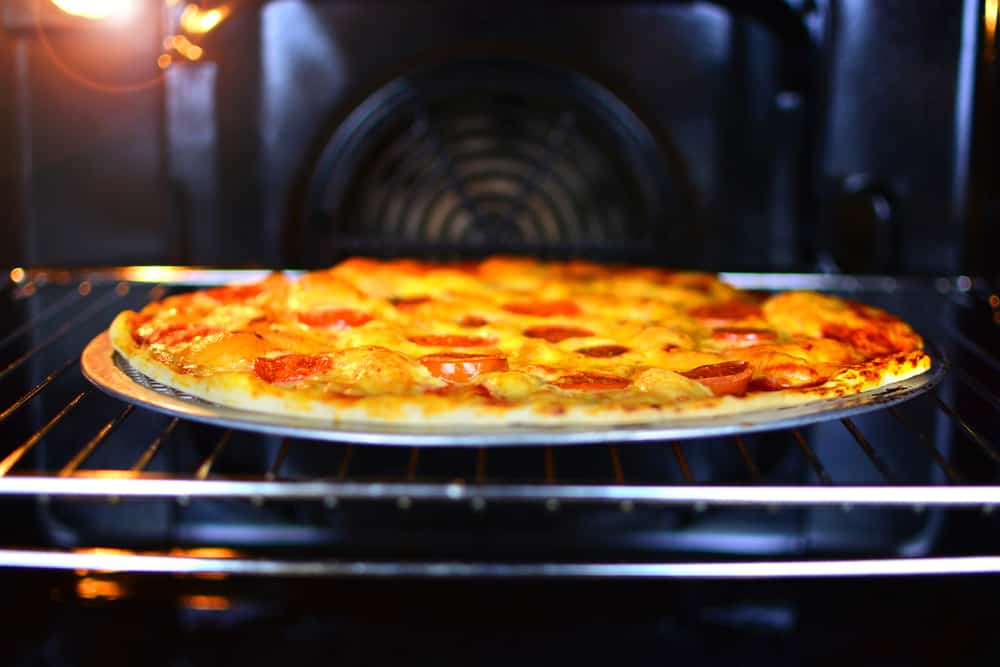
Your pizza will be baked to perfection at about 500F for 12-15 minutes.
Take the pizza out, smell it, and say thanks to yourself because of how amazing of a baker you are.
Step 4
Take the pizza out, smell it, and say thanks to yourself because of how amazing of a baker you are.

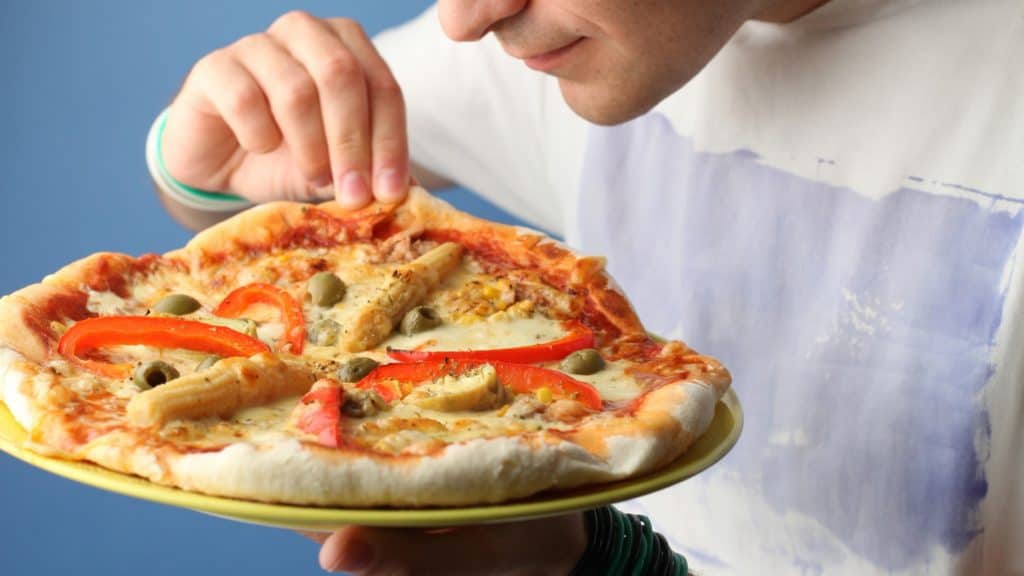
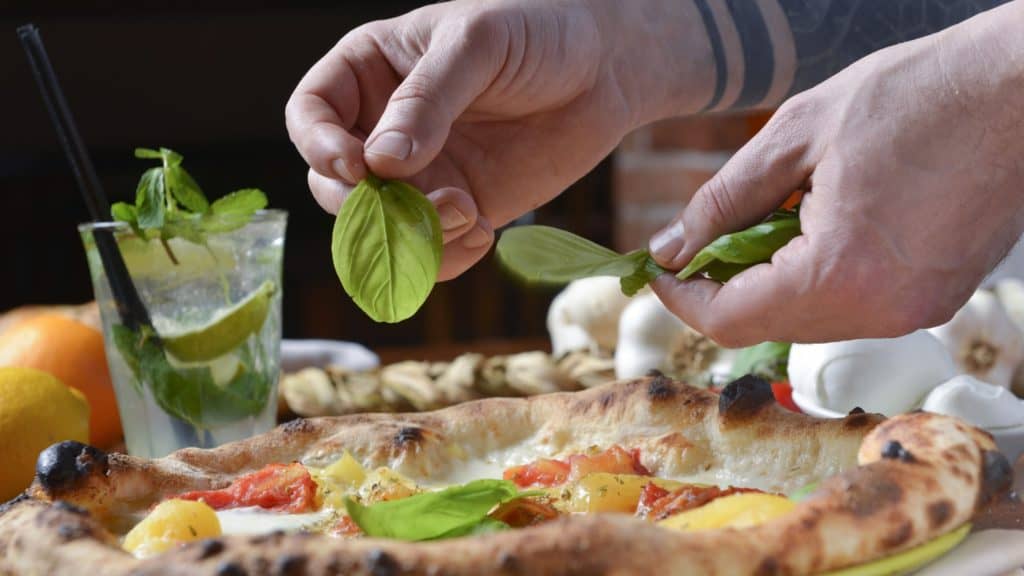
Garnishing the Pizza
Step 1
Finally, put some finishing touches on your pizza by garnishing it with fresh basil or a gentle amount of olive oil to make it look and taste even more delicious than anybody would expect.
The Last Slice
With this pro pizza at home recipe, you’re going to spread smiles across many faces, we assure you. Enjoy the best-tasting homemade pizza that you’ve ever tasted with our recipe.
So, which of the pizza mentioned above styles are you going to go with for your pizza adventure?
Let us know in the comments and tell us about your pizza experience. We’re eager to hear from you.
Check Amazon’s Pizza Must-Haves
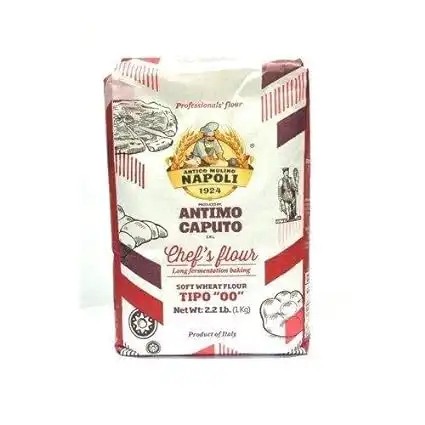
The Chef's flour is a general-purpose, high gluten flour that works well for many recipes. "Tipo 00" refers to how refined the flour is. Chef's Flour is best for those who want to bake in their traditional home oven up to 500 degrees Fahrenheit!
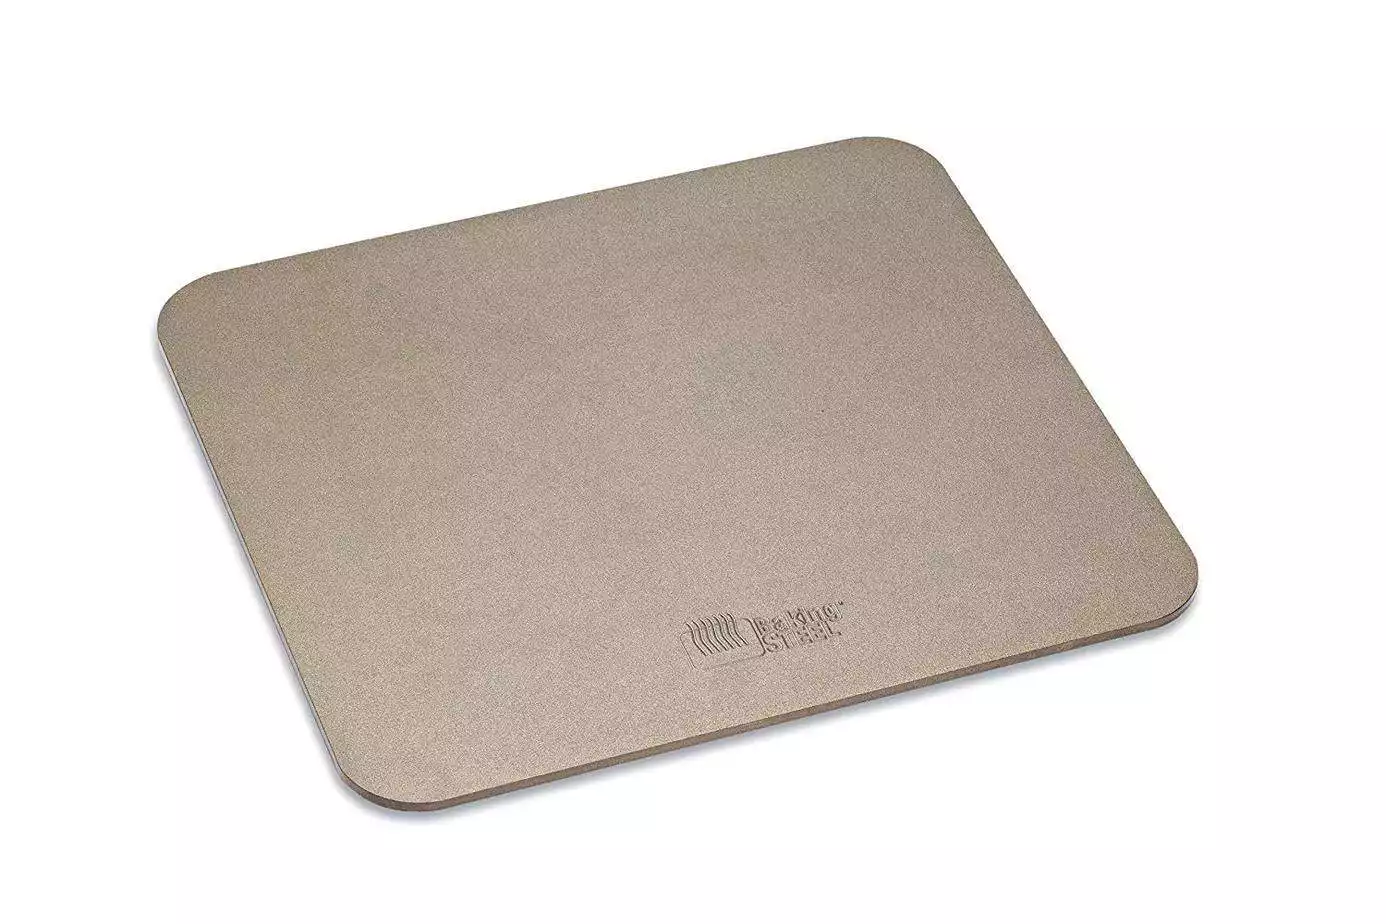
The Original Baking Steel is your secret weapon for recreating pizzeria-quality pizzas right in your home kitchen. Crafted from ultra-conductive steel, this game-changing tool captures and radiates heat with remarkable efficiency, ensuring a perfectly crisp, evenly baked crust every time.
It's not just for pizzas; use it for baking breads, roasting veggies, or even searing meats to culinary perfection. Durable, versatile, and easy to use, the Baking Steel is a true champion of home cooking that will elevate your baking game to professional heights.
Say goodbye to soggy, undercooked crusts and hello to the tantalizing taste of impeccably baked goods with The Original Baking Steel!

The Etekcity Lasergrip 800 Digital Infrared Thermometer is a versatile and reliable tool for accurate temperature measurements. Its non-contact design allows you to measure temperatures from a distance, making it safe and hygienic for various applications. With a wide temperature range of -58°F to 1382°F (-50°C to 750°C), this infrared thermometer is perfect for both everyday cooking needs and professional uses.
The built-in laser pointer helps you target the specific area you want to measure, ensuring precision and consistency. Whether you're grilling, cooking, or performing household maintenance, the Etekcity Lasergrip 800 provides fast and accurate temperature readings with ease.
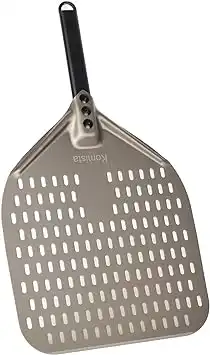
Why have two pizza peels when you can only have one. This pizza peel surpasses the benefits of wood peels with the convenience of a metal peel. It's made entirely from anodized aluminum for a lightweight design that's incredibly durable, too. It's designed to be used frequently in high-heat pizza ovens.
Let’s Start Practicing
Here is our Pro Homemade Pizza Recipe for you to start practicing. This recipe has much more detail than we’ve discussed above, so it will be straightforward for you to follow.
Feel free to add any additional toppings and make them your own.
When you feel that you are already making pizzas like a Pro, do not hesitate to let us and share your recipe and step with our community. Submit your recipe, and we will publish it, showing you like the Pro Pizza Baker!
Pro Homemade Pizza
Equipment


Ingredients
Dough
- 500 g 00 Type Flour You can also use Bread Flour
- 325 g Water
- 10 g Fine Salt
- 5 g Dry Active Yeast
- 25 g Olive Oil
- 20 g Honey
Sauce
- 120 ml Tomato Sauce
- 1 can San Marzano Diced Tomatoes Optional
- 1 tbsp. Butter
- 10 g Salt
- 1 tbsp. Olive Oil Extra Virgin
- 1 pinch Sugar
Toppings
- 300 g Low-Moisture Mozzarella Cheese
- Additional toppings of your preference
- Olive Oil for Garnishing
Instructions
Prepare the Dough
- Activate Yeat – Separate 20 grams of water from the total water and heat it up to 95°F –105°F.
- Mix the lukewarm water with the yeast together and whisk them in a small bowl and let it sit for10 to 15 minutes.
Mix the Dough
- In the bowl of the electric mixer, mix the flour with the yeast mixture, and the remainder of the water and mix on low speed until the dough comes together, about 1 minute.
- Add the Oil and the Honey and mix for 1 minute.
- Add the salt to the mixture and mix for 1minute.
Knead the Dough
- Knead the dough in the mixer on low speed for 5- 7 minutes. Switch to medium-low speed and mix for another 2- 3 minutes.
- Detach the mixture from the dough hook and the walls of the mixing bowl and form one big mass of dough.
First Fermentation
- Cover tightly and let the dough ferment in the refrigerator until it proofs and almostdoubles in size, for about 1 to 1 ½hrs. The ideal temperature for the first fermentation is 80°F.
Degas Dough
- With your fist, push down on the mixture and deflate the mixture. *This will release all the accumulated gas from the dough.
- Once you flatten the dough, bring it together into a big ball again.
Shape into Balls
- Divide the dough into 3 equal pieces with a bench scraper, about 280 grams each.
- Make a tight ball out of each piece of dough and make the smooth side the top, tucking the rough bottom side into itself to swell up the top.
- Firmly squeeze the balls near the bottom to get out any air pockets.
- Gently roll the bottom under your palm on a dry work surface, using a circular motion to close the bottom and smooth it out.
Second Fermentation
- Place the dough balls evenly in a proofing box or on a wide tray, making sure they are separated and not touching.
- Cover tightly and refrigerate for 8 to 24 hrs.
- Remove the balls from the refrigerator and let them sit for about 1 hr. to take the chill out.
Make the Sauce
- In a sauce pan, combine all sauce ingredients and simmer for 20-minutes.
Pre-Heat the Oven
- Place two baking stones or steels in the oven racks with a 6 to 8-inch separation from each other. If you only have 1stone/steel place it in the middle rack of your oven.
- Set the oven to 500°F and pre-heat for about 1 hr.
- Prepare the toppings for the pizza and have everything in its place.
Shaping of the dough
- Using your fingertips, dimple the dough a few times.
- Take it up in your hands, turning it with your fists, gently pulling with each rotation to stretch out the dough.
- Dip the dough into a little flour, shaking off the excess, and set on a clean, lightly floured surface.
- Start stretching out the dough with your hands, turning the ball as you press down the center.
Laying of the pizza
- Leave a little bit of board to the edge of the dough, give the right thickness and the right shape to the pizza. Be careful not to make holes.
- Alternatively, if your find stretching by hand is difficult, use a rolling pin to work the dough until you form a 12-inch circle.
- With a dough docker, dock the dough throughout the entire circumference. This will prevent the dough from forming bubbles during the baking process. Resulting in a nice even thin crust.
Top the dough
- Grab a large, preferably flat spoon and disperse the sauce onto the center of the dough.
- Use the back of the spoon to spread the sauce outward from the center in a spiral motion. Leave about ¾” inch around the rim of the pizza. Shake the pizza peel to make sure the dough isn’t sticking.
- Pour the cheese onto the center of the pizza and spread it with your fingers. Do not go all the way up the rim.
- Arrange the rest of your toppings evenly over the cheese.
- Give it a final shape by adjusting the rim as necessary to give the pizza a perfectly round shape.
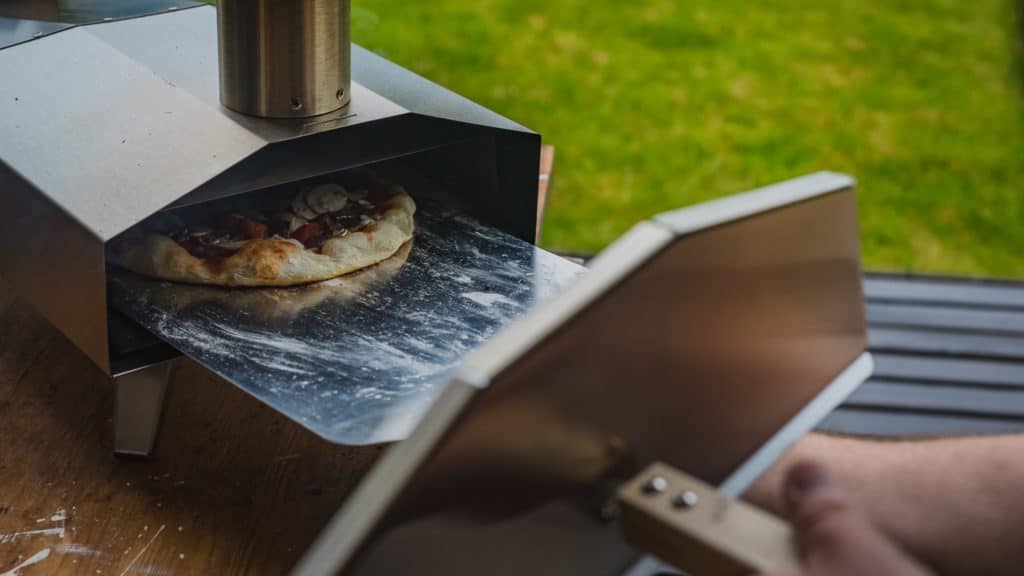
Transfer the pizza to the oven
- Shake the pizza back and forth again to make sure it isn’t sticking. If it sticks to the peel, lift the edge and add flour, cornmeal, or a mixture of both.
- Slide the prepared pizza onto the hot pizza steel, stone, or baking sheet. The pizza peel and the stone or steel should be at the same level, not angled or sloped.
- Bring the pizza to where you want to place it just slide it off the peel by moving the peel forward and backward. Once the dough touches the stone or steel, it will stick to it.
- Look at the shape; you will only have a few seconds to make any adjustments with the peel. You must be incredibly careful as it would be scorching to touch with your bare hands.
Bake the pizza
- Check the oven as it should be at 500F.
- Set a timer for at least 5 to 6 minutes so you can check the progress. If you see any large bubbles in the pizza, just poke them with a knife and add additional cheese on top. Try not to open the oven door.
- Grab the peel and rotate the pizza 180° if you feel the back is cooking faster. Check the bottom of the pizza to make sure it has been cooked well. It should be rich brown and burnished. The total cooking time should be from 12 to15 minutes total depending on your oven. Bake until the crust is properly browned.
Finish
- You may want to add a small number of your finishes right before serving your pizza. If you like, drizzle the pizza with garlic oil, or add flaky salt, our favorite truffle salt or any other add-on that you may want.
- For additional flavor, add a sprinkle of Parmesan or Pecorino to give it an extra pungent flavor.
Enjoy!
Not a PRO? Not a Problem!
Take a pizza class to bring your pizza skills to the next level,
so you can be a PRO!
Related Posts

Costco Pizza Delivery: Find How You Can Get It Now!
the PROs
People go to Costco’s food court for many different reasons, but the cheesy slice of pizza they serve is among …
Pizza for Beginners: Don’t Buy Pizza, Make It! Here’s How to Get Started!
the PROs
You have this idea that you want to make pizza at home as opposed to ordering it, but where do you start? Don’t worry! Here you will find answers and directions to all your questions.

Pizza Toppings Under Cheese or Over Cheese? [Why the Order Matters]
the PROs
Is Pizza Cheese on Top or Bottom? Hey pizza lovers, are you wondering if you should layer pizza toppings under …

Newsletter
Subscribe to our Recipe of the Week newsletter and receive our partners’ latest recipes, tips, and discount offers.
Keep in Touch!