
You’ve likely indulged in countless slices of pizza in your lifetime, but have you ever stopped to appreciate the magic of the cornicione?
You know, that fluffy, golden ring of dough that lovingly cradles your favorite toppings? If you’re wondering what on earth we’re talking about, you’re in for a treat!
The cornicione is the often-overlooked part of the pizza that’s just begging for a little attention. So, buckle up and get ready to dive into the world of this marvelous pizza component!
In this post, you’ll not only discover what cornicione is but also learn how to craft the perfect one for your homemade pizzas. Read on, and soon you’ll be impressing your friends and family with your newfound dough-sculpting prowess!
Let’s get started!
Here’s What You Will Find:
Key Takeaways
Cornicione
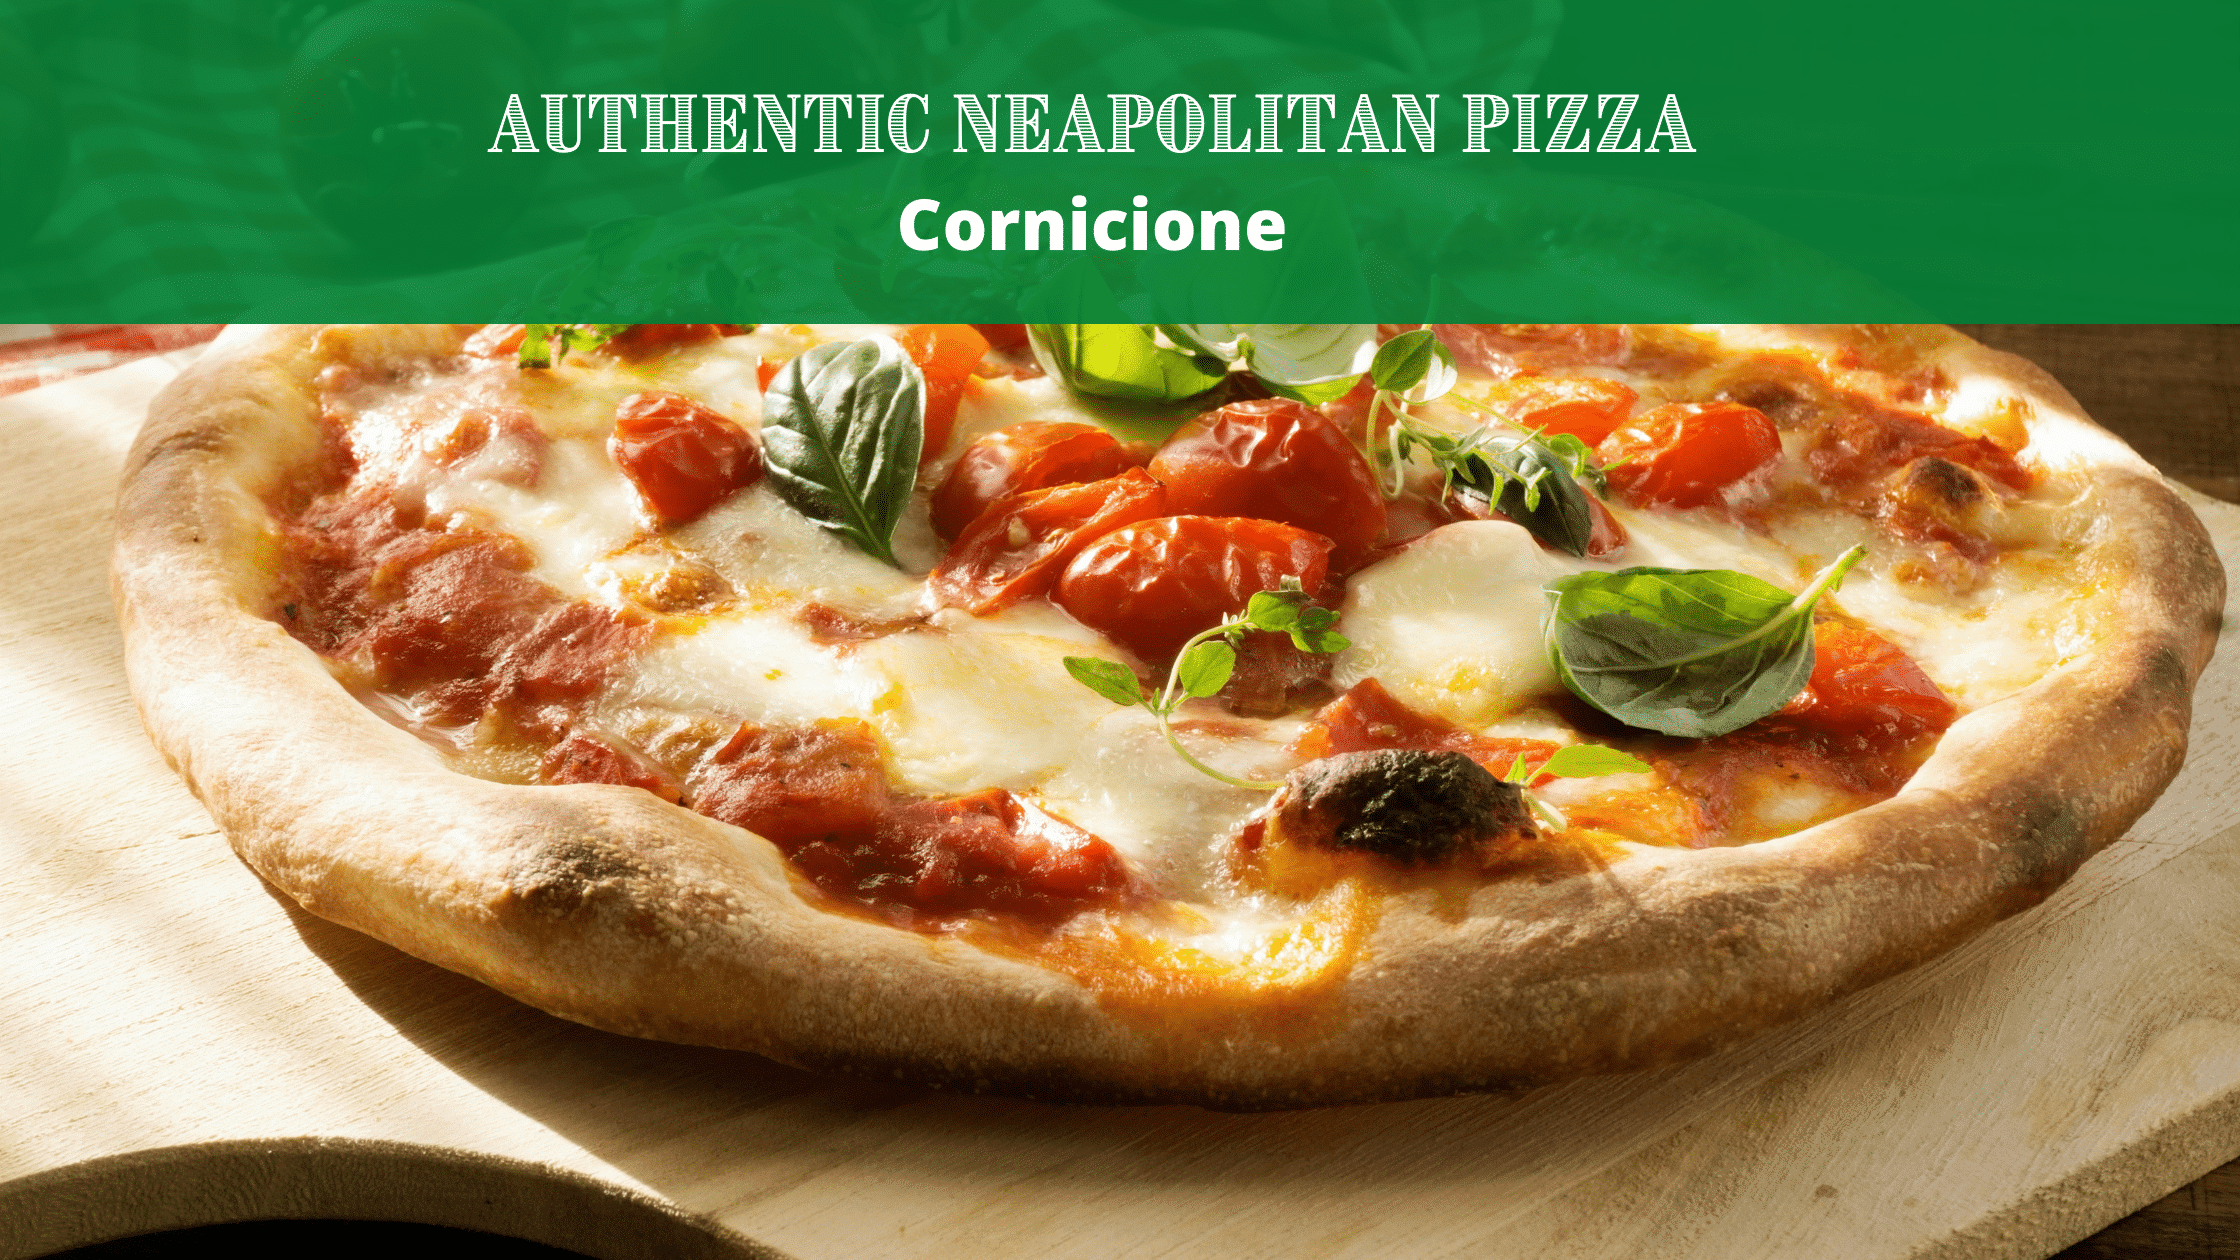
A cornicione is the outer edge of a pizza crust, which is often thicker and puffier than the rest of the crust. It is a traditional feature of Neapolitan-style pizza and is highly prized for its texture and flavor.
To make a good cornicione on your pizza, start by using a high-hydration dough (around 75-80%) and allowing it to ferment for at least 24 hours. This will help develop the flavor and texture of the crust.
When shaping the pizza, make sure to stretch the dough out to the desired size, leaving a thicker edge around the circumference. Once it is on the peel, let it rest for 15-20 minutes to relax the gluten and allow it to rise a bit.
When baking, make sure to place the pizza in the oven with the cornicione facing the outer wall of the oven. This will help it cook evenly and puff up nicely. For added flavor, you can brush the cornicione with olive oil or garlic butter before baking.
What Is Cornicione?
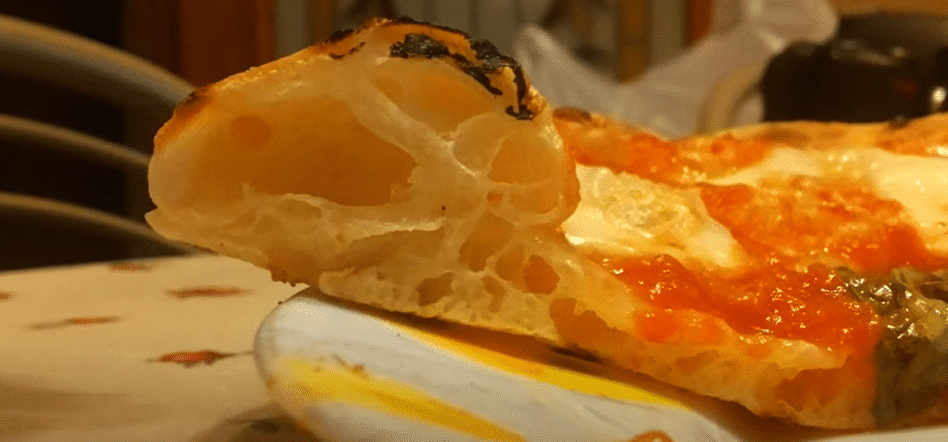
The word “cornicione” refers to the pizza’s edge or rim in Italian. The cornicione on a Neapolitan pizza should have an airy, raised edge, crispy exterior, and light and soft inside.
The pizza is topped with various toppings, including tomatoes, cheese, meats, and vegetables.
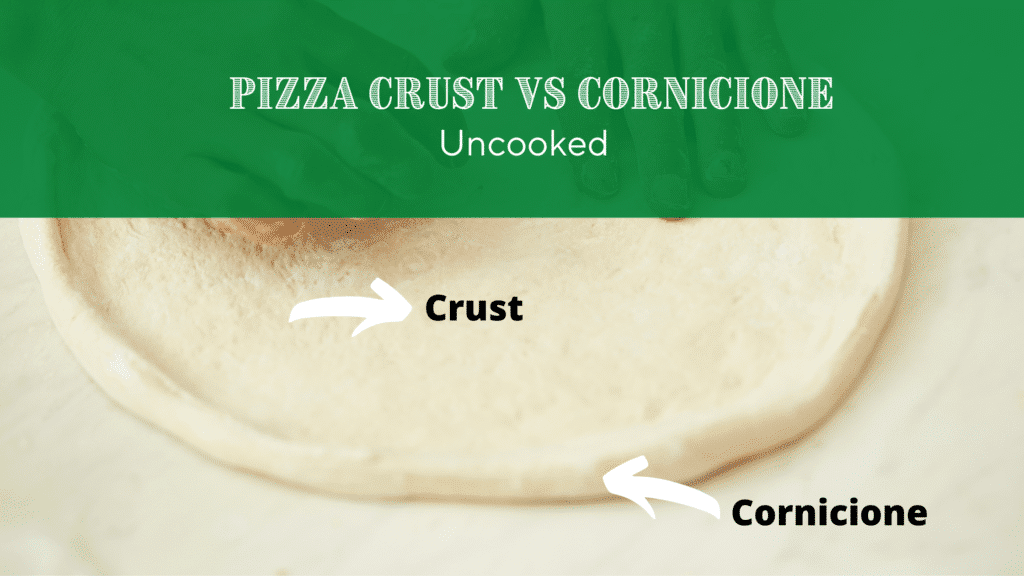
Unless you’re an accomplished pizza cook who has been speaking improperly, knowing the difference between a crust and “cornicione” is probably not all that significant.
Nonetheless, we believe it is a good idea to educate the general public so that, at least, you may amaze your friends with your excellent understanding of a weird Italian word that refers to a pizza “crust rim.”
In all seriousness, in the United States, the term crust is frequently misused to describe the pizza’s edge.
The crust refers to the entire bread portion of the pizza rather than just the border.
It should be evident that you know that pizza originates from Italy, but very few know that the Italians also defined the specific types of pizza we like to eat.
Thin-crust pizza is more common for most people, with no visible crust along the outer rim. From an Italian point of view, this is called Pizza Romana and was one of the first Street foods in Rome sold by the slice.
The Italians weren’t kidding when they invented these select types of pizza since their crusts all have different textures and overall bite.
Cornicione pizza is best known for its crunchy crust. That said, most Americans always confuse the crust with the outside edge of the pizza.
Pizza cornicione is quite the opposite, with a generous bubbly crust rim handy (so to speak) for pizza lovers who like to get a handle on their hot slice.
Associazione Verace Pizza Napolitana Rules
According to the (AVPN)- Associazione Verace Pizza Napolitana (aka The True Neapolitan Pizza Association. You probably know this style of pizza better as being called Neapolitan-style pizza.
The pizza crust is defined as the entire pizza bread that is baked. But for a pizza cornicione to be authentic, the outer rim must be half an inch to one inch thick.
Check Out the AVPN Rules:
Associazione Verace Pizza Napoletana Rules
How to Prepare the True Neapolitan Pizza?
Finally, we have the original recipe written down by the old generation of pizzamakers.
Let’s analyze the final aspect of the authentic Neapolitan pizza after cooking in the wood-fired oven:
1. The Neapolitan pizza is roundish, with a diameter max of 35cm;
2. The Neapolitan pizza presents a raised edge (the famous “cornicione”), swollen and free from burns, 1-2 cm;
3. The Neapolitan pizza must be soft and fragrant
How to Make the Best Pizza Cornicione at Home
Do you like your pizza to have plenty of fluffy crust around the rim? If that’s the case, you’ll love a traditional old-world pizza called Neapolitan, and it’s perfect cornicione.
You’ve seen these before at many pizzeria take-outs and restaurants but probably never knew what it’s called.
If you love making pizza at home, you can quickly learn this pizza technique with simple steps that produce the best results.
Are you ready to make some authentic pizza cornicione in your home kitchen? You want to start with the essential ingredients to make the difference to get the best results in your dough and its development.
What Ingredients You Need
You can find all these ingredients at your local store, yet flour is essential.
The reason for this is straightforward, as you’ll find out. Not every store may offer the flour you need, so it’s essential to find the right brand with the highest protein content.
Likewise, always check the expiration date on your flour, which might be getting too old, and lower your expectations unknowingly.
Flour
The type of flour you want to look for will be meant for making pizza. Any of the Italian milled wheat flours with high protein or gluten content will work.
Not every supermarket sells this type, so you may need to search for a baking supplier for a good quality flour.
You want to look for Tipo 0 or Tipo 00, which is dedicated Italian-milled pizza flour with higher levels of gluten.
The protein is also part of your pizza flour since this helps create the gluten that makes pizza dough so unique.
If you can get your hands on imported Italian-milled flour, buy a brand that the AVPN approves.
This association only uses pizza flour that creates authentic cornicione pizza dough. Look for brand names, including Grassi, Aguiaro, Caputo, and 5 Stagioni, for the pizza flour that works the best.
Here’s What the Pros at Homemade Pizza Pro Use and Recommend
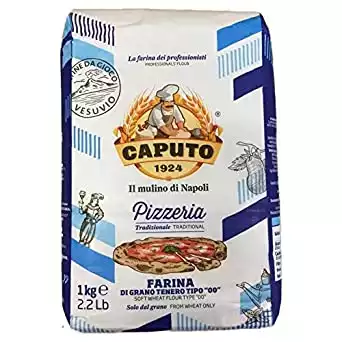
A flour with elastic, resistant gluten and protein resulting in a long-rise dough. Ideal for classic Neapolitan pizza made in high heat wood fired, gas or electric ovens in high temperatures over 700 degrees F.
What exactly is gluten?
Gluten is a protein that may be found in wheat flour. Gluten’s primary function is to hold the dough together.
If your dough is lacking in gluten content, it will just crumble. Gluten provides structure to the dough while also making it elastic and flexible.
You’ll need an elastic dough to produce a fantastic cornicione and a Neapolitan pizza.
Hydrating the gluten by soaking it in water and kneading it begins forming a robust network of gluten strands. This network will provide structure to the dough.
The more you knead the dough, the more solid the network becomes.
Why is gluten so vital?
Your pizza dough needs gluten to develop a robust chain of fermented protein molecules. In a nutshell, gluten holds your dough together and helps give it excellent elasticity.
This also helps create complex flavors in the dough that aren’t easily detected through regular fermentation.
When this process is slowed down in the fridge, it can take a long time to form, so some Neapolitan dough recipes call for slower gluten development.
Gluten Development
You must first hydrate the gluten to grow it (make it create a strong network that prevents your dough from ripping).
The gluten formation process begins when flour and water are combined. You must additionally knead the dough in addition to using water.
Kneading by hand will take around 15-20 minutes. It will take a little less time if you use a stand mixer.
Gluten also creates a great bread-like texture that provides a chewy texture and crunchy crust.
Without gluten formation, the pizza crust wouldn’t become crispy as the gluten begins to cook and harden.
This is even more apparent when using specialized pizza flour.
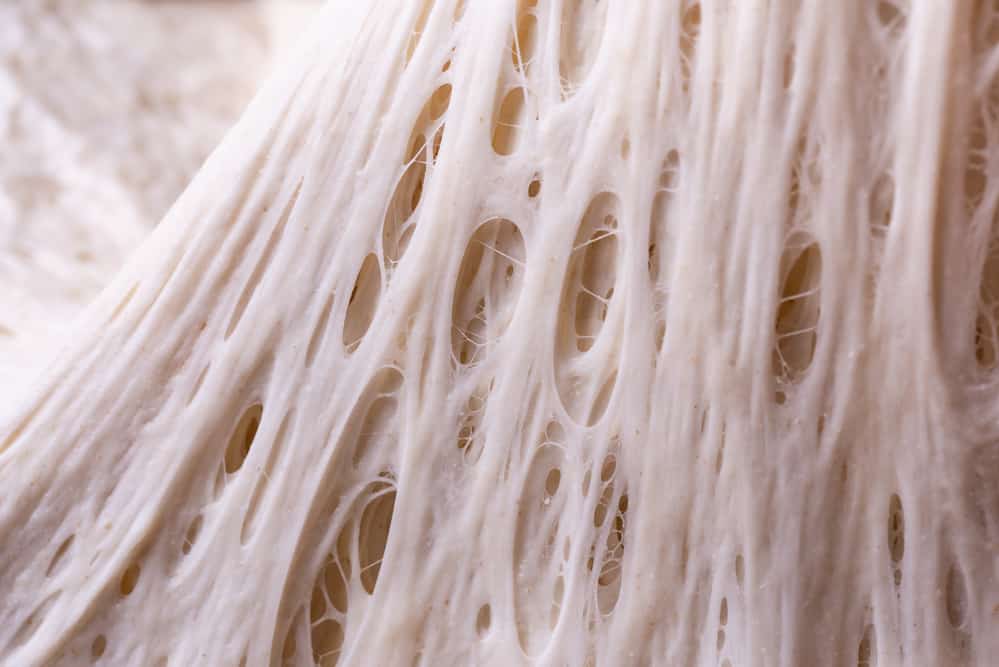
Cornicione Structure
How Gluten Relates to Hole Size
The size of the holes in the crust depends partly on how strong the gluten network becomes when mixing everything.
Gluten Strength
- A more robust gluten network holds the bubbles in tighter, so they don’t get as big.
- A looser gluten network lets the bubbles swell up like balloons throughout the dough.
Cold Fermentation
To generate those wonderful air bubbles in the cornicione, you’ll need long, gradual slow fermentation, proofing, and gluten formation. It takes 8 to 24 hours for a Neapolitan pizza to rise.
However, employing a technique known as cold fermentation, you may experiment with even extended fermentation durations, which can further enhance the flavor of your crust.
Reduce the amount of yeast to get a more extended fermentation period. The fermentation will slow down and extend over a long time when the dough contains less yeast.
I’d want to underline the value of excellent flour once more. A dough produced with all-purpose flour would probably overproof if left for 24 hours.
Over proofing means that the gluten network isn’t strong enough to contain the gas and will collapse, leaving you with a solid, flat dough devoid of air bubbles.
Yeast
While you could use fresh yeast that you buy at the supermarket, there is always a chance that this yeast has expired. You might be better off using active dry yeast that doesn’t expire as quickly as fresh yeast.
Even if a packet of dry yeast doesn’t activate, there is no cause for alarm.
A new packet can be added to your recipe without any residual problems.
Here’s What the Pros at Homemade Pizza Pro Use and Recommend
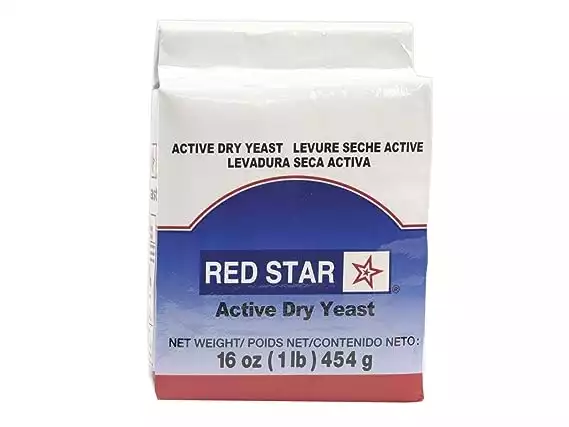
Red Star Active Dry Yeast is a trusted choice among bakers. It's known for its consistent performance, balanced fermentation speed, and subtly nuanced flavors it brings to pizza dough, contributing to a well-rounded and delicious crust.
With expired fresh yeast, you must discard this as soon as possible.
Fresh yeast is a playground for potential bacteria and will harm your health. Dry yeast is different since there is no moisture, so adding more to inactive dry yeast is 100% safe.
Water
Water in your flour is essential to get the correct hydration, impacting your dough in many ways.
It gives dough the elasticity needed for stretching and helps keep your dough from getting too sticky to work with.
The dough is hard to work with when there isn’t enough water, and you have a dry and tough dough.
This is all based on using what is called Baker’s Percentage Method.
You can decide on the hydration level between 55-60%, optimal for many Neapolitan pizza recipes.
No matter how much flour you’re using, this needs to be rounded off to the nearest hundred, including 500 to 700 grams.
If you’re not great at math, you can use our online calculator to get the most accurate hydration level in seconds.
Salt
Salt is essential to traditional pizza dough, yet it can also be too easy to screw up if you add too much.
You don’t want to add more than 3% of your total flour weight. If you have 500 grams of flour, 15 grams of salt would require. You’ll need to multiply the total weight of your flour by 3%.
In general, 1 pound of flour will require 1 tablespoon of salt. Use a digital scale to measure this, or measure spoons instead of a tablespoon you eat with.
Pizza Shaping (Cornicione Shaping)
You don’t want to ruin this delicate structure because it takes a lot for pizza dough to build up the amount of gas within well-fermented cornicione pizza dough. You want to keep most of the air bubbles created during fermentation.
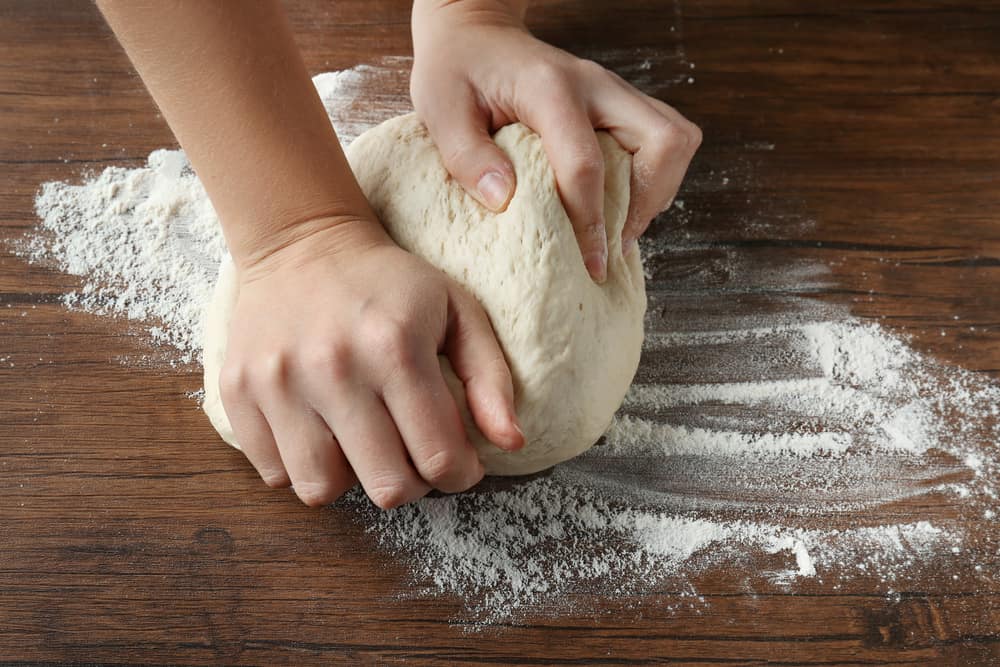
A stretchy dough is essential for making Neapolitan pizza and a great cornicione.
Don’t ever use a rolling pin to create your pizza shape. It forms the dough by hand, starting by carefully stretching it.
A healthy flour dash will keep the dough from sticking to your hands and the surface you’re working on.
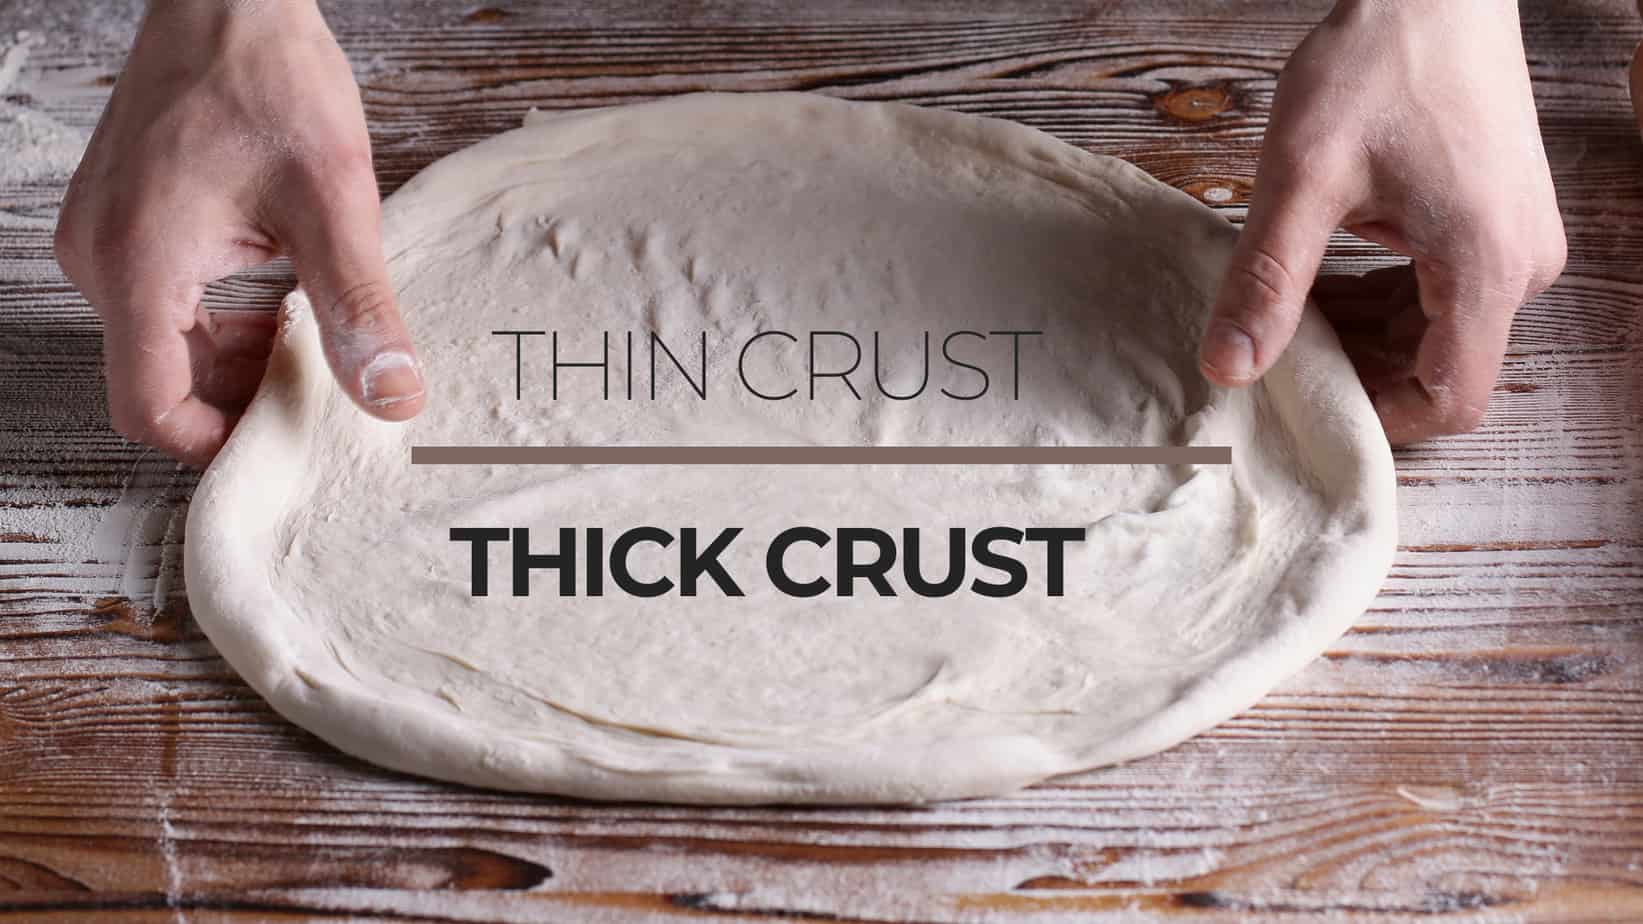
Don’t allow the rim to stretch as much as you pull the dough. The inside of the circle should become very thin, and the edge of the pizza should be intact.
This will make the outer edge puffy, making this outer ring more appealing, and it can become just as crunchy when it cooks at high heat.
Pizza Oven
Your pizza needs to cook quickly so the dough will rise and bake in the shortest time required for pizza. Pizza that’s baked at a lower temperature for a longer period of time will get a drier crust. The reason is that more water evaporates during the long bake, leaving you with a very dry crust.
You’ll need an extremely hot oven to cook your pizza in 2 to 3 minutes. High heat is used so you don’t have overcooked pizza dough, but it will also allow just enough dough to rise for your pizza to get the proper amount of bread-like texture with a soft interior.
With lower temperatures, you’ll get a dry and overly tough crust.
So always use the highest heat possible in your kitchen or a pizza oven reaching at least 700 to 900 degrees Fahrenheit.
This can also include your kitchen broiler if there is enough room for your pizza.
Here’s What the Pros at Homemade Pizza Pro Use and Recommend

The Ooni Koda 16 is an indispensable tool for any aspiring chef or grill lover. This sleek, cast-iron pizza oven quickly heats up to 932°F and cooks delicious pizza in just 60 seconds.
With its smart gas ignition system and advanced flame control knobs, it provides a unique cooking experience that's sure to turn heads. And because of its robust construction and corrosion-resistant powder coating, this oven is built to last through years of use outdoors.
And best of all, the Ooni Koda 16 is easy to use and clean, making outdoor cooking a breeze. Don't miss out on the chance to elevate your outdoor cooking game!
- Fast heating time
- Portable design
- Large cooking area of 16 inches for increased dining capacity.
- Gas-powered oven with adjustable temperature control up to 932°F for optimal cooking results.
- 3yr warranty
- Easy to clean enameled steel surface.
- The high initial cost of purchase may be prohibitive for some customers.
- Fuel canisters must be purchased separately, increasing overall costs of operation.
- Not suitable for indoor use due to the release of carbon monoxide from burning fuel canisters indoors.
- Requires frequent monitoring when in use, as the oven has no built-in safety features to shut off automatically if left unattended for too long.
Step Process to Make Pizza Dough and Shape the Cornicione (Step by Step)
Start with measuring your ingredients and putting them in separate bowls. This is done so you don’t accidentally put the wrong item into your main mixing bowl.
This is also important to determine what is fresh and active, such as instant yeast.
Use a sifter for your flour or a fork to break up any small lumps and help aerate the flour so it hydrates faster and without problems.
How to Make Pizza Dough and Shape the Pizza Crust (Cornicione)
Total Time: 24 hours
Activate Yeast
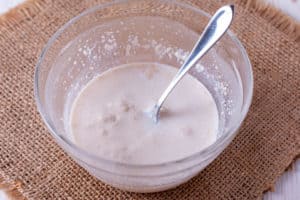
1- Pour your yeast mixture a little bit into a separate bowl. Add a packet of yeast and a pinch or two of sugar.
The reaction will start bubbling and foaming when the yeast is activated. This is when you can mix your olive oil with the yeast mixture.
Determine Hydration and Combine Flour and Water
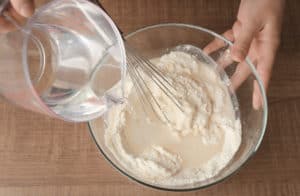
2- Measure your water based on the hydration chosen for the weight of your flour. This water should be warm but not hot.
Stir these together until all of the ingredients are mixed well. When these ingredients are combined you can add your water. This should be stirred in until there is no longer any dry mixture left. When the water is combined and you are left with a damp mixture, you can start to mix or stir this together, either with a stand mixer, metal spoon, a wooden spoon, or your hands.
Mix all Ingredients
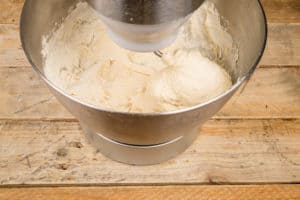
3. Into your bowl of flour, you can add the salt to this mixture and mix this around. Make a small funnel-shaped hole in your main dough mixing bowl.
Add your water to the flour and top this off with the yeast, water, and oil mixture.
If you are using a mixing machine, use dough paddles and mix this until the dough is thoroughly mixed. If you incorporate this by hand, you’ll use a wooden spoon until this is completed.
Fermentation
4. Scrap the dough into a separate bowl and then cover this with a lightly damp dishcloth or plastic wrap.
It’s best to place this in a warm area, allowing the gas from the yeast to make the dough double in size for no more than 2 hours. These trapped gases causes the dough to rise, and create bubbles inside your pizza cornicione.
If you are slow proofing your pizza dough, it needs to go under two rising processes. For the secont rising, it will need to be placed in the refrigerator for a day, allowing it to have more complex flavors.
You can split this uniformed ball into two, enabling you to make two pizzas from it.
Shaping
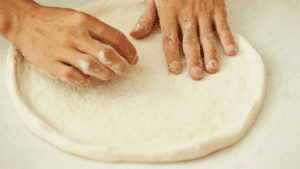
5. When the chilled pizza dough is taken from the fridge, allow it one hour to become room temperature before forming it into a pizza shape.
Pizza dough proofed quickly in 2 hours can be formed into a pizza shape using plenty of flour so the dough doesn’t stick to you or your table surface.
Carefully form the pizza shape by gently easing the pizza dough outwards in a light pulling and stroking motion on both sides of the dough in your hands.
When you reach the desired shape for your pizza dough, don’t forget to keep the outer ring of your dough thicker than the rest of the pizza shape. This outer ring will rise and bake as it gets cooked.
Add Toppings

6. You can immediately start putting the pizza sauce and toppings. Ensure you’ve preheated your home oven or grill so it will cook sooner.
Supply:
- Flour
- Water
- Yeast
- Salt
Tools:
- Hands
- Stand Mixer
- Food Processor
Materials: Bowl Scraper
Here’s a Video on How to Shape Cornicione
Related Questions
What is the burnt part of a pizza called?
The charring happens as a result of baking the pie in a very hot oven and adds in fact an incredibly delicious, lightly bitter flavor that distinguishes the Neapolitan pizzas and complements the tart tomato sprinkling. Sometimes also call Leopard spotting.
What is the noncrust part of pizza called?
The correct word is Cornicione, or Cornee-cho-ne. Translated to cornice, cornicione is typically only really used by pizza cognizant when discussing what a pizza offers them to enjoy.
How do you pronounce Cornicione?
The Corsican language. Cornee-cho-ne
The Last Slice
We hope this information has given you great insight into making the perfect Cornicione pizza dough.
And though your pizza recipe might come from the internet, always make slight adjustments to the salt and water to get the best results for taste and hydration texture.
We hope this helps encourage you to explore different pizza-making recipes that allow you to be a professional pizza maker with relative ease.
Additional Resources on Pizza Crust
Pizza Dough Thickness (The Easy Guide on How Thick Should Pizza Dough Be?)
the PROs
The crust is one of the deciding factors in most pizza styles, right from the thin crust ones such as New Haven and New York style to thick crust pizzas such as the Sicilian and the Detroit. So no matter what pizza style you like, the crust is always a deciding factor. So how thick your crust should be? Let’s find out!
Enjoy!
Not a PRO? Not a Problem!
Take a pizza class to bring your pizza skills to the next level,
so you can be a PRO!
Related Posts

Costco Pizza Delivery: Find How You Can Get It Now!
the PROs
People go to Costco’s food court for many different reasons, but the cheesy slice of pizza they serve is among …
Pizza for Beginners: Don’t Buy Pizza, Make It! Here’s How to Get Started!
the PROs
You have this idea that you want to make pizza at home as opposed to ordering it, but where do you start? Don’t worry! Here you will find answers and directions to all your questions.

Pizza Toppings Under Cheese or Over Cheese? [Why the Order Matters]
the PROs
Is Pizza Cheese on Top or Bottom? Hey pizza lovers, are you wondering if you should layer pizza toppings under …

Newsletter
Subscribe to our Recipe of the Week newsletter and receive our partners’ latest recipes, tips, and discount offers.
Keep in Touch!