As an ardent pizza lover knows, the journey to creating the perfect pie is a lot more complex than merely slapping some sauce and cheese on the dough. The real magic lies in the base—your pizza dough—that unassuming canvas that holds all the ingredients together.
But did you know that one simple, but strategic, tweak can transform that dough from good to transcendent?
The secret to the perfect pizza is something called “cold fermentation.”
It might sound a little scientific, even daunting, but the reality is beautifully simple—and the results, are mouth-wateringly delicious. With the power of time and a touch of patience, you’ll unlock flavors and textures in your pizza dough that you never thought were possible at home.
Intrigued?
Let’s dive in and uncover the wonderful world of cold fermentation for pizza dough. Read on to discover the secrets of this technique and make your homemade pizza truly unbeatable.
Trust us, your taste buds will thank you.
Let’s get started!
Here’s What You Will Find:
Pizza Dough Cold Fermentation
There’s something indescribably satisfying about biting into a perfectly crafted slice of pizza. The balance of flavors, the melding of textures, and that divine crust—all work together to create a sensory experience that’s tough to match.
And as any pizza aficionado will tell you, the key to an exceptional pizza lies in its dough.
Most home cooks prepare pizza dough in the same way—combine flour, water, yeast, and salt, then knead and let it rise.
Simple, right?
But what if we told you there’s a method to elevate your dough game, transforming your homemade pizza from good to exceptional? That’s where the concept of cold fermentation comes in.
Cold fermentation might sound like a term straight out of a biochemistry textbook, but don’t be daunted—it’s a straightforward technique that can be easily mastered at home. This process is all about harnessing the power of time and patience to create a pizza dough that’s flavor-packed and texturally superior.
What is Cold Fermentation?
Before we get into the nitty-gritty of the cold fermentation process, it’s crucial to understand what it is. Cold fermentation is essentially the process of letting your pizza dough rest and ferment in a cold environment (like your refrigerator) for an extended period. This slow, cool fermentation allows the yeast in your dough to work its magic, breaking down the complex carbohydrates in the flour into simpler sugars, thereby enhancing the flavor and texture of your pizza base.
In the baking world, the process of cold fermentation is also referred to as “retarding” the dough. This term comes from the French word ‘retarder,’ meaning to delay or slow down. When the dough is retarded, it’s placed in a cooler environment, such as a refrigerator, to slow down the yeast activity, thus delaying the fermentation and rise of the dough. Check our article on retarding pizza dough for more.
This process not only extends the fermentation period, allowing for more complex flavors to develop but also provides greater flexibility in terms of baking schedule. Retarding the dough is a technique often employed in professional bakeries, but it’s also easily applicable in home baking, especially when making flavor-packed cold-fermented pizza dough.
The Science Behind Cold Fermentation
The yeast, an integral part of the fermentation process, plays a significant role in the cold fermentation process. This microscopic organism feeds on the sugars in your dough, releasing carbon dioxide and ethanol as byproducts.
When the dough ferments at room temperature, this process occurs relatively quickly, and your dough will rise within a few hours. Check our article on how to proof pizza dough for more info.
However, when the dough ferments in a cold environment, this yeast activity slows down, allowing for a long, slow rise that significantly improves the flavor and texture of your dough.
So, what are these biochemical reactions happening during the cold fermentation? As the yeast breaks down the carbohydrates, it not only creates carbon dioxide (which helps your dough rise) but also a wide array of organic acids and flavor compounds.
This extended fermentation period leads to a more complex-tasting dough, all thanks to the increased production of these acids and compounds. As a result, the cold-fermented dough has a deeper, richer flavor that’s noticeably different from dough fermented at room temperature.
Benefits of Cold Fermentation for Pizza Dough
There’s no denying the noticeable advantages cold fermentation brings to your pizza dough. The transformation is not just about taste; it’s about texture and digestibility too. Let’s take a closer look at these perks:
Better Flavor
How cold fermentation affects the taste?
When you allow your dough to ferment in a cold environment for an extended period, a remarkable transformation occurs. The yeast has more time to work on the carbohydrates in the flour, producing a greater variety of organic acids and flavor compounds.
These contribute to a dough that has a deeper, more complex flavor compared to dough that’s quickly risen at room temperature. This process imparts a subtle, tangy taste to your crust, balancing the richness of the cheese and the sweetness of the tomato sauce—making each bite of pizza a gastronomic delight.
Improved Texture
Cold fermentation doesn’t just improve flavor; it also enhances the texture of your pizza dough. The slower yeast activity allows the dough to develop a more robust gluten structure, which in turn provides the crust with a distinctive chewy texture and airy interior. When baked, your pizza base will achieve a delightful combination of crispness on the outside and a fluffy, tender crumb on the inside.
Better digestion
Health advantages of cold fermented dough
An often overlooked benefit of cold fermentation is that it makes the dough more digestible. The long fermentation process partially breaks down the gluten in the dough, making it easier for your body to process. In addition, the organic acids produced during fermentation can help your body absorb more of the nutrients from the flour, turning your pizza into a meal that’s as beneficial as it is delicious.
Step-by-Step Guide to Cold Fermenting Pizza Dough
Ready to bring the magic of cold fermentation into your kitchen?
Here’s a comprehensive guide to get you started.
What do You Need to Cold Ferment Pizza Dough?
Ingredients and Equipment
To create your cold-fermented pizza dough, you’ll need a few simple ingredients: flour, water, yeast, and salt. You might also want to include a small amount of sugar and olive oil for added flavor.
As for equipment, you’ll need a mixing bowl, dough proofer (optional), a dough scraper, and a few containers for the dough to ferment in.
Creating the Dough, Mixing and Kneading
Combine the flour, yeast, salt, and sugar (if using) in your mixing bowl. Gradually add in the water, stirring until it comes together into a shaggy mass. Add the olive oil and knead the dough—either in the bowl or on a lightly floured surface—until it’s smooth and elastic. This usually takes about 10 minutes of kneading by hand.
Cold Fermentation Process
The cold fermentation process involves letting your pizza dough rise slowly in a cold environment, typically your refrigerator, over an extended period—usually 24 to 72 hours. This technique significantly slows down the activity of the yeast, allowing it to gradually convert the carbohydrates in the flour into flavorful organic acids and gas.
The resulting dough is characterized by a complex, tangy flavor, a delightfully chewy texture, and an improved nutritional profile. This method requires patience but rewards you with a superior crust that truly elevates your homemade pizza experience
How to Cold Ferment Pizza Dough
To get started:
- Place the dough balls in a dough proofer or any container to proof them and cover them with a lid or cling film.
- Leave the dough to proof in the refrigerator for 8 to 72 hrs.
- When you are ready to shape your pizzas, take the dough out and let it sit for 1 hour before starting to shape it.
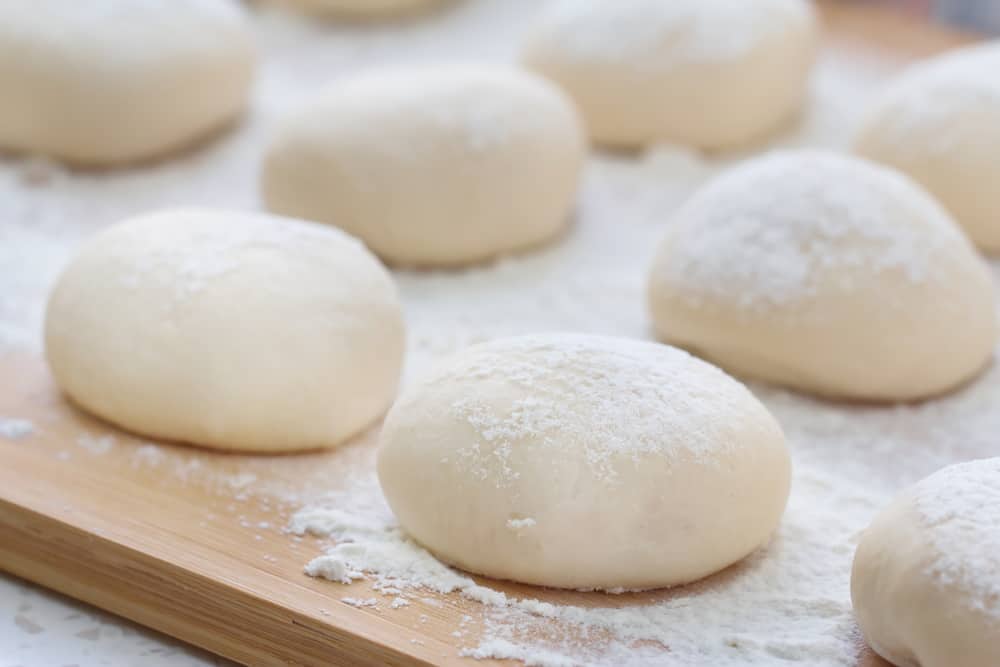
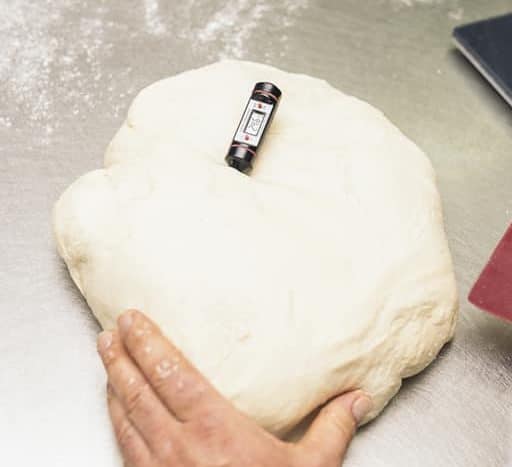
Step 1: Dust or Spray Doughballs
Take each dough ball and lightly dust it with flour or spray it with non-stick vegetable oil spray.
You can save any extra dough balls you will not use in the freezer by placing them in a freezer bag or freezer container. They should be suitable for up to 3 months.
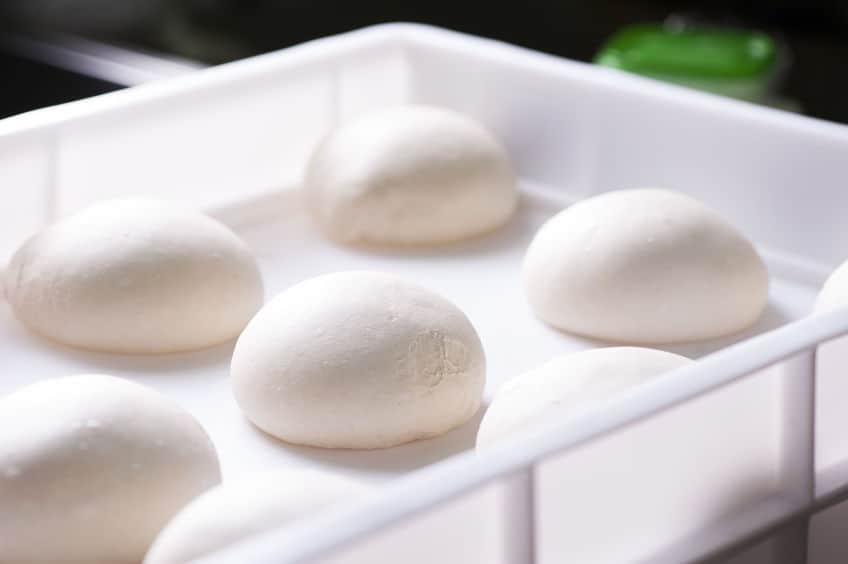
Step 2: Set Dough-balls in Container
Set all dough balls in a covered container. Make sure they don’t touch each other, or they will stick during proofing. Refrigerate dough balls from 8 to 72 hrs.
Step 3: Rest the dough balls
After the dough is fermented, before you shape it into a pizza crust, take them out of the refrigerator for at least 1 hr. This resting period will make the dough easier to shape.
How long to cold ferment pizza dough and why?
Once you’ve created your dough, divide it into individual portions for each pizza, then place each portion in a separate container. Seal the containers and pop them into the fridge. The length of the fermentation process can vary, but for optimum results, aim for at least 24 to 72 hours. This extended period allows the yeast plenty of time to create the organic acids and flavor compounds that give the cold-fermented dough its unique taste and texture.
Post-fermentation: Shaping, Proofing, and Baking Your Pizza Dough
When you’re ready to make your pizza, remove the dough from the fridge and let it come to room temperature—this usually takes about 1-2 hours. This is important as the dough needs to warm up to reactivate the yeast for the final rise. Shape the dough into your desired pizza shape, add your toppings, and bake in a preheated oven until golden and bubbly.
This step requires careful handling to preserve the gas bubbles created during fermentation, which contribute to the airy texture of your final crust. Begin by gently stretching the dough from the center, turning it as you go, and avoid pressing out the gas at the edge of the dough. This will give you that deliciously puffy and crispy crust.
As for baking, an important tip is to ensure your oven is as hot as possible. Traditional pizza ovens can reach up to 900°F, but home ovens usually max out at about 500-550°F. Preheat your oven to its maximum temperature for the best results. Using a pizza stone or steel can also help achieve a crispier crust by retaining and distributing heat evenly.

Once your pizza is baked to golden perfection, let it rest for a couple of minutes before slicing. This allows the cheese to set slightly and prevents all your delicious toppings from sliding off when you cut into it.
So there you have it—a complete guide to creating amazing, cold-fermented pizza dough at home. But as with any culinary endeavor, perfection comes with practice and a few personalized tweaks.
We will offer some helpful tips and tricks to get you to master the art of cold-fermented pizza dough, answering common questions, and customizing the process to suit your taste and schedule.
Pizza Dough Retarding
What is Retarding Pizza Dough?
Retarding dough or “cold fermentation” reduces the dough’s temperature to delay or prolong the pizza dough fermentation process rate.
The temperature has a direct effect on yeast as heat accelerates the rate of fermentation. If the dough is placed in a warm place, the dough will rise faster.
What is the Best Temperature for Cold Ferment Pizza Dough?
Temperatures from 33°F to 40°F (1°C to 4°C) are ideal for slowing down the fermentation process rate of the yeast for a slow and prolonged pizza dough fermentation process.
Retarding Dough
By retarding the dough, your dough will have more complex flavors, allowing you to make it ahead of time.
You can ferment the dough, save it, and use it at a later date.
Tips and Tricks for Perfect Cold-Fermented Pizza Dough
Creating a great pizza is a culinary art, and like any art, it comes with its own set of tips and tricks. Here are some ways to make your cold fermentation journey more successful and tailored to your taste.
Finding the right yeast: Fresh vs. dry yeast
While most recipes call for dry yeast, given its long shelf-life and easy availability, don’t hesitate to experiment with fresh yeast if you can find it. Some pizza aficionados swear by the unique flavor profile it offers. The key to remember here is the conversion ratio: for every part of dry yeast, you’ll need three parts of fresh yeast. Check our article on the best yeast for pizza for more info.
Ideal fermentation temperature and location
Your refrigerator is the obvious place for cold fermentation, but remember, not all spots in the fridge have the same temperature. The back of the fridge is usually the coldest, while the door is the warmest. You might need to experiment to find the sweet spot in your fridge that gives you the best fermentation results.
Timing your dough
While the ideal fermentation period is between 24 to 72 hours, this isn’t a hard and fast rule. If you prefer a milder flavor, a 24-hour fermentation might be enough.
On the other hand, if you like a more robust, tangy flavor, let the dough ferment for 72 hours or more. The key here is to test different durations and see what suits your palate best.
Pizza Dough Cold Fermentation – Best Practices
If you place the dough balls in a small container, the dough balls grow and stick to each other. So, bigger is better; your dough will need space and confined air to rise appropriately.
For a better rise, it is best to place the pizza dough to rise in a proof box as these types of containers are air-tight and specially made for this purpose. However, if you don’t have or want to get a proof box, any container with a tight seal will do.
Here’s What the PROs at Homemade Pizza Pro Use and Recommend
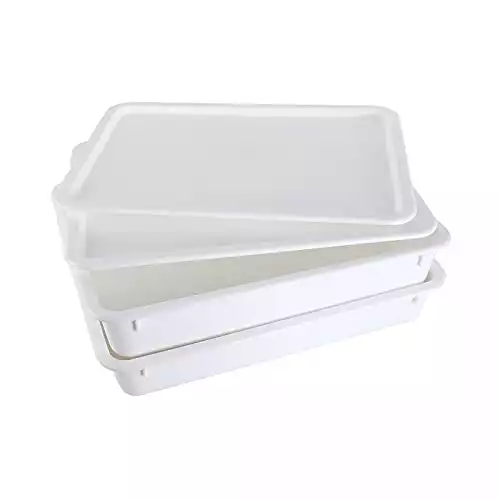
These dough-proofing boxes are generously sized at 17.25 x 13 x 3.54" with covers and are sturdy enough to stack while you wait.
Made with food-grade white plastic, you can rest assured your customers are being served the highest quality bread and pizzas.
Durable construction with covers, our proofing boxes will become a staple in your kitchen for years to come.
It is best if the container has a lid instead of a cling film. The refrigerator’s humidity may unseal the container allowing air to come in, and the dough ball will dry up; they will develop a crust and adhere to any smells in the refrigerator.
Before adding the dough balls to the container, it is also best practice to spray your bowl with non-stick cooking spray for easy cleanup.
What is the Best Temperature for Rising Pizza Dough?
During this stage of fermenting the dough should be covered with a lid or plastic wrap and away from air drafts and kept at a temperature from 33°F to 40°F (1°C to 4°C).
Where is the Best Place to Let Pizza Dough Be Proof?
The best place to let dough proof is in a cold place. The most accessible place would be your refrigerator.
The typical temperature of your fridge is 38°F, which is perfect for this kind of proofing.
If you leave it in a cold place, you can also let it sit outside.
However, it would be best if you made sure the container is completely sealed no matter where you proof your dough.
How Long Do You Proof Pizza Dough?
The least recommended amount of time pizza dough should proof in the refrigerator is 6 to 8 hrs.
So, if you wake up early, you can probably have pizza that same day.
For a couple of days, proofing in the refrigerator is excellent, from 24 to 72 hrs., enhancing the crust’s taste.
However, in any more than three days, the yeast will start to eat up all the sugar in the dough and convert it into alcohol. The excess alcohol production will adversely affect crust flavor.
The best place to let dough proof is in a cold place.
The most accessible place would be your refrigerator. The typical temperature of your fridge is 38°F, which is perfect for this kind of proofing.
Depending on what kind of pizza you want to make, it could be that that kind of pizza is what you want.
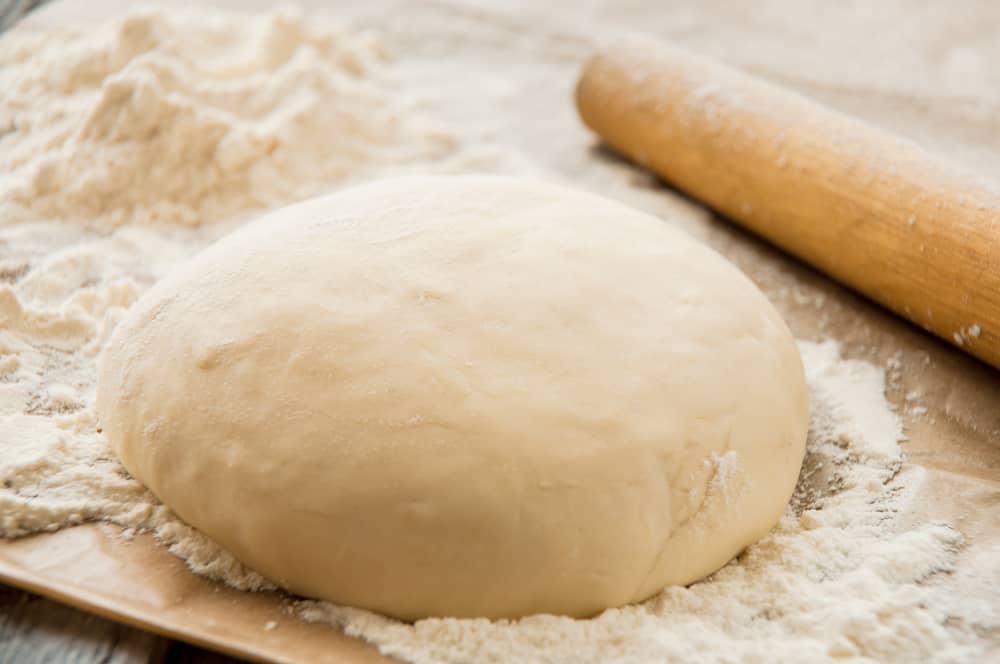
For example, let’s say you want to make a cracker-style pizza base that looks more like a flatbread. In this instance, you avoid the proofing process. It will probably still be a delicious pizza, but it will be quite different from the traditional pizza.
If your goal is a flat cracked-style pizza, make sure to roll your dough with a rolling pin and make it as flat as possible because if you leave a thick dough to make the crust, it will end up dense and chewy.
Frequently Asked Questions About Cold Fermentation
To round off, let’s address some common queries and concerns about the cold fermentation process:
What if my dough hasn’t risen much in the fridge?
Don’t panic! The cold environment significantly slows down yeast activity, which means your dough will rise much slower than it would at room temperature. Once you remove the dough from the fridge and it comes back to room temperature, you’ll see a more noticeable rise.
Can I freeze the cold-fermented dough?
Absolutely. If you’ve made a large batch of dough, you can certainly freeze it. Just remember to thaw it in the fridge and then allow it to come to room temperature before shaping and baking.
How long can I store the cold-fermented dough in the fridge?
While the peak flavor is typically reached within 72 hours, the cold-fermented dough can be stored in the fridge for up to a week. However, after the 72-hour mark, the yeast’s leavening power starts to diminish, so you may notice a decrease in the dough’s puffiness and oven spring.
My dough has a slightly sour smell. Is it still good?
A tangy, beer-like smell is entirely normal for cold-fermented dough and is a sign of the organic acids produced by the yeast. However, if the smell is strongly unpleasant or the dough has a greyish hue, it’s best to discard it and start fresh.
Why is my cold-fermented dough harder to stretch?
The cold-fermented dough can be more elastic and resistant to stretching due to the well-developed gluten network. Allow the dough to warm to room temperature before shaping; this will relax the gluten and make it easier to stretch.
Hopefully, we answered some of your questions and alleviated any concerns you might have had. Remember, practice and patience are essential when trying out new culinary techniques, and cold fermentation is no exception. Embrace the process, learn from each batch, and before you know it, you’ll be making pizzeria-quality pies at home.
The Last Slice
There’s no denying the magic that the process of cold fermentation brings to your homemade pizza. This simple, yet transformative technique is a game-changer that elevates the humble pizza dough to new gastronomic heights. It’s the key to unlocking deeper flavors, developing a superior texture, and even enhancing the nutritional value of your dough.
While it might take a bit more planning and patience than a quick-rise dough, the results of cold fermentation are truly worth the wait. Each bite of your homemade pizza will speak volumes about the time and love invested, echoing with rich, complex flavors, and a perfect balance of crispy, chewy textures.
Whether you’re an amateur cook exploring new culinary avenues or a seasoned pizza enthusiast looking to perfect your pie, the art of cold fermentation is an exciting journey of discovery. And remember, there’s no right or wrong here—only the opportunity to experiment, learn, and most importantly, to savor the delicious fruits of your labor.
So go ahead, embrace the slow magic of cold fermentation, and let your homemade pizza dough rise—both literally and figuratively—to the occasion. After all, isn’t making your taste buds dance with joy what cooking is all about? So get fermenting, and bring the pizzeria experience to your kitchen. You’ve got this!
Here at Homemade Pizza Pro, we’re always on the hunt for new tools and equipment that can enhance our culinary creations, and recently, we’ve been experimenting with a game-changing gadget—a dough proofer. This nifty device creates the ideal environment for the dough to ferment and rise, providing consistent temperature and humidity that can be a game-changer in the fermentation process.
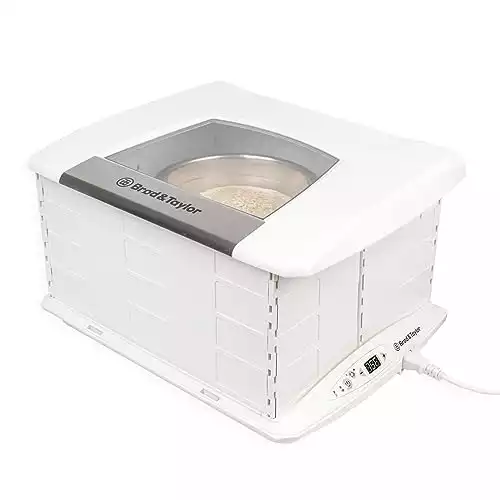
Enjoy accurate temperature control and consistent humidity. The Brod & Taylor Folding Dough Proofer creates an environment of consistent low-temperature warmth that is vital for many kitchen processes.
Ideal for pizza dough and yeast bread. Whether you’re a novice bread maker or an experienced enthusiast, this is the tool that helps ensure a flavorful, open-textured bread that is ready when you want it to be.
We’ve been quite impressed with the results we’re seeing with our cold-fermented pizza dough so far—it’s like having a professional bakery setup at home! If you’re serious about your pizza-making journey, we definitely recommend giving a dough proofer a try.
It’s a worthwhile investment that takes the guesswork out of the fermentation process, providing more control and consistency. And, of course, we’d love to hear about your experiences with it! So if you decide to try one out, do share your impressions and results.
After all, the joy of cooking is in sharing, experimenting, and growing together in our culinary endeavors.
Happy baking!
Fermentation Related Articles
Pizza Dough Fermentation: Unlocking the Secret to the Perfect Crust
the PROs
Learn the correct process of pizza dough fermentation and why this is so important in the pizza-making process.

Poke Test Demystified: Master the Technique for Perfect Pizza Every Time
the PROs
Are you tired of ending up with a pizza crust that’s either too thick or still raw in some parts, …
How to Proof Pizza Dough Fast
the PROs
How to Proof Pizza Dough Fast Behind every tasty pizza dough is a secret. Secrets behind its fantastic flavor and …

How to Control Temperature, Time, and Hydration for Pizza Dough
the PROs
Learn how temperature, time and hydration affect pizza dough and how you can control them.

Dough Degassing: The Key to a Crispy, Airy Pizza Crust
the PROs
Discover what pizza dough degassing is and why so important in the pizza-making process. See how it works and check the best practices.
Retarding Pizza Dough: The Timeless Technique for a Perfect Crust
the PROs
In this article, you will learn what retarding dough is and why it is the key to your homemade pizza success. When you decide to make pizza at home, the most challenging but most important part of the process is making the pizza dough.

Pizza Dough Proofing Like a Pro! – Get Your Dough Right!
the PROs
Have you ever heard the phrase the proof is in the pudding? In this guide, you will learn that the …
Enjoy!
Not a PRO? Not a Problem!
Take a pizza class to bring your pizza skills to the next level,
so you can be a PRO!
Related Posts

Costco Pizza Delivery: Find How You Can Get It Now!
the PROs
People go to Costco’s food court for many different reasons, but the cheesy slice of pizza they serve is among …

Pizza for Beginners: Don’t Buy Pizza, Make It! Here’s How to Get Started!
the PROs
You have this idea that you want to make pizza at home as opposed to ordering it, but where do you start? Don’t worry! Here you will find answers and directions to all your questions.

Pizza Toppings Under Cheese or Over Cheese? [Why the Order Matters]
the PROs
Is Pizza Cheese on Top or Bottom? Hey pizza lovers, are you wondering if you should layer pizza toppings under …

Newsletter
Subscribe to our Recipe of the Week newsletter and receive our partners’ latest recipes, tips, and discount offers.
Keep in Touch!