
If you’ve ever been to Chicago but missed out on their signature deep-dish pizzas, you need to go back now so you can try one.
Visiting Chicago has many perks, but their deep-dish pizzas are by far one of the best reasons to go there, and eating this type of pizza will never disappoint.
Made with about a gazillion different layers, each one carrying its chewy yumminess, these pizzas will satisfy even the pickiest eater.
After all, Chicago deep-dish pizzas genuinely have something for everyone, so whether your favorite ingredient is the sauce, the meat, or the cheese – or all of them put together – you’re in for a real treat.
Chicago Deep-Dish Pizza Recipe – Homemade, Anyone?
Now, having said all these great things about this incredible deep-dish pizza, if you’ve ever thought about making your pizza but were afraid the recipe would be too complicated, think again.
Today there are dozens of Chicago Deep-Dish Pizza Recipe found online, but most of them are similar in many ways.
First of all, they teach you how to make the extra-thick crust, which is unlike any other pizza crust you’ve ever enjoyed. The crust alone is a great reason to try Chicago deep-dish pizza, but it certainly isn’t the only one.
Usually, a layer of cheese is slapped on the crust before the meats are, and these include just about everything you can think of. No, not anchovies (unless you want them there), but beef, sausage, pepperoni, and others, as well as veggies such as bell peppers, onions, and so on.
Chicago deep-dish pizza is so thick by the time it goes into the oven that once it gets in front of you, you suddenly realize you have no choice but to eat it with a knife and fork! After all, it would just be too messy otherwise!
But is there a decent homemade Chicago deep-dish pizza recipe that’s worth anything? Fortunately, the answer to that question is a resounding YES.
If you love being in the kitchen cooking up masterpieces or you love this type of pizza, you owe it to yourself to give it a shot.
Chicago Deep-dish pizza recipes all have one thing in common – they all produce an authentic, delicious Chicago-style pizza that you’ll love sharing with friends and family.
Chicago Deep-Dish Pizza Recipe – Baking Your Own Pizza
Pizza is just about everyone’s favorite food, and with good reason. Between the crust, the personalized ingredients that make it your own, and of course, the gooey yummy melted cheese, what’s not to love?
Chicago pizza is so famous these days that many companies in the city now ship their deep-dish pizzas to people worldwide. Many of them ship partially baked pies, so the customer doesn’t have to spend so long in the kitchen.
These pizzas are easier to make than you think, and you’ll love both the time in the kitchen getting creative and the mouth-watering results once you take the pizza out of the oven.
Indeed, making your pizza is a great family-oriented activity, and because you make it yourself, you can put whatever ingredients on it that you like. Don’t you like onions? Just skip them! Love Italian sausage a little more than the average person? Add a few more of them to the pie!
You can easily make the Chicago deep-dish pizza a masterpiece that is unlike anyone else’s, and it’s a super fun activity to boot.
Even if spending time in the kitchen isn’t exactly your favorite activity, what could be more fun than creating your deep-dish pizza?
In fact, since the popularity of pizza is not likely to wane anytime soon, you’ll be doing yourself a favor by learning how to make the world-famous deep-dish pizza that the great city of Chicago is known for, and the pizza promises not to disappoint.
Chicago Deep-Dish Pizza Recipe Details
ABOUT THE INGREDIENTS
Flour
An authentic Chicago Deep Dish pizza must be made with All-Purpose Flour. What we are trying to accomplish is a flaky crust similar to what a biscuit is.
The result is a tender dough that requires a light touch when you’re working with it.
Cornmeal
The cornmeal in this Chicago Deep-Dish Pizza Recipe gives the dough texture. You can use any kind of cornmeal but the coarse grind is preferable so you can actually get to taste and feel the texture.
Yeast
In our Chicago Deep-Dish Pizza Recipe, we use active dry yeast. It is not necessarily faster, but it gives a sense of security.
When using active dry yeast, you activate the yeast first, then combine it with the rest of the ingredients. By doing this, you make sure your yeast is alive.
If you were to use instant, which you can. You mix the flour, the yeast, and water and let sit. If the dough doesn’t rise, the yeast is dead, and you must discard all your flour and start again.
Water
You can certainly use tap water to make your pizza dough if that water is good to drink.
Bottled water will perform better, just try to avoid mineral water, as it’s not recommended for pizza dough.
Salt
Fine Sea Salt will taste and dissolve better than table salt. You can still use table salt, but keep in mind that it can change the taste of your crust as regular table salt as an iodine taste.
Diastatic Malt
Diastatic malt powder is the “secret ingredient” savvy pizza bakers use to promote a strong rise, great texture, and lovely brown crust.
Lard
The lard will give the crust the flakiness that is so characteristic to deep dish pizza.
Butter
There is nothing better to improve flavor than adding butter to anything you cook. That is exactly what butter does for this crust, you will taste a flaky buttery, melt in your mouth crust.
EQUIPMENT
Stand Mixer
Digital Scale
Mixing Bowls
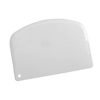
Bench Scraper
Round Dough Scraper
Rolling Pin
Two Baking Stones or Baking Steels
INGREDIENTS
Dough
475g All-Purpose Flour
275g Water
10g Diastatic Malt
25g Medium Grind Cornmeal
20g Lard, cut into small pieces
20g Unsalted Butter
5g Active Dry Yeast
10g Fine Sea Salt
Sauce
120 ml Tomato Sauce
One 28-ounce can of whole San Marzano diced tomatoes
Toppings
250g Sliced Part-skim Mozzarella Cheese
250g Sliced Provolone Cheese
250g Mild Sausage
Dried Oregano for Garnishing
Grated Parmesan or Romano Cheese for dusting
Additional toppings of your preference
Chicago Deep-Dish Pizza Recipe Directions:
Prepare the dough
ACTIVATE YEAST
Set all the ingredients in front of your work area. This is what the French call “Mise en Place” or everything in its place.
Everything you need in place will save you time as you don’t have to ramble looking for things that you need.
- Separate 20 grams of water from the total water and heat it up to 95° – 105°F.
- Mix the lukewarm 20 grams of water with the yeast together and whisk them in a small bowl and let it sit for 10 to 15 minutes.
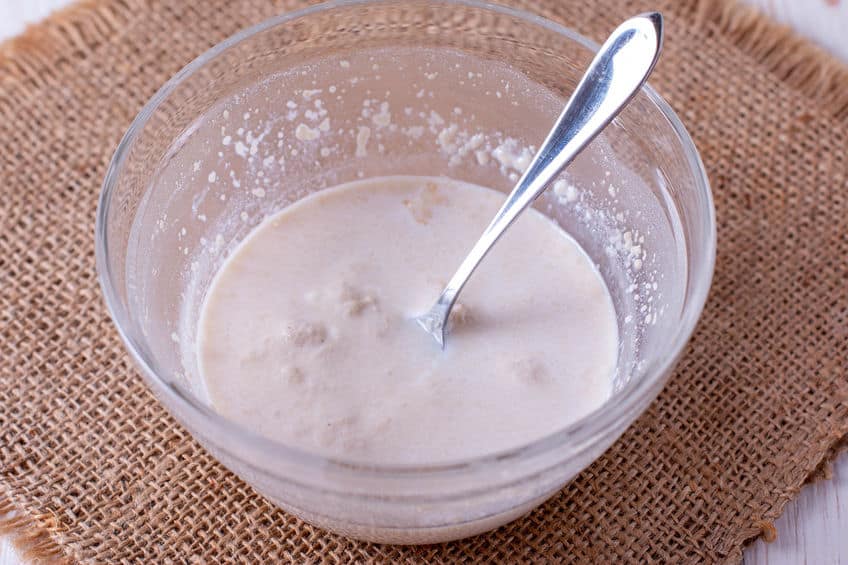
When the activation period is over, the mixture should be bubbly. If not, the yeast is dead, discard the mixture, and start again with new yeast.
If you are using Instant Yeast, you don’t need to activate the yeast. Mix the flour directly in with the yeast.
MIX THE DOUGH
- Attach the dough hook to the electric mixer.
- In the bowl of the electric mixer, mix the flour, cornmeal and malt. With the mixer running on the lowest speed, add the lard and butter and mix for 1 minute.
- Pour in the water, followed by the yeast mixture.
- Continue to mix the dough at the lowest speed for about 1 minute, until most of the dough comes together around the dough hook.
- Stop the mixer, with your fingers pull away any dough that remains on the hook and scrape the sides and bottom of the bowl with a bowl scraper.
- Add the salt to the mixture and mix for 1 minute.
- Check the bottom of the bowl for any unincorporated flour. If there is unincorporated flour sprinkle a little water and mix for 1 minute.
- Transfer the dough to an unfloured work surface.

Total mixing time should be from 7 to 10 minutes. It will be ready when the dough separates from the bowl and attaches to the dough hook.
KNEAD THE DOUGH
- Knead the dough by hand 2 – 3 minutes, until smooth.
- Weigh the dough. With a dough cutter cut any excess until the dough weighs 775g – 800g depending on the size of your pan.
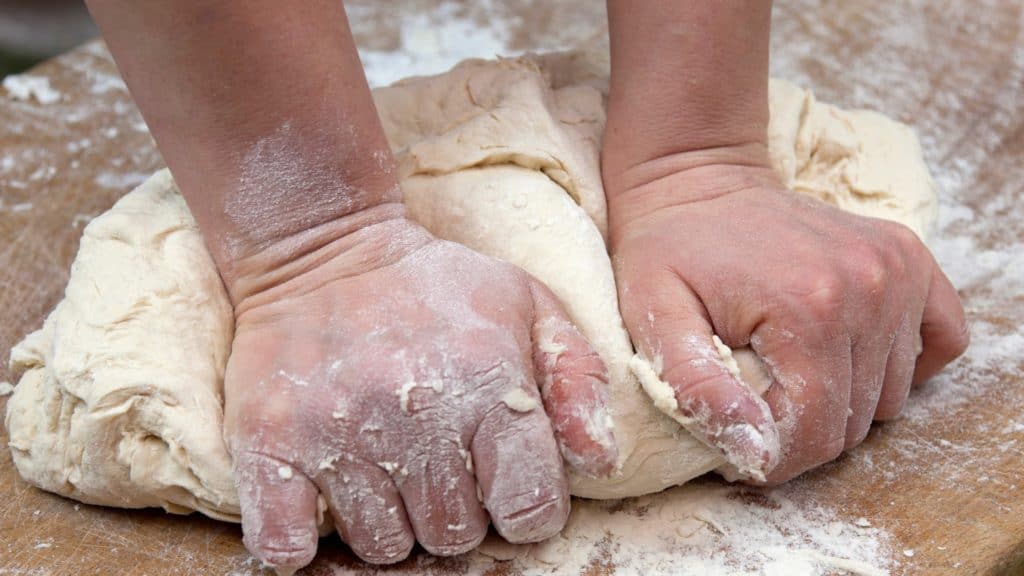
Total kneading time should be from 2 to 3 minutes.
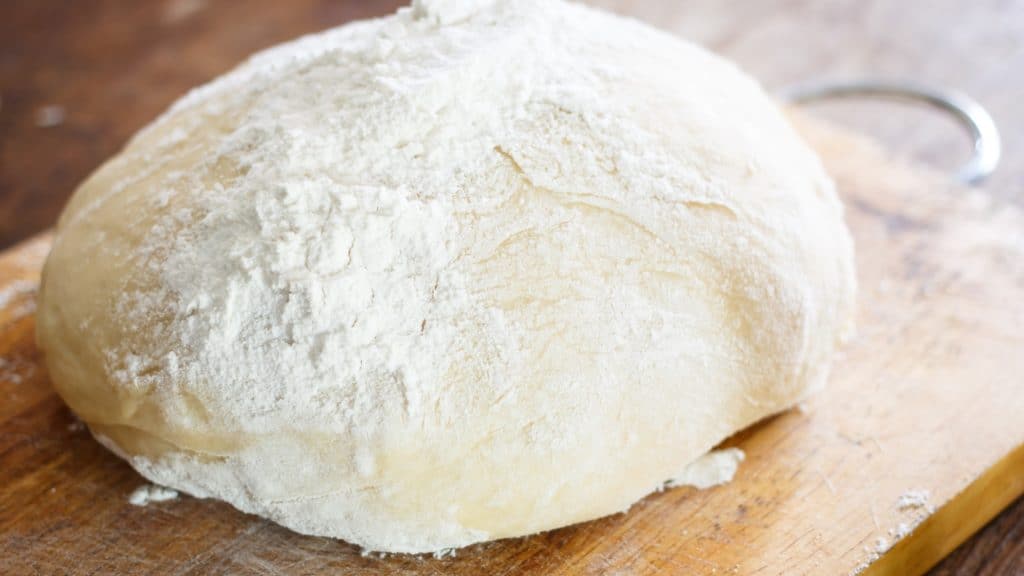
FIRST FERMENTATION
- Cover tightly and let the dough ferment in the refrigerator until it proofs and almost doubles in size, for about 1 to 1 ½ hrs. The ideal temperature for the first fermentation is 80°F. Some ovens have a “Proofing Setting” you can use.
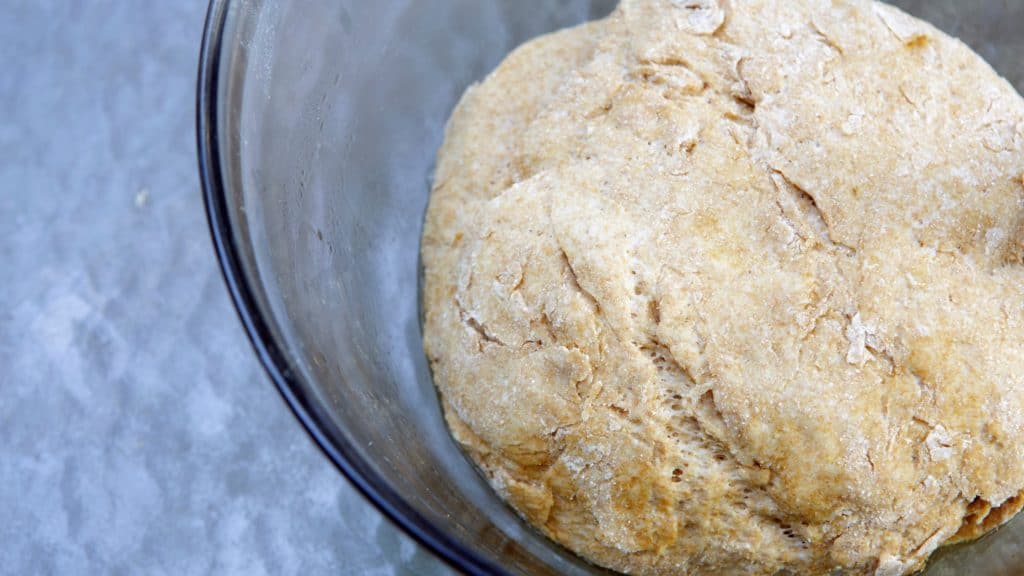
You can also let the dough ferment for up to 24 hours in the refrigerator for more flavor.
At the end of this first fermentation, you will have a big inflated doughball, like a balloon.
DEGAS THE DOUGH
- With your fist, push down on the mixture and deflate it.
*This will release all the accumulated gas from the dough.
- Once you flatten the dough, bring it together into a big ball again.
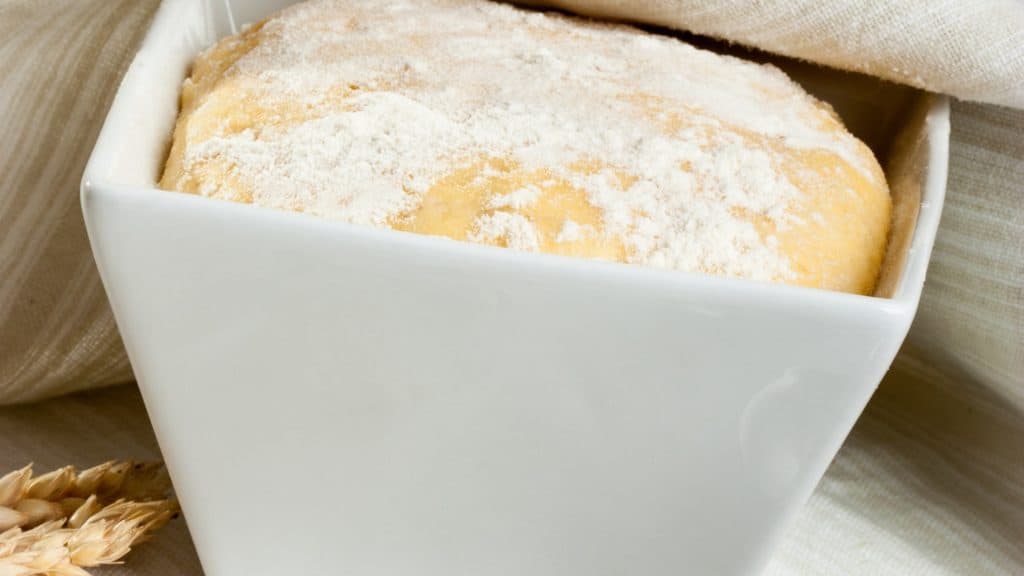
SECOND FERMENTATION
- Place the dough ball in a proofing box or on a sheet pan.
- Cover tightly and refrigerate for 8 to 24 hrs. After the dough ball has rested, use it immediately or chill it for up to 36 hrs.
While in the refrigerator make sure the dough is properly covered to avoid any air drafts affecting the moisture, humidity, and flavor of the dough.
- Remove the dough ball from the refrigerator and let it sit for about 1 hr. to take the chill out. *This will make the dough balls easier to shape.
PRE-HEAT THE OVEN
- Place two baking stones or steels in the oven racks with a 6 to 8-inch separation from each other. *If you only have one stone/steel place it in the middle rack of your oven.
- Set the oven to 500°F and pre-heat for about 1 hr.
- Prepare the toppings for the pizza and have everything in its place.
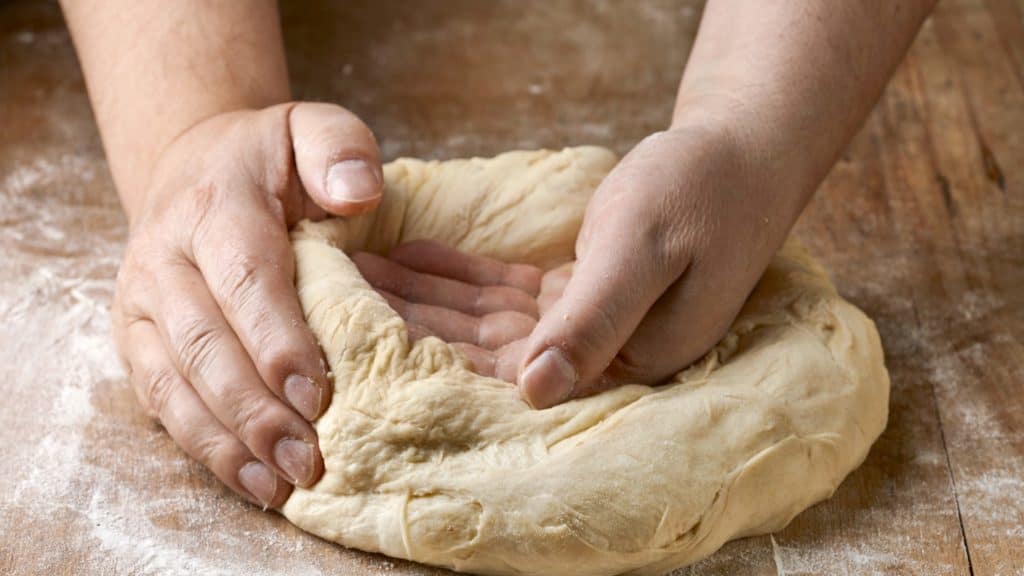
SHAPING AND LAYING OF THE PIZZA
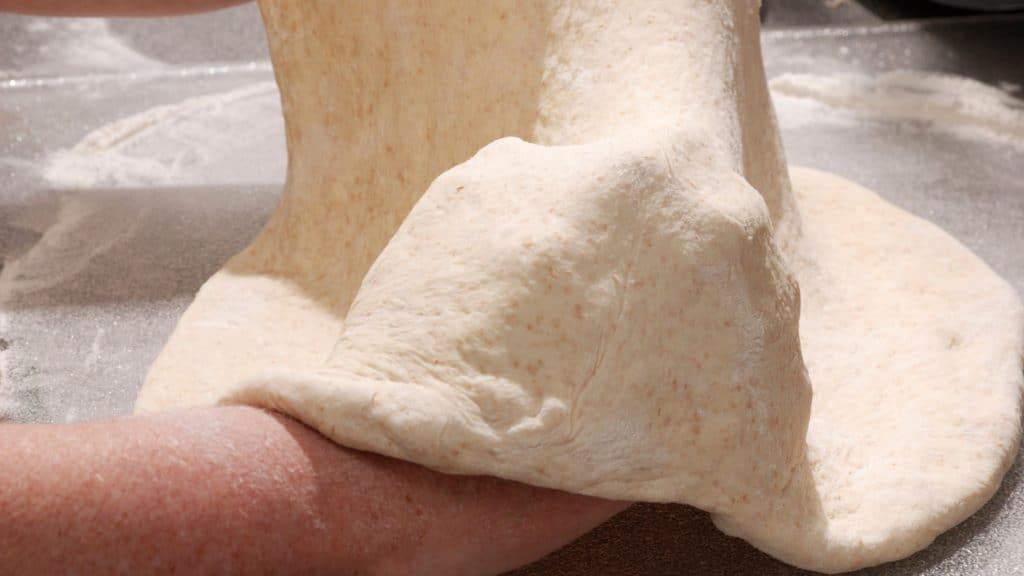
The laying of the pizza is one of those details that make the difference between a successful pizza and a lousy pizza. To make the best pizza, it’s better if you dust a wooden pizza peel with flour and slide it under the dough.
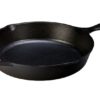
- Butter the bottom and sides of a 12 by 2-inch or 13- by 2- inch round deep-dish pizza pan or cast-iron pan.
- Dust your working surface with cornmeal.
- Transfer the dough to the working surface.
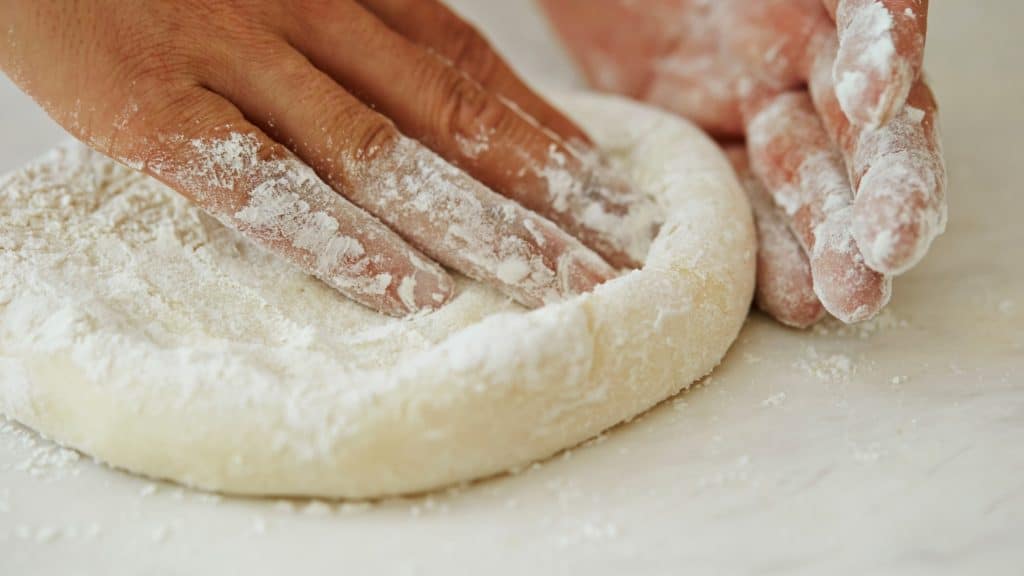
Make sure the surface is lightly floured.
- Coat both sides of the dough with cornmeal.
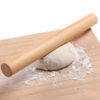
- With a wood rolling pin, roll the dough into a 17-18-inch circle.
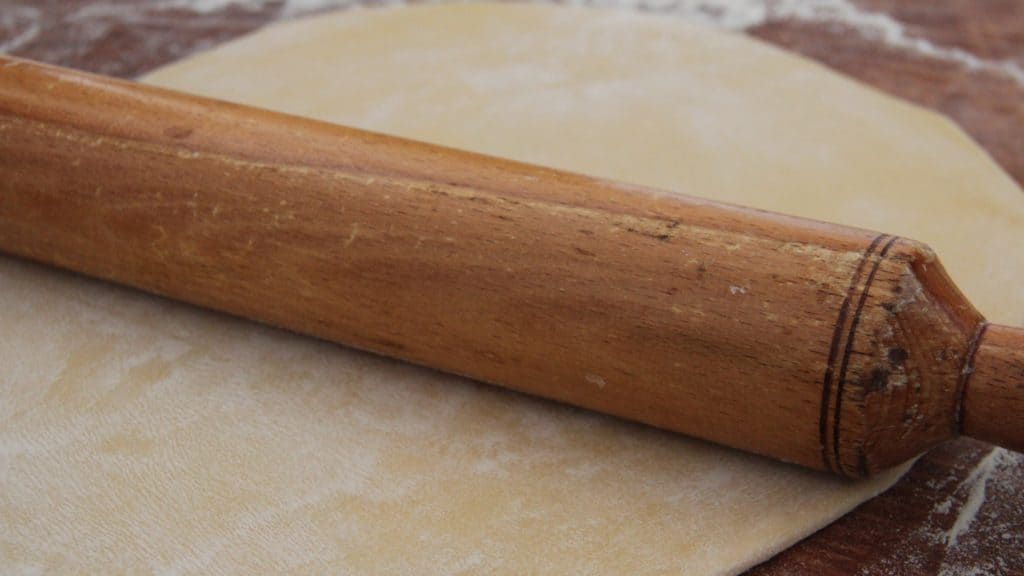
The thickness of the dough should be not more and 1/4″.
- Carefully, lift the dough and place it in the center of the pan.
You can use a cast iron pan or any round metal deep cake pan.
During the laying, you should pay attention to the following:
Leave a little bit of board to the edge of the dough
Give the right thickness to the pizza
Give the right shape
Be careful not to make holes
If you do have some holes, don’t worry, it’s okay if a hole or two forms. You can patch them by gently pulling some of the surrounding dough over to close and seal the tears.
- Lift the edges to allow the dough to fall into place. At this point, the dough will be hanging over the rim of the pan.
- Press around the edge of the dough and secure it to the pan’s rim.
- Take the rolling pin and roll it over the rim of the pan to cut away the dough excess. If the dough is shrinking, with your fingers to press the dough around the inside of the pan and extend it to the top.
- Set the pan aside and let it rest at room temperature for 30 minutes.
TOP THE DOUGH
Don’t forget that all the ingredients and all the toppings shall be prepared beforehand. You should not attempt to make a pizza without having everything on hand.
- Arrange the mozzarella slices on top of the dough.
- Distribute the sausage evenly over the cheese.
- Arrange the provolone cheese slices over the top.
- Take a handful of diced tomatoes and distribute them evenly.
- Grab a large, preferably flat spoon and disperse the sauce onto the edges of the dough.
- Disperse the mozzarella cheese over the top of the pizza.
- Sprinkle with Romano or Pecorino cheese.
TRANSFER THE PIZZA TO THE OVEN
- Place the pan on the bottom stone or steel. If you only have one stone/steel, place the stone in the middle rack of the oven. Place the pan on top of the stone/steel.
BAKE THE PIZZA
Unfortunately, we can’t give you an exact period of time to bake any pizza. Every oven is different, so review once again our section on “Get to know your oven” to check what works best for you.
We can definitely tell you that you should do the following:
- Set a timer for at least 5 to 6 minutes so you can check the progress. Try not to open the oven door too much as every time you open that door, the oven will lose temperature, and your pizza might turn mushy, and it will take longer to cook.
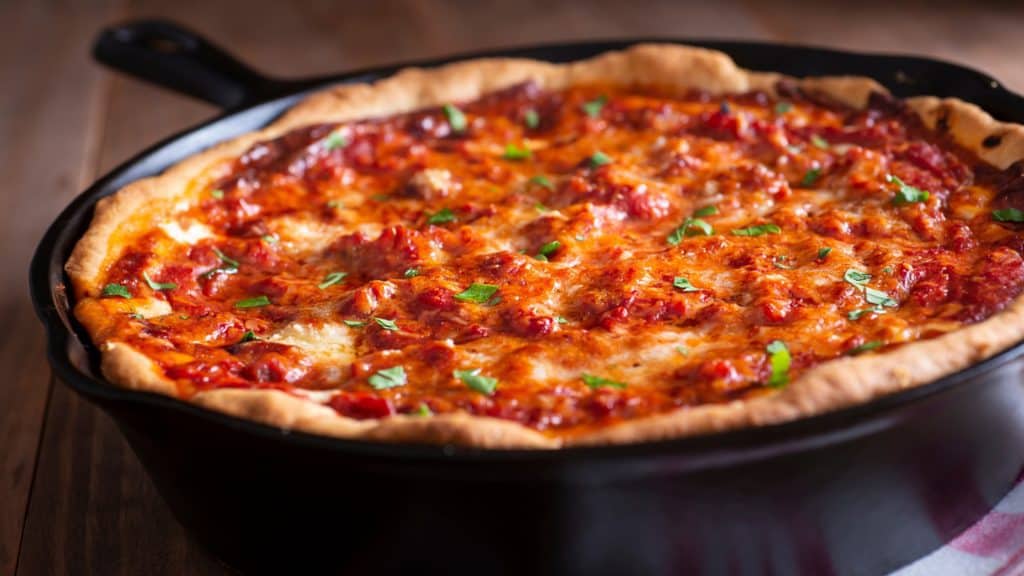
- Rotate the pan 180 degrees and continue to bake for another 12 to 15 minutes, until the cheese is melted, and the crust is a rich golden brown.
- Check the bottom of the pizza to make sure it has been cooked well. It should be rich brown and burnished. The total cooking time should be from 12 to 15 minutes total depending on your oven.
- Bake until the crust is properly browned. Check your time, so see how long it took to cook and keep a record of it.
FINISH
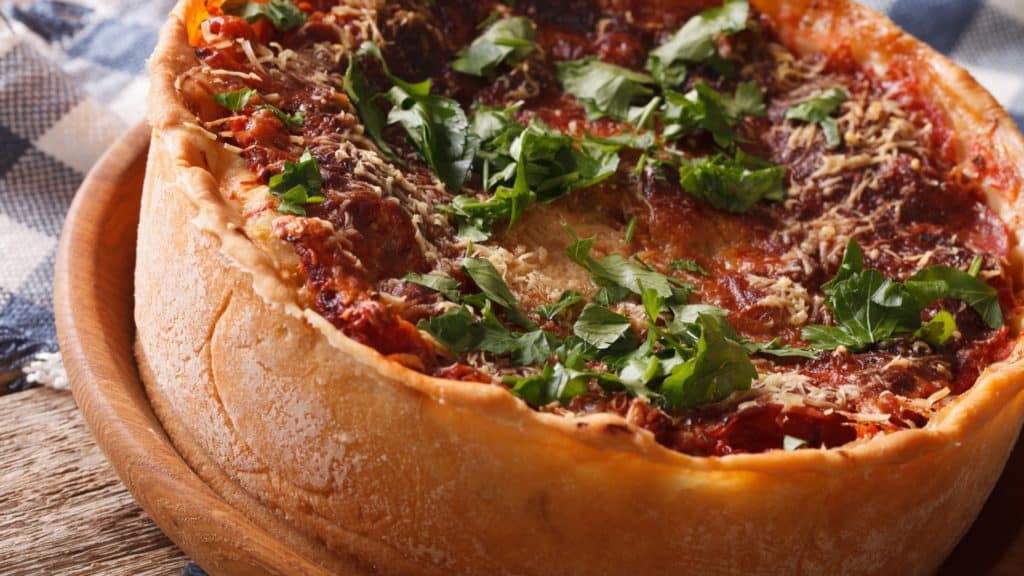
It’s time for the best part. After you waited a day or two to make your pizza it’s now time to taste the fruits of your labor.
- Remove from the oven and run a long metal spatula around the inside of the pan to loosen the pizza from the pan.
- With the same spatula, lift the pizza from the pan and check the bottom of the crust. It should be brown and crisp. If it needs more time, return the pan to the oven for 1 -2 minutes.
- When done, let it rest for 30 seconds to 1 minute.
- Lift the pizza and transfer it on to a cutting board or serving platter.
Do not cut the pie on your peel, or you may damage it.
Hold on; we are not done yet.
- You may want to add a small number of your finishes right before serving your pizza. If you like, drizzle the pizza with extra-virgin olive oil.
Just like any other food, we eat first with our eyes, you need to make it’s pretty and pleasant to the eye. Garnish with your favorite garnishes. A pop of color is always nice, as well as a touch of texture.
You can garnish your pizza with Oregano, Basil, Arugula, or Parsley, or any other herb you deem appropriate.
Chicago Deep-Dish Pizza Recipe – The Last Slice
You’ve made it to the end! Now that you’ve learned how to make your pizza.
The next step is quality control.
Here is what you should expect from it.
The top crust should be uniformly browned.
The bottom crust should also be browned with no burned spots.
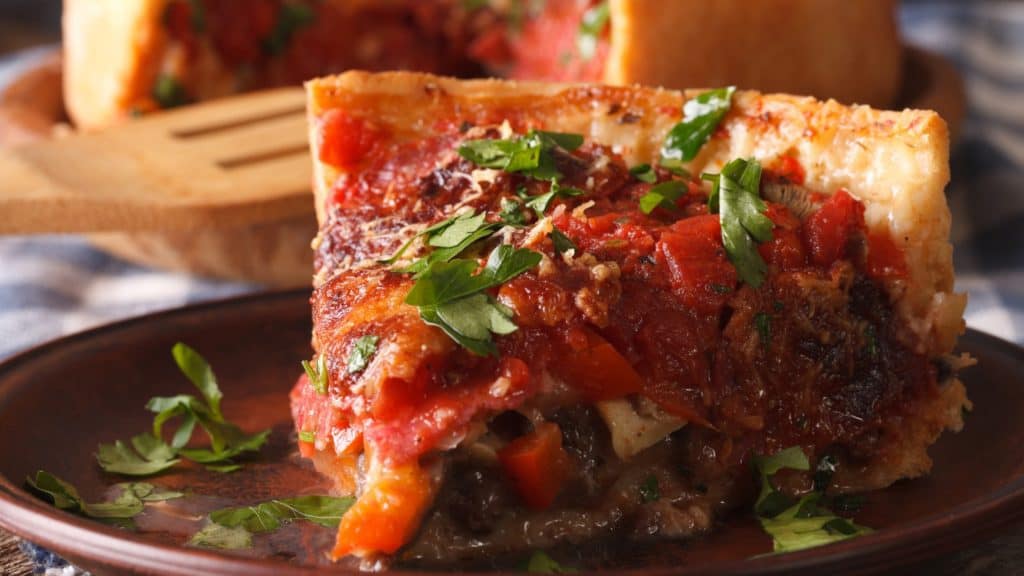
The inside of the crust should be flaky.
The cheese should be stringy and perfectly melted.
- Cut the pizza into slices.
- Serve immediately.
Get your Chicago Deep-Dish Pizza Recipe Recipe Card
Print and save your favorite recipe.
Equipment


Ingredients
Dough
- 475 g All-purpose flour
- 275 g Water
- 25 g Medium Grind Cornmeal
- 10 g Diastatic Malt
- 20 g Lard
- 20 g Unsalted Butter Preferably European-Style, cut inot small pieces at room temperature
- 5 g Active Dry Yeast
- 10 g Fine Sea Salt
Sauce
- 80 ml Tomato Sauce
- 1 28-oz Can of Whole San Marzano Diced Tomatoes
Toppings
- 250 g Part-Skim Mozarella Cheese
- 300 g Sliced Provolone Cheese
- 250 g Mild Sausage
- 1 tbsp Extra Virgin Oil For Garnishing
- 1 tsp Dried Oregano For Garnishing
- 1 tbsp Grated Parmesan or Romano Cheese For Dusting
Instructions
Activate Yeast
- Separate 20 grams of water from the total water and heat it up to 95°– 105°F.
- Mix the lukewarm 20 grams of water with the yeast together and whisk them in a small bowl and let it sit for 10 to 15 minutes.
Mix
- Attach the dough hook to the electric mixer.
- In the bowl of the electric mixer, mix the flour, cornmeal, and malt. With the mixer running on the lowest speed, add the lard and butter and mix for 1 minute.
- Pour in the water, followed by the yeast mixture.
- Continue to mix the dough at the lowest speed for about 1 minute, until most of the dough comes together around the dough hook.
- Stop the mixer, with your fingers pull away any dough that remains on the hook and scrape the sides and bottom of the bowl with a bowl scraper.
- Add the salt to the mixture and mix for 1 minute.
- Check the bottom of the bowl for any unincorporated flour. If there is unincorporated flour sprinkle a little water and mix for 1 minute.
- Transfer the dough to an un-floured work surface.
Knead
- Knead the dough by hand 2 – 3 minutes, until smooth.
- Weigh the dough. With a dough cutter cut any excess until the dough weighs 775g – 800g depending on the size of your pan.
First Fermentation
- Cover tightly and let the dough ferment at room temperature for about 1 hr.
Degas
- With your fist, push down on the mixture and deflate it. *This will release all the accumulated gas from the dough.
- Once you flatten the dough, bring it together into a big ball again.
Second Fermentation
- Place the dough ball in a proofing box or on a sheet pan.
- Cover tightly and refrigerate for 24 to 48 hrs.
- Remove the ball from the refrigerator and let them sit for about 1 hr. to take the chill out. This will make the dough easier to shape.
Pre-Heat the Oven
- Place two baking stones or steels in the oven racks with a 6 to 8-inch separation from each other. If you only have one stone/steel place it in the middle rack of your oven.
- Set the oven to 500°F and pre-heat for about 1 hr.
- Prepare the toppings for the pizza and have everything in its place.
Shape and lay the dough
- Butter the bottom and sides of a 12 by 2-inch or13- by 2-inch round deep-dish pizza pan or cast-iron pan.
- Dust your working surface with cornmeal.
- Transfer the dough to the working surface.
- Coat both sides of the dough with cornmeal.
- With a wood rolling pin, roll the dough into a 17-18-inch circle.
- Carefully, lift the dough and place it in the center of the pan. At this point, the dough will be hanging over the rim of the pan.
- Lift the edges to allow the dough to fall into place.
- Press around the edge of the dough and secure itto the pan’s rim.
- Take the rolling pin and roll it over the rim of the pan to cut away the dough excess. If the dough is shrinking, with your fingers to press the dough around the inside of the pan and extend it to the top.
- Set the pan aside and let it rest at room temperature for 30 minutes.
Top the dough
- Arrange the mozzarella slices on top of the dough.
- Distribute the sausage evenly over the cheese.
- Arrange the provolone cheese slices over the top.
- Take a handful of diced tomatoes and distribute them evenly.
- Grab a large, preferably flat spoon and disperse the sauce onto the edges of the dough.
- Disperse the mozzarella cheese over the top of the pizza.
- Sprinkle with Romano or Pecorino cheese.
Transfer pizza to the oven
- Place the pan on the bottom stone or steel. If you only have one stone/steel, place the stone in the middle rack of the oven. Place the pan on top of the stone/steel.
Bake Pizza
- Set a timer for at least 15 minutes so you can check the progress.
- Rotate the pan 180 degrees and continue to bake for another 12 to 15 minutes, until the cheese is melted, and the crust is a rich golden brown.
Finish
- Remove from the oven and run a long metal spatula around the inside of the pan to loosen the pizza from the pan.
- With the same spatula, lift the pizza from the pan and check the bottom of the crust. It should be brown and crisp. If it needs more time, return the pan to the oven for 1-2 minutes.
- When done, let it rest for 30 seconds to 1minute.
- Lift the pizza and transfer it on to a cutting board or serving platter.
- Using a rocking cutter or a serrated knife, cut the pizza into the desired slices.
- You may want to add a small number of your finishes right before serving your pizza. If you like, drizzle the pizza with extra-virgin olive oil. For additional flavor, add a sprinkle Parmesan or Pecorino to give it an extra pungent flavor.
- Garnish with your favorite garnishes. A pop of color is always nice, as well as a touch of texture.
- Cut the pizza into slices.
- Serve immediately. Enjoy!
Take this recipe to the next level with the following ingredients:

You'll love this Italian Mozzarella Di Buffala cheese for its slightly elastic consistency, with a thin and shiny rind that is porcelain white. The aroma of this mozzarella is enhanced at cutting, with the appearance of a slight whey draining with a scent of milk enzymes.

A smooth extra virgin olive with pleasant notes of fruit and aromas of cut grass, made from three varietals of Italian olives - Frantoio, Leccino, and Moraiolo. Hand-harvested and produced by Il Boschetto in the Maremma region of Italy, in the medieval Tuscan village of Castiglione Della Pescaia, Guglielmo di Malavalle Multicultivar Extra Virgin Olive Oil is a young, fruity oil with beautiful green-yellow color and hints of artichokes and wildflowers.
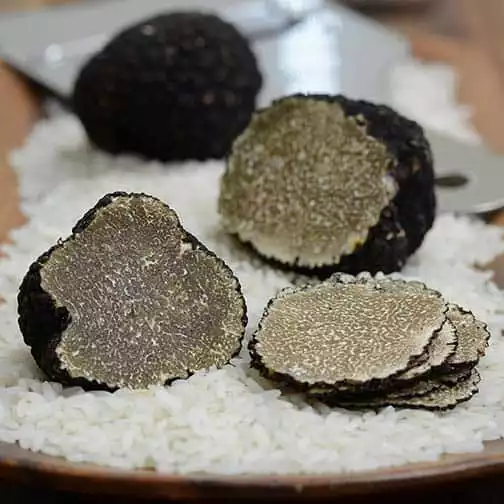
The summer variety of the black truffle, these delicious mushrooms are subtle and mildly flavored. They’re in season from May through August, and while they lack the intensity of the winter or fall types, they are a great way to add some nice truffle flavor to light summer and spring recipes - without breaking the bank. In shape and looks, they look the same as the winter variety, but you’ll notice that they don’t have that intense aroma. Slice thinly and warm them up with truffle butter or truffle paste to add some extra flavor, or use them to bring the look of fresh truffles to dishes.
For More, Check Out the Gourmet Food Store
Recommended Recipes
From our kitchen to yours.
Want to see more? Check out our community recipe page
Share the love for pizza. Check out our readers’ homemade pizza recipes. Try them and choose your best!
Go to our Community Recipe Page
Enjoy!
Not a PRO? Not a Problem!
Take a pizza class to bring your pizza skills to the next level,
so you can be a PRO!
Related Posts

Costco Pizza Delivery: Find How You Can Get It Now!
the PROs
People go to Costco’s food court for many different reasons, but the cheesy slice of pizza they serve is among …
Pizza for Beginners: Don’t Buy Pizza, Make It! Here’s How to Get Started!
the PROs
You have this idea that you want to make pizza at home as opposed to ordering it, but where do you start? Don’t worry! Here you will find answers and directions to all your questions.

Pizza Toppings Under Cheese or Over Cheese? [Why the Order Matters]
the PROs
Is Pizza Cheese on Top or Bottom? Hey pizza lovers, are you wondering if you should layer pizza toppings under …

Newsletter
Subscribe to our Recipe of the Week newsletter and receive our partners’ latest recipes, tips, and discount offers.
Keep in Touch!