
Pizza Dough Not Rising
Having your homemade pizza dough not rising can be crushing, but it’s not the end of the world. If you have had similar proofing problems, you can learn to avoid future proofing problems that may come up.
So. let’s find out what you need to do!
Here’s What You Will Find:
Key Takeaways
If Your Pizza Dough is Not Rising
Ensure you used sufficient water and yeast, and test if the yeast is alive.
Check the salt; if the salt comes in contact with the yeast, the yeast may die, and the dough may not rise.
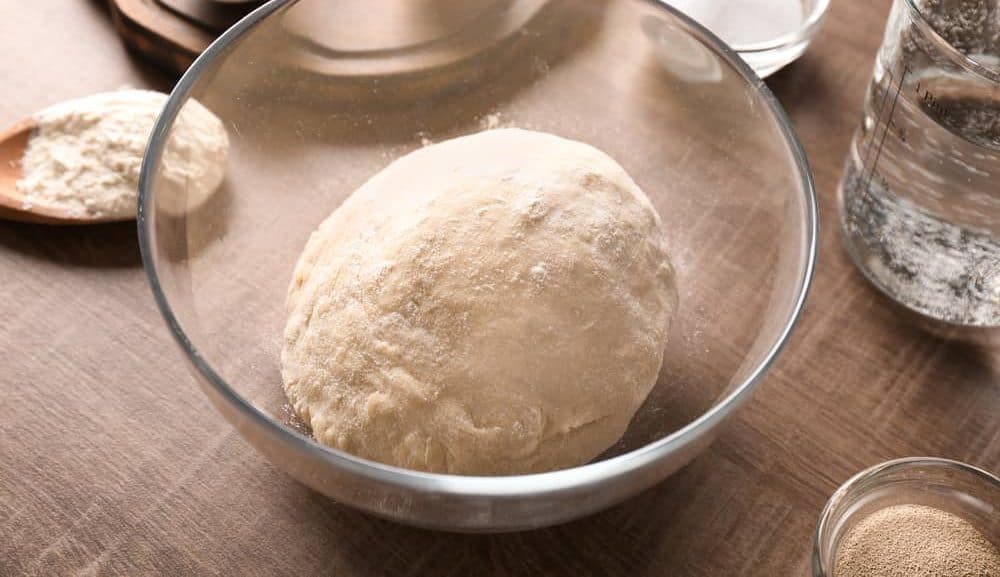
Place the dough in a warm place (80F); cold temperatures will slow down the process.
If Your Pizza Dough Didn’t Rise – Here’s What to Do
The old expression of saying keep calm’ or don’t worry should automatically be applied to making pizza dough.
Let’s face it, kitchen mistakes can happen for any reason, and if they do, you need to find out what’s going wrong. From what you can see, you can quickly fix pizza dough mishaps.
Just like any other situation in life, first, you need to:
Identify the Reasons Why Your Pizza Dough Didn’t Rise
Why did my pizza dough didn’t rise?
Any yeast dough won’t rise mainly because of improper or no dough fermentation. It could be caused by a faulty or inadequate quantity of ingredients or a mismanaged dough process.
So, let’s take a quick look at the fermentation process.
Check the Fermentation Process
Fermentation is a slow process by which yeast feeds simple sugars to produce carbon dioxide and alcohol.
Fermentation occurs as the yeast in the dough becomes active, which causes the dough’s rise or proving.
So, why do we need to ferment the dough to make pizza?
Fermentation improves the structure, texture, and flavor of the dough. To learn more about fermentation, check our article Discover the Ultimate Guide to Pizza Dough Fermentation.
As you can see, yeast is the star ingredient of the fermentation process!
Do you want to know what is happening to your pizza dough?
Always start by checking the amount of yeast. We will discuss this in more detail later on.
But if something isn’t happening because of problems with your essential ingredients, look for the most obvious signs.
Identifying what happened with your unrisen pizza dough begins by looking at each ingredient and method process to see what has failed.
Possible Reasons Why Your Pizza Dough Didn’t Rise
Many factors are attributed to causing the pizza dough not to rise:
Yeast
Yeast will help your pizza dough rise but require extra care. It needs warm temperatures, food, and just the right conditions. If any of these variables are off, you can end up with a flat dough that doesn’t rise the way it should.
Flour
Using the correct type and amount of flour will certainly, determine your success. Too much flour may result in a dry stiff dough. Or using flour that is not intended for pizza-making can make the whole difference in the world.
Water
The water content of any pizza dough is measured by the hydration percentage of the water ratio to the total flour. Also, the flour’s ability to absorb water. So much or too little water will undoubtedly determine the potential of the dough to rise.
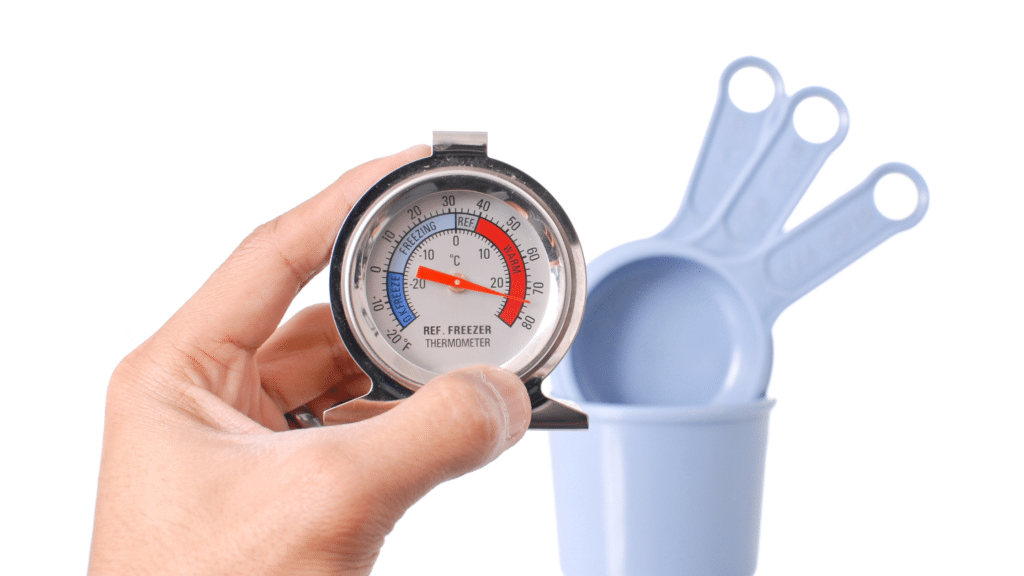
Temperature
When making pizza dough, a good thermometer will be your best friend. The ideal temperature plays such an essential role that you can’t live without it. Sudden changes or extreme temperatures will contribute to the dough not rising.
These factors will affect the formation of the gluten network and the fermentation process achieved through proofing.
Pro Tip
When using proofing containers to ferment dough, use a container at least two or three times the size of the dough. Bigger containers allow dough room to rise without overflowing.

Troubleshooting Process
Here are the steps to check why your pizza dough didn’t rise.
Step 1 – Check Your Ingredients
Even though you have your pizza recipe, the ingredients that count the most for getting dough to work correctly.
In most cases, dry yeast is the most critical ingredient in developing the appropriate pizza crust using quality ingredients.
To find the best yeast for pizza dough, check our article Yeast: Here’s What You Need to Know.
Check the Yeast
Possible Problems Related to Yeast:
Here are some of the causes of your pizza dough not rising that might be related to the amount of yeast.
Not Enough Yeast
If you’ve added too little or insufficient yeast to your dough mixture, the dough will still rise; it will take longer to proof.
Aside from the temperature, the amount of time given for the dough to rise will also determine how much yeast is enough.
Oddly enough, longer proofing results in more vital gluten, which can make a better pizza crust.
The hard part is waiting for your pizza dough to be proofed appropriately so you can eat your pizza right away.
Dead Yeast
It’s a horrible thought, but dry yeast (active dry yeast or instant yeast) does have a shelf life that can result in yeast that doesn’t react when you try to activate it. Fresh yeast has an even shorter life span.
The same applies to fresh, active dry yeast or instant yeast. You can kill the yeast by using too hot water to activate it or slow the process if the water is too cold. Accordingly, lukewarm water will work best.
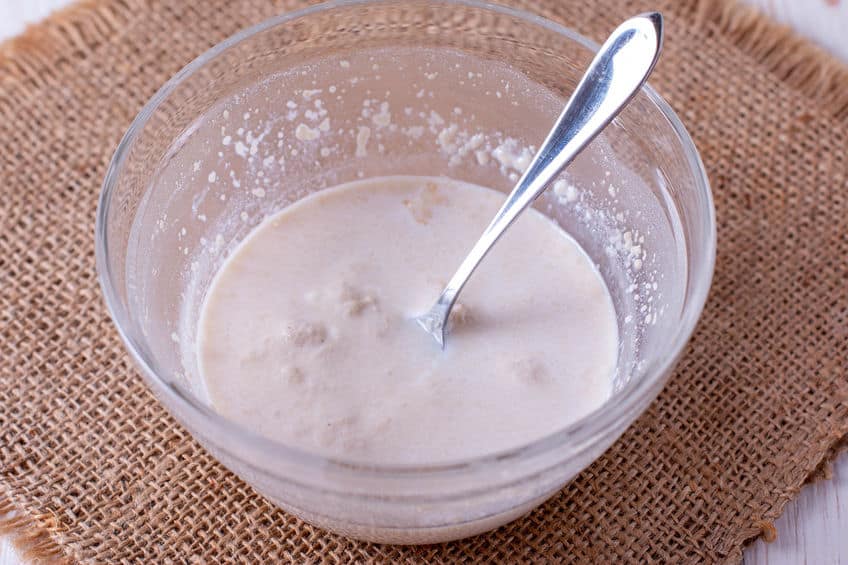
Activating Yeast
You should be able to see if your yeast is still good when you proof your yeast. If it’s bubbling and expanding with a yeasty smell, then it’s good.
Expired yeast
Expired yeast will cause your dough to rise slowly, and you can quickly remedy this issue.
Add more fresh “not expired” yeast to help your dough rise without any problems.
Dead yeast won’t ruin your pizza dough or change the flavor of the dough one single bit.
Water temperature
Water temperature is going to play a significant role in proofing your yeast. The same can be said about the type of yeast you use.
Room temperature water may be too cold in you are in a cold room, so to activate the yeast, the water needs to be lukewarm (95-to 105 degrees F); this warmer environment will be enough to chemically cause the yeast to react with the water and sugar. Cold water will slow the process. This activation process is what causes it to bubble up.
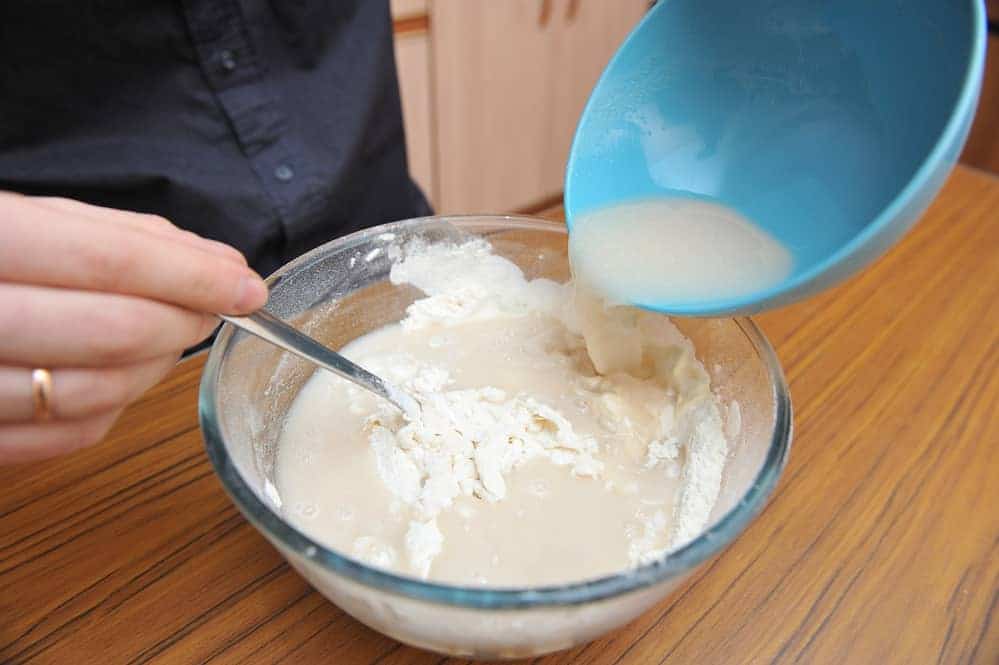
Adding Yeast Mixture to Flour
When adding the yeast mixture to the flour, also add the warm water, mix for 1 minute, and let rest so the flour can absorb the water mixture appropriately and set the dough to rise.
Here’s What You Can Do if the Problem is the Yeast
You can always use fresh yeast (“Fresh” as in not expired, not cake yeast) to counter this problem if the yeast has expired or is dead.
Even if yeast expires, you can easily add more yeast to your dough to rise normally. You won’t have any problems with your dough rising after that.
Hot temperatures will kill the yeast, and the dough will not rise. To fix this, add more yeast to the dough mixture, knead it for about 5 minutes, and let it rest.
If the water is too cold, be patient; the dough will rise and take longer, place it inside the oven without turning it on or in another place where the temperature is about 80 degrees F.
Check the Flour
The flour may be another cause why the pizza dough not rising.
Most homemade pizza recipes call for different kinds of flour, depending on your pizza style or sometimes on your dietary needs.
If you use the wrong flour, you will also have problems forming enough gluten development.
Also, so many people stick to Vegan diets, making good pizza dough even more problematic.
So what exactly do you need to check with your flour?
Flour Protein Content
Pizza dough needs high protein content flour. To get excellent rising dough, you need to have 12% gluten.
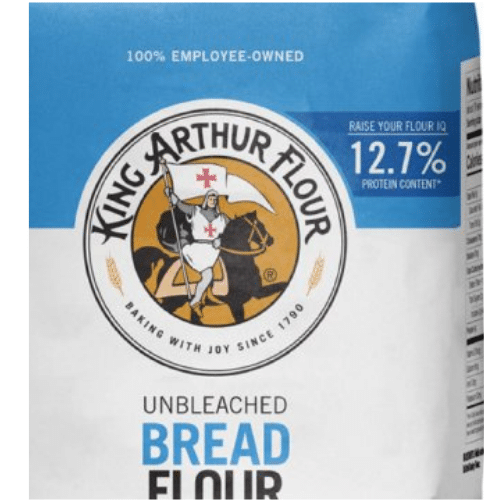
Good bread flour will do the job as well. Gluten helps to provide stretch when you start to form your pizza shape.
But more importantly, gluten helps give your cooked dough a great crunch or satisfying chew. You cannot get this by using ordinary all-purpose flour.
Here’s What You Can Do if the Problem is the Flour
If you used the wrong flour, maybe you used all-purpose, cake flour, or any other grain flour such as chickpea flour or rice flour with low protein content; you can quickly fix the problem by adding vital wheat gluten to the dough mixture.
This additive contains the supplemental protein that helps to form gluten. That is, of course, if you aren’t gluten intolerant. To learn more about using vital wheat gluten, check our article Vital Gluten: The Magic Touch for Pizza Dough.
To make pizza dough rise, you’ll want to look for finely ground wheat flour with high protein content in the 0′ or 00′ grade so you get better hydration in your dough.
To find the best flour to make pizza dough, check our article, The Top Pizza Flour, which will Give You the Best Results Every time.
Check the Water Content or (Hydration Percentage) and Water Quality
Another factor that may lead to pizza dough not rising is water.
Tap water contains natural elements that include minerals essential for creating gluten in your pizza dough; bottled water may not contain such minerals.
With natural calcium and magnesium found in hard water aid the strength of gluten, which helps it be more robust and tougher yeast dough, you can achieve.
Not enough water can make your dough stiff and dry. And we all know what happens if there’s not enough liquid for the yeast to use: It doesn’t work how it should!
You want the dough to be slightly sticky and elastic.
Too much water can lead to sticky pizza dough, which is also concerning.
To learn more about pizza dough hydration, check our article, The Scientifically Proven Formular for Pizza Dough.
* Water Substitute for Pizza Dough
One expert tip, if you don’t want to risk using tap water, is safe to use milk. The calcium in milk is perfect for making a solid gluten network and hydrating pizza dough, yielding excellent stretch and the dough rise properly.
It can also add a bit of sweetness and dough.
Here’s What You Can Do if the Problem is the Water
In terms of quality, you would want to know what’s in your water; you can learn more about this in our article Astonishing Secrets Water Can Reveal about your Pizza.
Also, avoid distilled water, as all minerals have been removed during filtration.
You might not have expected higher hydration to affect the elasticity you’re looking for.
The starting point is 65-70% hydration based on the amount of flour vs. water. If you have 1000 grams of flour and 650 grams of water, this is 65% hydration.
To learn more about pizza dough hydration, check our article, The Ultimate Guide to Dough Hydration.
So if the dough is too dry, calculate how much water you used and compensate for the difference by adding more water to bring the dough to the correct hydration percentage.
If the dough is too wet and the dough isn’t rising, add more flour at 1 tablespoon, allowing it to rest and absorb the extra water until it is at the desired consistency.
Check our guide on the 7 Hydration Percentages that Make the Best Pizza for more on this subject.
Pizza Pun
What holiday celebrates the rising of dough?
Yeaster.
Check the Salt Content
Adding Salt
Adding too much salt to your dough will slow down the fermentation process. In most cases, it can kill the yeast and stop the proofing from happening. Hence, the pizza dough not rising.

The overly salty dough will ultimately cause the yeast to be less active and weaken your dough or not rise.
You need to add enough salt to your dough recipe to give it flavor, but the salt content should not exceed 5% of your flour.
This ratio is calculated based on a percent of the flour weight. The ideal percentage of salt ranges from 2.5% to 5%, depending on the pizza you are making.
Here’s What You Can Do if the Problem is the Salt
Salt can slow down or even kill your yeast production and fermentation. If you added too much salt, you might want to start a new batch or use this dough for making flatbread instead.
It will suit other applications that don’t need a rising process. Ultimately, you’ll end up making new pizza dough aside from this.
For more information on salt content, check our article The Role of Salt in Pizza Dough.
Check the Oil Content
Adding Oil
Adding oil to pizza dough helps improve the dough’s texture and adds flavor to the finished crust.
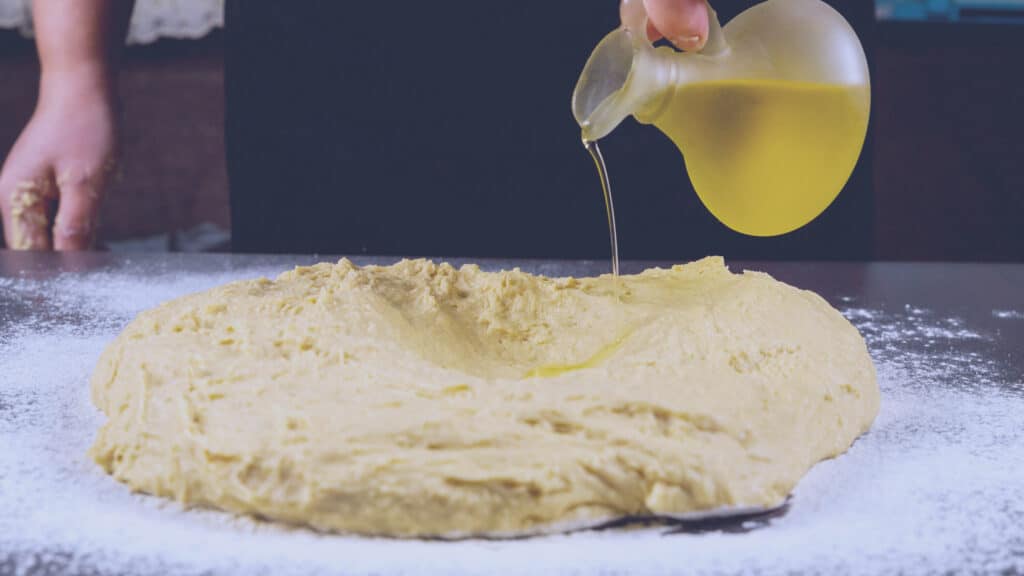
Oil will help increase the dough’s volume during fermentation. However, too much oil may add weight to the dough, making it rise slower or the pizza dough not rise.
Here’s What You Can Do if the Problem is the Oil
We can all agree that there is a limit to how much oil can go into a pizza dough recipe. Some recipes call for an average of 2-3% based on the hydration of your flour.
When it comes to weighing out your ingredients for pizza dough, the oil percentage is then calculated at 2 to 3% but does not exceed more than 5% of your total flour. Always start at a low percentage and test your dough; remember that it is always easier to add than to subtract.
When you notice that you used too much oil in your dough when the situation gets a little problematic; however, you can quickly fix this problem by making some adjustments.
For detailed calculations on fixing the oil content, check our article Here’s Everything You Need to Know About Oil in Pizza Dough.
Step 2 – Check Your Temperature
Temperature is one of the critical variables that you need to pay close attention to. The temperature of the dough, the refrigerator, and the kitchen all make a massive difference in your result.
The humidity in the air is of equal importance. The flour in your dough will absorb more or less water, depending on the humidity of the air caused by a heater or air conditioner. As a result, you can have a wetter or drier dough.
Checking Temperatures
Proofing time and temperature work closely together and vary based on different types of doughs, flour strength, dough formulation, the degree of fermentation, and treatment received by the dough during mixing and kneading.
Check the Water Temperature
Water temperature plays a vital part in fermentation but isn’t limited to helping yeast to become activated. No matter what kind of yeast you use, fresh or dry yeast will react the same way if the temperature is optimal.
Here’s what you’ll need to know to get effective results.
The best temperature for the water you are using should be 95-105F degrees. You want to get your yeast into the warm water as soon as possible, which will help your yeast become active. Boiling water will kill the yeast.
Anything cooler will not activate your yeast, and you will see the dough will not rise, so always use water at this desired temperature.
Check the Fermentation Temperature
The best temperature, while your dough begins to ferment will be 80F degrees. This proofing process is usually in a part of your kitchen that is warmer and keeps your rising dough at a constant temperature while it begins to rise.
Inside a home oven, while is turned off, will do the trick, and you can see the process through the oven door.
Check Your Dough Temperature
The dough’s temperature, as it begins to proof or rise, affects the rate of fermentation and, in turn, the flavor and texture of the finished crust. It may also be a factor why pizza dough is not rising.
The optimal dough temperature for most doughs is 75 degrees F.
Here’s What You Can Do if the Problem is the Temperature
You must increase the room temperature if your kitchen is cooler than usual.
This can be done by turning on your oven and cracking the door. This will give your kitchen increased warmth and allow your dough to proof as it should.
Step 3 – Review Your Fermentation Process
Fermentation is also called proofing and can be completed either by using warm temperatures or cold proofing.
If you’re cold proofing, these times take longer inside your fridge and are specific to a particular type of dough.
You’ll also find that when the dough is proofed twice, it will change the overall texture of your crust.
Bulk Dough Fermentation
After the dough is mixed with yeast, it’s allowed to rise before the shaping of the dough balls occurs. This process causes the dough to stretch and relax as the gluten strengthens.

The two most essential components of bulk fermentation are:
Time
More time requires less yeast, but you get more flavor, while less time requires more yeast and less flavor.
Higher temperatures increase fermentation, while lower temperatures decrease fermentation.
Temperature
Higher temperatures increase fermentation, while lower temperatures decrease fermentation.
Bulk Fermentation or Rising Process
The dough’s first rise, also known as bulk fermentation, first fermentation, or the first rise, is the dough’s first resting period after the yeast has been added.
This is a crucial first step if you want your pizza to look and taste good. It’s called bulk proofing or bulk fermentation because the entire batch of dough is fermented before it’s divided and shaped into dough balls that will be later shaped as pizzas.
The bulk fermentation is complete when the dough doubles or is substantially larger.
The first fermentation should be 1 to 1 1/2 hours; that has already converted the yeast cells and sugar into gas and makes your dough rise.
Ensure that your dough rises quickly and is located in a warm area or about 80 degrees F, which is the optimal rising temperature. This proves your dough quickly if you’re in a hurry.
Second Fermentation or Dough Proofing
Proofing most commonly refers to the final rise a dough undergoes, which occurs after the dough balls are shaped but before the pizza is shaped.
During the proofing stage, the yeast produces gas, which imparts a level of aeration to the dough just before the baking stage.
Pizza recipes call for your dough to proof a second time to make your dough softer. This can take at least 30-45 minutes after the first proofing.
The risen dough is cut into balls and allowed to ferment further. After this, each dough ball is shaped into your pizza form.
Cold Fermentation or Dough Retarding
Pizza dough proofed in your fridge is called cold fermentation; slow rise and takes up to 24 hours.
By retarding the dough in a cold environment, the dough will have more complex flavors, allowing you to make it ahead of time. You can ferment the dough, save it, and use it at a later date.
This slows the production of gas within the dough resulting in a crust that will become dense.
This fermentation is best when you want to produce a thinner and lighter crust, just like a thin crust pizza.
Here’s What You Can Do if the Problem is the Fermentation Process
As usual, you’ll need to increase the temperature in your kitchen to stimulate your dough fermentation and make the dough rise faster. But even with cooler rooms, you’ll have to allow your slow-rise dough more time to rest, as it proves.
Rooms that are room temperature around 74-76F degrees will take longer for your dough to rise.
To ensure you have a good fermentation, check the temperature of the ambient or the place where the dough will be proof, and cover the dough with plastic wrap so it’s protected from humidity or smells from the refrigerator.
Step 4 – Review Your Kneading Process
Mixing dough seems easy enough, but the kneading will make every bit of difference for the best formation of gluten in your dough.
You knead the dough after the dough is initially mixed and only for a few minutes. Over-kneading will turn the dough tough.
Not Enough Kneading
Kneading pizza dough will help build up the right amount of gluten. If you don’t knead the dough, it won’t have the strength to spring back or hold its shape after it’s cooked.
When cooked, this under-kneading step will result in a limp dough lacking internal resistance.
No Gluten Development
As it begins to prove, the properly mixed dough is why gluten will form. With no gluten development, you likely did not mix your dough, which will appear uneven in the overall dough color.
An adequately mixed dough will have a satin-like color and natural sheen.
Here’s What You Can Do if the Problem is the Kneading Process
A poorly kneaded dough won’t have better-tasting qualities after it gets cooked. To fix this, knead your dough for an additional 5 minutes and then check for gluten development.
Ensuring that you have adequately kneaded dough helps form good gluten, which is essential for creating chewiness or levels of crunchy crust.
Perform the Following Tests:
Just like any unsuspecting chef will check their cooked pasta by throwing it on the wall, these tricks don’t always work.
You can test dough using proven methods that will immediately tell you – you’ve done your job correctly. Follow these dough testing tips to get the best results.
Dough Tear Test
This is a clear indication that your dough hasn’t developed enough gluten. To fix this, knead your dough for another couple of minutes and allow it to sit for 10-15 minutes. Whether it’s proofed a second time, it will form enough gluten so that it doesn’t tear when you stretch it out.
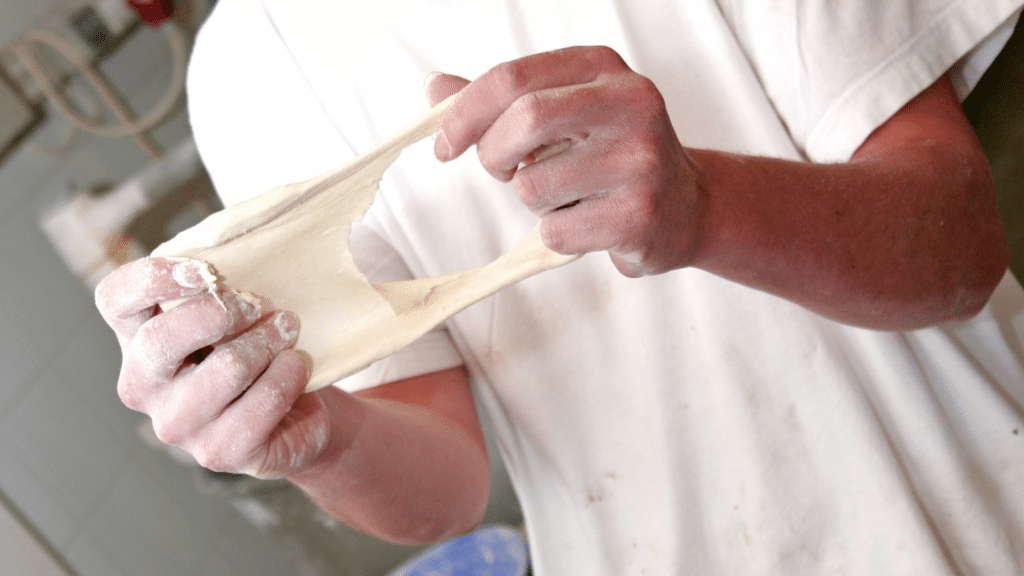
Windowpane Test
There is an easy way to see if you’ve kneaded your dough properly. It involves taking a small piece of dough and stretching it like a little window. If the dough is kneaded thoroughly, it will stretch easily, forming a thin, almost see-through inner membrane.

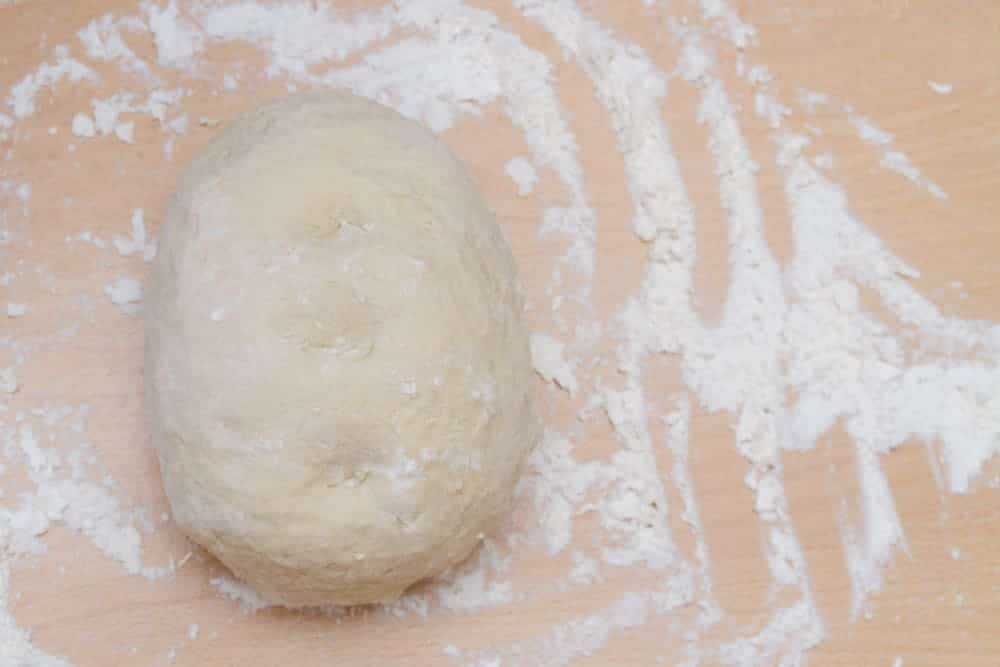
Spring test
Slightly dent the dough with your finger; if it retains the indentation, it is ready!
Are You Having Trouble Making Pizza Doughballs?
Here’s What You Can Do
We love that you can now buy fresh pizza dough balls straight from New York City. The perfect size for a medium pizza. They will ship frozen, just thaw and make the most wonderful pizza in minutes.
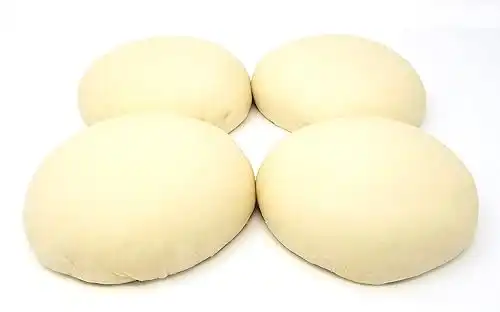
New York Pizza is different. The crust is completely unique. Airy, Crispy, and a taste that can’t be duplicated. Dairy-Free - Soy Free. Pizza Dough is made fresh and frozen only for transportation. All-Natural ingredients - Flour, Water, Olive Oil, Salt, Sugar and Yeast
Price includes Express Shipping. 1 Doughball creates a 12 to 14-inch pie depending on how thick you like the crust.
Complete instructions with each order. Taste the difference New York Water makes!
The Last Slice
We hope this guide gives you more information on identifying and fixing your dough and the top reasons why your pizza dough is not rising correctly.
While many reasons have been answered, many common mistakes are easily remedied. Now you can confidently make better pizza dough no matter your mistake.
Additional Resources
Enjoy!
Not a PRO? Not a Problem!
Take a pizza class to bring your pizza skills to the next level,
so you can be a PRO!
Related Posts

Costco Pizza Delivery: Find How You Can Get It Now!
the PROs
People go to Costco’s food court for many different reasons, but the cheesy slice of pizza they serve is among …
Pizza for Beginners: Don’t Buy Pizza, Make It! Here’s How to Get Started!
the PROs
You have this idea that you want to make pizza at home as opposed to ordering it, but where do you start? Don’t worry! Here you will find answers and directions to all your questions.

Pizza Toppings Under Cheese or Over Cheese? [Why the Order Matters]
the PROs
Is Pizza Cheese on Top or Bottom? Hey pizza lovers, are you wondering if you should layer pizza toppings under …

Newsletter
Subscribe to our Recipe of the Week newsletter and receive our partners’ latest recipes, tips, and discount offers.
Keep in Touch!