
Are you wondering what low-hydration pizza dough is?
A pizza dough’s hydration is one of the most important factors when achieving the perfect crust, the foundation of a great pizza! Low-hydration pizza dough has lower water content than other pizza dough types, giving it a unique texture and flavor.
One of the biggest debates in pizza-making is the best type of dough to use, and one popular option is low-hydration pizza dough. This type of dough requires special techniques, as it often has more difficult characteristics than other types of dough.
But don’t worry; this article will explore the benefits and drawbacks of low-hydration pizza dough. We’ll examine low hydration pizza dough, how to use this type of dough, and its pros and cons.
So let’s get started!
Here’s What You Will Find:
Pizza dough is an essential part of any pizza-making experience. But did you know there’s a specific type of pizza dough called low-hydration dough?
What is Low Hydration Dough?
Low-hydration pizza dough is a type of pizza dough with less water in its ingredients compared to traditional pizza dough; it is mixed at 50 to 60% hydration.
The lower amount of water leads to a less sticky dough, easier to handle and results in a crispier crust. Due to the low amount of water in the dough, it is very difficult to work with as it is not as flexible, it doesn’t rise well, and the final crust will feel dry, dense, and hard when baked in a conventional oven.
Additionally, the longer shelf life of low-hydration dough makes it a great option for those who like to prepare their pizza dough beforehand.
If you want to know the hydration level of your recipe, you can use our online pizza dough hydration calculator.
It is important to note that even though Authentic Neapolitan pizza has a 55% hydration, the crust is slightly crispy pizza crust and chewy that’s because it is baked in a wood-fired oven at over 900 degrees Fahrenheit and bakes pizza in 90 seconds.
If one bakes the same Neapolitan pizza dough hydration at 55% at a lower temperature, the results will be completely different and no longer considered authentic Neapolitan.
The baking process is so fast that larger amounts of water are unnecessary. The baking temperature will determine the crust’s texture.
This pizza dough has a lower water content than the traditional kind, resulting in a different texture and flavor.
Low-hydration pizza dough has a higher amount of flour concentration than regular pizza dough, resulting in a crunchier texture. The crust also tends to be more flavorful because the higher flour concentration means it takes longer for the yeast to break down and release flavors into the dough.
Additionally, because less liquid is added to the mix, low-hydration pizzas tend to cook faster in hotter ovens since all the moisture evaporates quickly.
Using low-hydration pizza dough may require some practice and experimenting as every pizza oven is different, and this type of pizza requires precise temperature control.
Benefits of Low-Hydration Pizza Dough
Low-hydration pizza dough is a great way to make delicious pizzas with less fuss. With low-hydration pizza dough, you get all the flavor of traditional pizza without worrying about dealing with high-maintenance dough.
Here are some benefits of using low-hydration dough for making your favorite pizzas:
Crispier crust
The lower amount of water results in a crispy crust that is perfect for those who love a crunch in every bite.
Easier to handle
Low hydration dough is less sticky, making it easier to handle and shape. No more frustration with messy, sticky dough!
Longer shelf life
With less water, low hydration pizza dough can last longer in the refrigerator, making it a convenient option for those who like to prepare their pizza dough ahead of time.
Improved texture
The lower water content leads to a denser, chewier texture that is perfect for those who love a hearty crust.
Characteristics of Low-Hydration Pizza Dough
The best way to describe low-hydration dough is a very stiff and thick dough.
It has a lower amount of water which causes the yeast within the dough will create more gluten. It would be best to knead it to shape it into a pizza.
This dough is also characteristically easy to handle and doesn’t stick to your hands. The fermentation process will take much longer.

It can take one hour or more for the low-hydration dough to rise. Often, it’s expected that some pizza recipes allow for a second proofing for fully developed pizza dough.
First, it’s super easy to work with! Low-hydration pizza dough has a stiffer consistency, making it much simpler and faster to shape than traditional or high-hydration pizza dough. You don’t have to worry about sticky or soft textures; this dough is far easier to roll out and manipulate into the perfect size and shape for your pies.
Second, low-hydration pizza dough requires less time in the fridge than its counterparts.
Low-hydration dough has several distinct characteristics that set it apart from other pizza doughs. These include:
- Less sticky: With a lower water content, the low-hydration dough is less sticky, making it easier to handle and shape.
- Denser texture: The lower water content in low-hydration dough results in a denser, chewier texture, which is perfect for those who love a hearty crust.
- Crispier crust: The lower water content in low-hydration dough results in a crispier crust, which is great for those who love a crunch in every bite.
- Longer shelf life: Low-hydration dough can last longer in the refrigerator, making it a convenient option for those who like to prepare their pizza dough ahead of time.
- Enhanced flavor: With less water, low-hydration dough allows the other ingredients to shine, resulting in a more flavorful crust.
Low-Hydration Dough vs. High-Hydration Dough
The difference between low-hydration and high-hydration pizza dough comes down to the amount of water in the ingredients, particularly flour.
High-hydration dough contains more water, typically around 60-80% of the total ingredients. This results in a very wet and sticky dough, making it difficult to handle and shape.
The high water content in high-hydration dough creates a tender, airy crust with large bubbles and a chewy texture.
On the other hand, the low-hydration dough contains a lower amount of water, typically around 45-60% of the total ingredients. This results in a dough that is less sticky and easier to handle, with a denser, chewier texture. The lower water content also results in a crispier crust.
The choice between low-hydration and high-hydration dough comes down to personal preference. High-hydration dough is great for those who love a tender, airy crust, while low-hydration dough is a great option for those who prefer a crispy, crunchy crust.
Ingredients and Equipment Needed
Low-hydration pizza dough produces a crunchy, thin crust that can hold various toppings without becoming soggy. Here are the ingredients and tools you’ll need for perfect low-hydration dough every time!
Ingredients for low-hydration pizza dough:
Flour
The type of flour used in low-hydration pizza dough is important, as it affects the texture and flavor of the crust. Bread flour or all-purpose flour can be used, but high-protein flour, such as 00 flour or a mixture of all-purpose and bread flour, will produce the best results.
Unbleached high gluten is best for this type of dough.
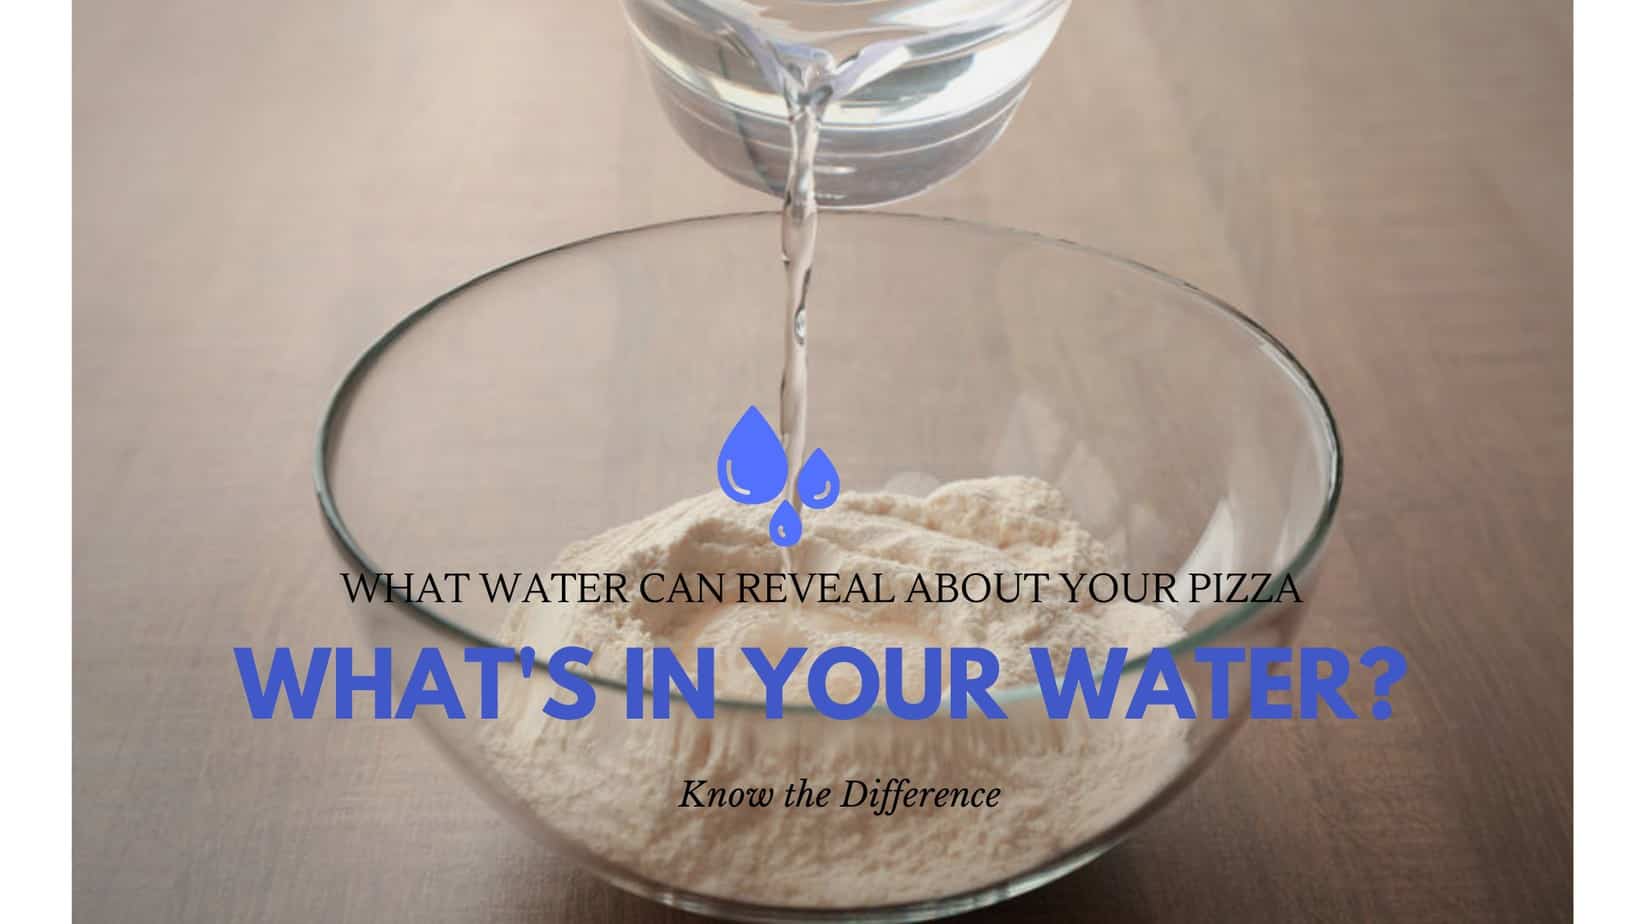
Water
Water helps combine the ingredients into a cohesive ball but not too much—you should aim for about 55% hydration.
The low hydration of the dough requires a smaller amount of water, which is mixed with flour, salt, and yeast to form the dough. It’s important to use filtered or bottled water for the best flavor, as tap water can contain minerals or other substances that can affect the dough.
Water will determine your ability to handle the dough and the overall texture of your pizza. Since your dough has yeast that activates your flour, the water percentage will create various flavors and consistencies.
The role of water goes even further. Water lets these ingredients disperse across the pizza dough when pouring in yeast, sugar, and salt.
These additional ingredients also dissolve in your dough, thanks to water.
Arguably, the most significant water duty in pizza dough is it allows for gluten strands development.
Gluten, a wheat protein, is a binder for your pizza ingredients. Without water, your pizza will lack texture. You also have a denser dough since gas bubbles can escape during fermentation.
Active dry yeast
Yeast is also necessary to give the dough its lightness and rise; active dry yeast works perfectly here.
Yeast is the leavening agent in low-hydration pizza dough, creating air pockets in the crust. Fresh or dry yeast can be used, but following the manufacturer’s instructions for activation and proofing is important.
Salt
You’ll need salt, too; we always recommend fine grain, as it is easier to dissolve. Salt is added to the dough to enhance flavor and control yeast activity. It’s usually added in a ratio of around 2% of the weight of the flour.
Equipment needed
To make low-hydration pizza dough, you will need the following:
Kitchen scale is also helpful for precise measurements
Large mixing bowl
Wooden spoon
If you are using a stand mixer, a dough hook
Plastic wrap
Rolling Pin
Baking stone or steel
Proofing box
Low Hydration Pizza Dough Recipe
This pizza dough is perfect for a thin, crispy crust that won’t fall apart or be too heavy. The dough’s hydration is key, affecting its texture and flavor.
Also, lower-hydrated doughs tend to develop less gluten than their wetter counterparts, resulting in crisper and crunchier textures when cooked at high temperatures. The lack of water also creates a denser crumb structure which adds body and stability, allowing for larger toppings without compromising the structural integrity of the crust.
All you do is mix the dry ingredients in a bowl before adding the water and kneading until everything comes together in a nice dough ball. Once it’s been kneaded for several minutes, let it rise for an hour or two before rolling out on a lightly floured surface and adding your favorite toppings.
Low-hydration pizza dough requires less water and flour than traditional recipes, resulting in a crispier crust with more flavor. The lower water content also means that the pizza will take longer to bake and requires more attention during preparation.
Making low hydration pizza dough requires minimal effort and creates a crunchy yet soft crust. Here’s everything you need to do to make the perfect low-hydration pizza dough.
You’ll need four basic ingredients: flour, water, salt, and yeast. The key to success lies in nailing down the correct ratio of each ingredient.
Ingredients:
- 500g pizza or bread flour
- 275g water
- 5g active dry yeast
- 10g salt
- Toppings of your choice (pepperoni, mushrooms, green peppers, onions, etc.)
Mixing of Low Hydration Pizza Dough
For preparing low-hydration pizza dough, you will need a large bowl to hold the ingredients and allow room for mixing and kneading. A metal or plastic bowl is suitable.
Low-hydration pizza dough typically has a 50-60% hydration level. This means that the amount of water used in the dough is 50-60% of the total flour weight.
Regarding temperature, it’s ideal to use warm water (around 95°F) when making the dough to help activate the yeast and promote fermentation.
As for humidity, it’s important to note that too much humidity can result in a sticky dough, while too little humidity can result in a dry and dense dough. Ideally, you want to maintain a relative humidity of around 70% when making pizza dough.
Fermentation is an important aspect of dough making as it helps to develop the dough’s flavor and structure. A relatively short fermentation time of 2-4 hours is typical for low-hydration pizza dough. The dough should be kept warm during this time to promote yeast activity.
Small water content and flour absorption adjustments can also help create the final product’s desired texture. Considering these factors, one should measure all ingredients accurately to ensure consistency throughout the process.
Start by gathering your ingredients: bread flour, yeast, salt, and water.
After properly weighing out each ingredient, it is time to combine them into a cohesive mass with either a stand mixer or a wooden spoon.
Depending on the mixer you are using, it can take 10 to 15 minutes before your dough has reached its optimal consistency and texture. Be sure not to overmix, which could lead to a tough end product.
- Start by weighing out the flour and water. It’s important to use a kitchen scale for accuracy, as low-hydration pizza dough requires precise measurements.
- Mix flour, salt, and yeast in a large mixing bowl. Make a well in the center of the mixture and pour in the water.
- Slowly mix the ingredients using a wooden spoon or dough hook until a shaggy dough forms. You may need to use your hands to bring the dough together fully.
- Knead the dough on a floured surface for 5-10 minutes until it is smooth and elastic.
- Cover the dough in a clean, oiled bowl with plastic wrap. Let it rest in a warm, draft-free area for 2 hours or until it has doubled in size.
And that’s it! You’ve now mixed up a beautiful batch of low-hydration perfect pizza dough. It’s ready for the next step: fermentation.
Fermentation
This is where the magic happens!
The dough will undergo a long, slow fermentation, during which the yeast will work to create air pockets and develop the crust’s flavor. After 2 hours of rest, the dough can be transferred to a proofing box for the final fermentation. Place it in the refrigerator overnight for the best results or at least 8 hours.
Shaping the Dough
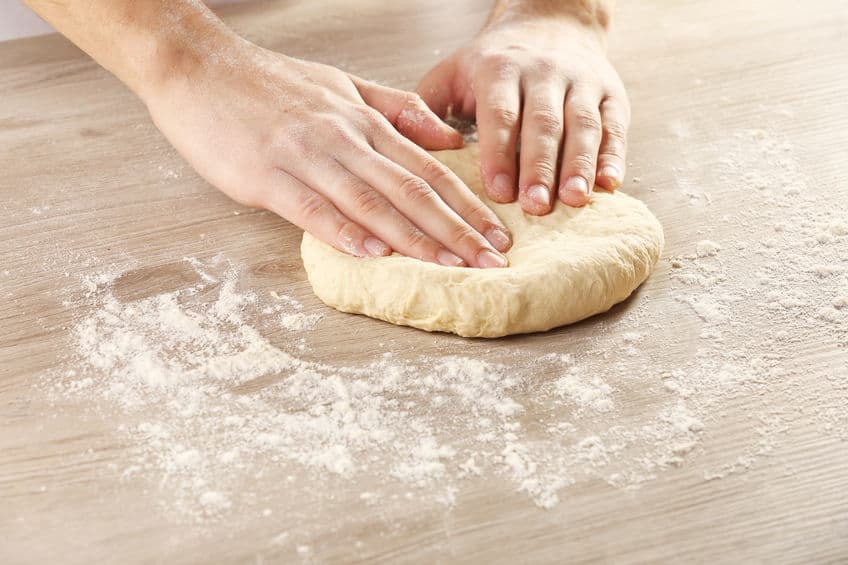
Shaping low-hydration pizza dough by hand is a fun and simple way to create a homemade pizza. The dough has lower water content and can be easier to handle and produce a crispier crust. Here’s how to do it:
- Flour your hands and work surface: Before you start shaping the dough, ensure your hands and work surface are well-floured to prevent the dough from sticking.
- Divide the dough: Take the ball of dough and divide it into smaller pieces, depending on how many pizzas you want to make.
- Pre-shape the dough: Take one piece of dough and gently press it into a round shape with your hands. Don’t worry if it’s not perfectly round; you’ll have a chance to shape it more later.
- Let it rest: Cover the pre-shaped dough and let it rest for 10-15 minutes to relax the gluten and make it easier to shape.
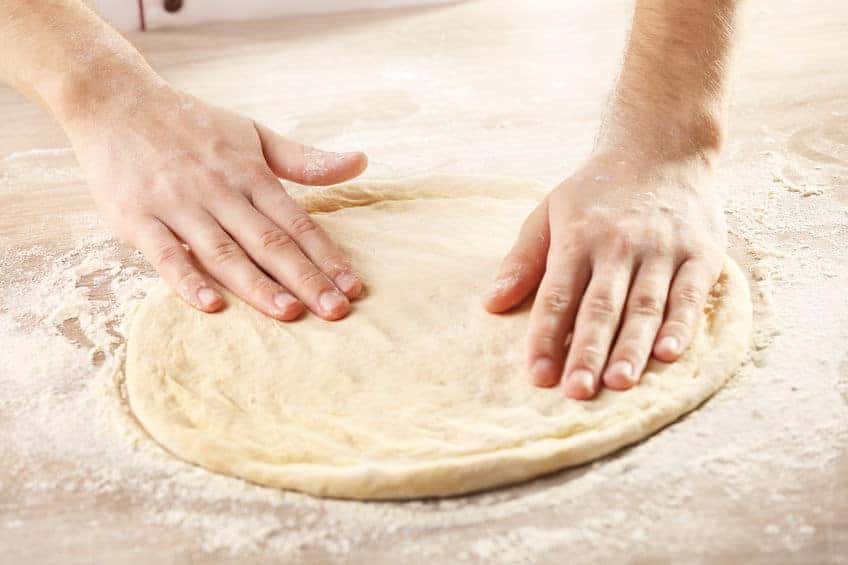
- Shape the dough: To shape the dough into a larger round, place it on a lightly floured surface and use your hands to gently press and stretch the dough outwards, rotating it as you go. The dough should be thin, but not too thin that it will tear.
Shaping Low-Hydration Dough by Hand
Firstly, let’s look at shaping the dough by hand – it’s not as hard as it looks!
Shaping low-hydration pizza dough can be a difficult challenge. Whether a seasoned professional or an amateur home cook, it takes practice and patience to master the art of stretching and forming your dough into the desired shape.
The low-hydration dough is particularly tough to work with as it’s much stickier than traditional dough, making it harder to manipulate.
However, don’t let this deter you! With some simple techniques and tips, anyone can easily learn how to shape low-hydration pizza dough.
Before you begin, ensure that all of your ingredients are at room temperature, making them easier to work with.
When shaping by hand, start in the center of the dough and gently press outwards using both hands in a circular motion until you achieve your desired size or shape.
Shaping Low Hydration Pizza Dough Using a Rolling Pin
You only need some flour and basic tools such as a rolling pin or dowel on your bench top.
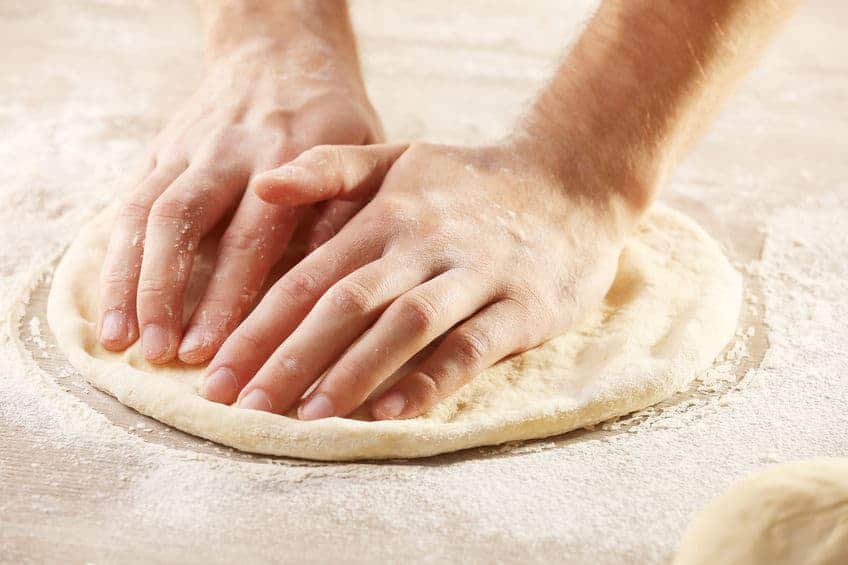
For an even thinner and rounder crust, use a rolling pin to gently roll the dough outwards, starting from the center and working your way out. Make sure to rotate the dough often so it remains round.
Place the dough ball in the center of your bench top and use your fingertips to press down into the center, gently stretching the sides outwards until you have an even circle about 10-12 inches in diameter.

If you want an even thinner base, repeat this process until you reach your desired thickness.
Transfer to a pizza peel or sheet: Carefully transfer the dough to a peel or sheet lightly dusted with cornmeal once the dough is shaped. This will make sliding the pizza onto the pizza stone or baking sheet easier.
And that’s it! You’re now ready to add your toppings and bake your homemade pizza.
Pre-baking and Toppings
Once the dough is shaped, it’s time to add the toppings of your choice. low-hydration pizza dough is more delicate than traditional dough, so be careful not to overload it with too many toppings. It’s best to keep it simple and let the flavor of the crust shine through.
Low-hydration doughs offer an immense range of flavor possibilities regarding toppings. Whether you’re looking for classic combinations such as pepperoni, olives, and mushrooms or something more unique, like artichoke hearts and smoked salmon, topping your pizza is no wrong.
Just be sure that whatever you choose does not release too much liquid into your crust, so it doesn’t become soggy!
Finishing your low-hydration pizza is just as important as picking the right toppings.
Baking the pizza
Add your favorite toppings and place the pizza on a pre-heated baking stone or steel in a 500°F (260°C) oven for 10-15 minutes or until and bake until the crust is golden brown and the cheese is melted and bubbly. The high heat and long bake time will produce a crispy pizza crust and perfectly melted toppings.
Tips and Tricks
Making low-hydration pizza dough can be a fun and rewarding experience, but a few tips and tricks can help you achieve the best results. With these tips and tricks, you’ll be well on your way to making the perfect low-hydration pizza dough. Let’s go over the following:
Use the best ingredients
Use pizza flour or any high protein content flour for the best results. Use filtered or bottled water if your tap water is heavily chlorinated or has an unpleasant taste.
Control temperature and humidity
To ensure that your yeast is active and your dough ferments properly, it’s important to maintain the right temperature and humidity. A warm, draft-free area is ideal, such as a closed oven with a bowl of hot water. If your kitchen is too cool, place the dough in a proofing box or covered plastic container to maintain the proper environment.
Use a Baking Stone or Steel
Achieving a crispy crust is all about heat and steam. Preheat your oven and baking stone or steel to 500°F (260°C) for at least an hour before baking to get the best results. The high heat will quickly evaporate the moisture from the dough and create a crisp, chewy crust. You can also try scoring the dough with a knife or razor blade before baking to allow steam to escape.
Don’t overload
Avoid over-topping the pizza, as this can make the crust soggy.
Variations and flavor additions
Experiment with different flours and water amounts to find the right hydration level for your taste. Low-hydration pizza dough is versatile and can be flavored in many different ways. Try adding herbs, spices, or cheese to the dough before shaping, or experiment with different types of flour for a unique flavor. The options are endless!
FAQs
Is it better to have more or less water in the pizza dough?
It depends on personal preference, but pizza dough’s lower hydration level (less water) will produce a crispier crust. A higher hydration level (more water) will result in a softer, chewier crust.
Low-hydration doughs, typically around 55-60% hydration, are easier to handle, roll out, and shape, resulting in a cracker-like crust. They also hold to heavier toppings and have a longer shelf life than higher hydration doughs.
On the other hand, higher hydration doughs, typically around 65-80% hydration, have a softer texture and are more difficult to handle and shape. However, they have a more complex flavor profile and produce a soft, chewy crust with a nice bite.
What happens if you don’t put enough water in pizza dough?
If you don’t put enough water in the pizza dough, the dough will be too dry and difficult to handle. This can result in a dense, tough, and cracker-like crust that may not rise properly and will lack flavor.
When making pizza dough, using the right amount of water to achieve the desired texture and consistency is important. Too little water will result in a dry, crumbly dough that won’t stick together and will be difficult to shape.
On the other hand, too much water will result in a sticky and stretchy dough that may not hold its shape and will produce a soft and soggy crust.
To ensure that you have the right amount of water in your dough, it’s important to measure the ingredients accurately and follow a reliable recipe. Suppose you’re making changes to the recipe, such as adjusting the type or temperature of the water. In that case, it’s important to make sure you adjust the water amount accordingly to compensate for these changes.
What is ideal pizza dough hydration?
The ideal pizza dough hydration level can vary based on personal preference and the style of pizza you’re making. However, a 60-65% hydration level is a good starting point for most pizzas.
A 60-65% hydration level results in a balanced dough that is easy to handle and shape and produces a crisp crust with a nice chew. It’s a good level for most traditional pizza styles, such as Neapolitan, New York, and Roman.
If you prefer a softer, chewier crust, you may want to try a higher hydration level of around 65-75%. This dough will be stickier and more difficult to handle but will produce a soft and flavorful crust.
The Last Slice
Low-hydration pizza dough is a delicious and easy way to make homemade pizza. With a crisp crust and the ability to hold up well to heavy toppings, it’s the perfect choice for those who prefer a thin and crispy crust.
Whether you’re a seasoned pizza maker or a beginner, this dough is simple to make and fun to shape by hand or with a rolling pin.
So why not gather your ingredients, get your hands dirty, and try making pizza at home today? You’ll be surprised by how delicious and satisfying it can be to create your own homemade pizza from scratch.
Additional Resources
Best Water for Pizza Dough: Temperature, Quality, and Hydration
the PROs
In this article, we are going to dive deep into the mysterious ways of water. In conjunction with flour, yeast, and salt, it can make the most spectacular pizza dough.

High Hydration Pizza Dough – Secret Ingredient to Perfectly Crispy Pizza
the PROs
Are you looking for a delicious, crunchy high hydration pizza dough recipe? This type of dough is very popular among …
How to Adjust Pizza Dough Hydration Levels for a Perfect Crust
the PROs
How to Adjust Pizza Dough Hydration Making good pizza dough is an art form and one of the most important …
Flour Absorption 101: The Key to Crafting the Perfect Pizza Crust
the PROs
Ah, pizza. The one food that unites us all! What would we do without our delicious, cheesy slices of heaven? …
Pizza Dough Hydration Calculator
the PROs
Making the perfect pizza dough can be difficult, especially for novice bakers. But with the right tools, anyone can master …

7 Hydration Percentages by Pizza Style that Actually Make the Best Pizza
the PROs
Making a pizza is all about getting your pizza dough to have just the right amount of hydration. If you’re looking to get the best results this guide can help you find the specific pizza dough hydration according to your desired pizza style. Let’s check it out!
Enjoy!
Not a PRO? Not a Problem!
Take a pizza class to bring your pizza skills to the next level,
so you can be a PRO!
Related Posts

Costco Pizza Delivery: Find How You Can Get It Now!
the PROs
People go to Costco’s food court for many different reasons, but the cheesy slice of pizza they serve is among …
Pizza for Beginners: Don’t Buy Pizza, Make It! Here’s How to Get Started!
the PROs
You have this idea that you want to make pizza at home as opposed to ordering it, but where do you start? Don’t worry! Here you will find answers and directions to all your questions.

Pizza Toppings Under Cheese or Over Cheese? [Why the Order Matters]
the PROs
Is Pizza Cheese on Top or Bottom? Hey pizza lovers, are you wondering if you should layer pizza toppings under …

Newsletter
Subscribe to our Recipe of the Week newsletter and receive our partners’ latest recipes, tips, and discount offers.
Keep in Touch!