So you’ve decided to make your pizza but are unsure how to stretch pizza dough to perfection. Well, fear not!
This post will show you some simple tips and tricks on stretching pizza dough like a PRO. Whether you prefer a thin, crispy crust or a thick, fluffy one, we’ve got you covered!
By the end of this post, you’ll be able to stretch pizza dough confidently and impress your friends and family with your homemade pizza skills.
So, keep reading to learn more!
Let’s get started!
Here’s What You Will Find:
Key Takeaways
Stretching Pizza Dough
Room Temperature Dough: Pizza dough is easier to stretch when it’s at room temperature. The cold dough can resist stretching and potentially tear.
Flour Is Your Friend: Always flour your hands and working surface before stretching the dough. This prevents sticking and allows for easier manipulation.
Gravity and Gentle Pressure: Use gravity and gentle pressure to stretch your dough. You can lift the dough, let it drape down, and rotate it, allowing gravity to help with stretching.
Practice Patience: If the dough springs back and resists stretching, let it rest for a few minutes before continuing. Patience is key in achieving the perfect stretch.
Make the Pizza Dough
Making the dough is easy; it only takes a few ingredients you probably already have in your kitchen. An essential component is flour – you’ll need about two cups of pizza flour. Add a teaspoon of salt and a tablespoon of sugar to the flour, then stir in a package of active dry yeast.
Next, pour in warm water and olive oil, then mix everything until it forms a soft dough. Once the dough is mixed, turn it onto a floured work surface and knead for about 10 minutes.
Then, shape it into a ball and let it rest for at least 30 minutes before using it to make your favorite pizza. So there you have it – now you know how to make delicious homemade pizza dough from scratch!
How to Stretch Pizza Dough
To start shaping pizza dough, you should work with it from the edges, not the middle, to stretch the pizza dough. If you’re working with store-bought pizza dough, stretching with your hands is the best method. If you use a rolling pin to stretch it, you may tear it or make it shrink. The best method is to stretch the dough by hand; Neapolitan pizzas are made without rolling pins.
First, you should remove any jewelry from your hands. It will prevent the dough from stretching correctly. Dust your hands with flour or semolina and start working with a ball of unstretched dough.
Press the dough ball against the work surface while stretching it. When it becomes more manageable, you can gently stretch it. Then, place the sliced toppings on the pizza and repeat the process with the other pizza dough balls.
Stretching the dough by hand makes a big difference in the taste and crust of the final product rather than keeping the dough untouched. Becoming an expert at this process takes time and practice, but once you’ve tried a few times, you can do it by hand.
Once you’ve tried it a few times, you’ll know what works. If you’re still unsure, start a pizza-making class, learn how to hand stretch pizza dough, and practice it until you’re confident and satisfied with the results.
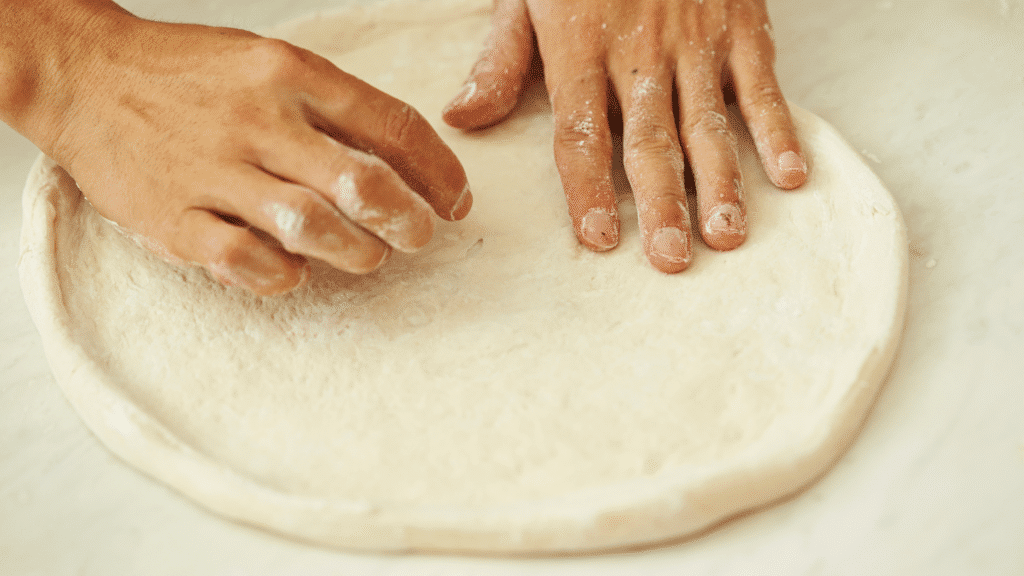
To stretch pizza dough balls, indent the dough ball in the center. This will create the outer edge of the pizza dough base, which should be around 1/4 inch thick.
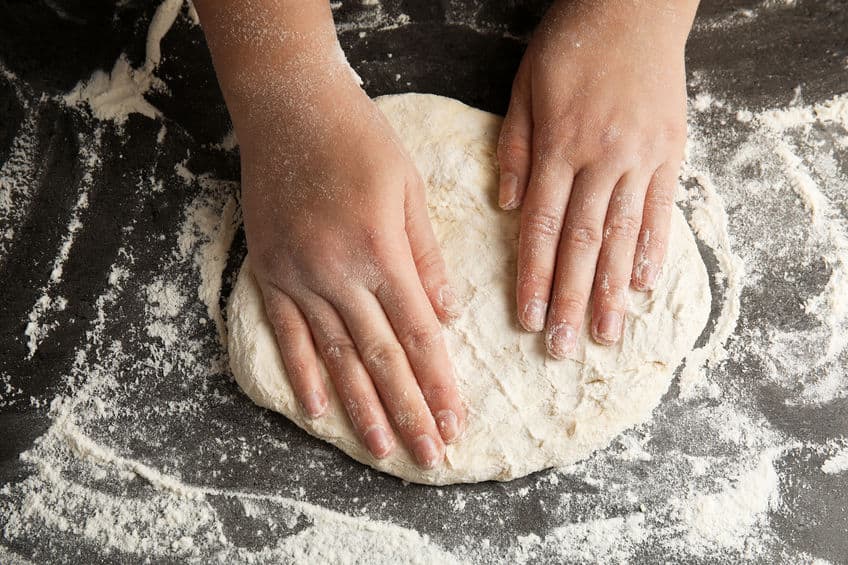
Next, lay it out using the ‘DJ Deck’ technique, which involves putting both hands flat on the dough disc, stretching it in a circular motion, and rotating it while pulling it apart.
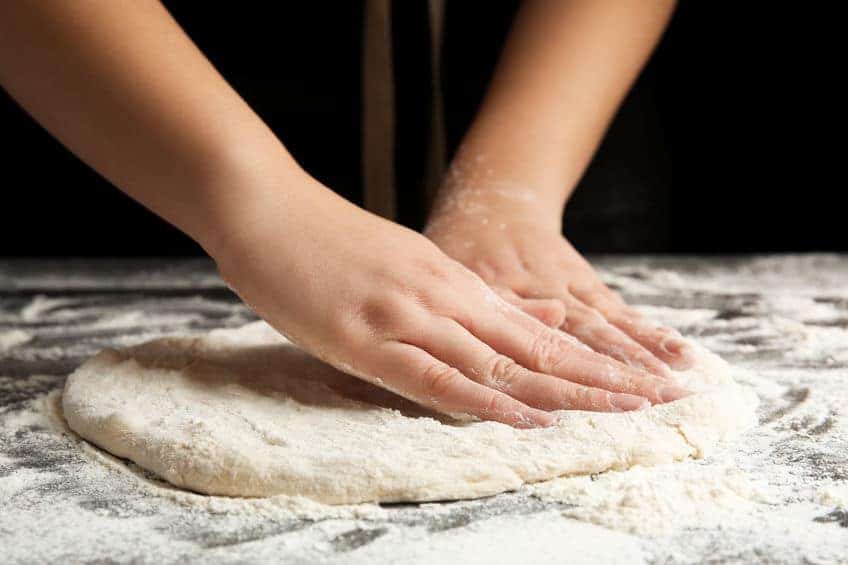
You can also lift the pizza dough hold it like a steering wheel, and let gravity to the rest. Also, you can hold the dough with the back of your hands and knuckle stretch the dough.

You should see a thin layer of crust around the edges of the pizza base, and the crust should be a 10-inch round, with a thin crust in the center. This is called the “cornicione.”
Tips on How to Stretch Pizza Dough
Stretching pizza dough may seem daunting, but getting the hang of it with some practice is easy.
Here are a few helpful tips to help you stretch your dough like a pro:
- Flour your countertop or cutting board generously, and then place the dough ball in the center.
- Use your hands to press the dough into a flat disk gently. Then, stretch the dough ball outwards from the center using your fingertips.
- Let the pizza dough rest for a few minutes if it is resistant before stretching.
- Once the pizza dough is stretched to your desired thickness, transfer it to a baking sheet, parchment paper, or pizza stone and proceed with your recipe.
The first thing to remember is to always start with room-temperature dough. If you start with cold pizza dough, it will be challenging to work with and likely result in a tough and chewy crust. When you’re ready to stretch the dough, flour your work surface generously.
Remember to keep the thickness of the outer crust even as you stretch it out. Once the dough is stretched to your desired width, transfer it to a pizza peel or a greased sheet pan and continue with your recipe.
Why is the Pizza Dough Not Stretching?
There are a few reasons dough is hard to stretch, but tight gluten is the most common cause. During cold dough fermentation, the gluten connects with the surrounding gluten fibers, making it tighter.
Stretching the dough too far may make it snap back to its original shape. Another common cause of stiffness is cold dough. If your dough is cold, leave it in a warm place for 30 minutes before kneading it.
When you are stretching pizza dough, you should be very careful not to break the dough. It can snap back if you force it. This is normal.
However, if the dough snaps back, it is probably too cold and should be left in the refrigerator for at least fifteen to twenty minutes.
After the dough has risen, you can stretch it. This usually takes about half an hour, but you can leave it out overnight.
How to Stretch Pizza Dough by Hand
Stretching pizza dough by hand can be a fun and satisfying task. Here’s a basic step-by-step guide on how to do it:
- Prep the Dough: Start with a well-rested pizza dough. Ideally, it should be at room temperature. Cold dough is harder to stretch and shape.
- Flour Your Surface: Dust your work surface and hands with flour. This will prevent the dough from sticking. Also, dust the dough ball lightly.
- Start with a Flat Shape: Start by flattening the dough into a disk shape with your hands. Press from the center of the dough outwards, leaving a thicker edge for the crust. Be careful not to press or flatten the edge of the dough.
- Stretch and Turn: Pick up the dough by the edge, and let gravity help stretch it as you go around the edge of the dough, turning it like a steering wheel. Leave the center slightly thicker than the edges.
- Use Your Knuckles: Drape the dough over your two fists and gently stretch it by moving your hands apart. Rotate it occasionally for an even shape. Be careful not to tear it. If the dough resists stretching, let it rest for a few minutes, then try again.
- Final Shape: Place the stretched dough on a well-floured pizza peel or baking sheet, then adjust the shape as needed. Your dough is now ready for toppings.
Remember, practice makes perfect. The more you practice, the better you will get at hand stretching and shaping pizza dough. It’s okay if the dough isn’t perfectly round; that’s part of the charm of homemade pizza.
What is the Trick to Stretching Pizza Dough?
Plenty of instructional videos demonstrate how to stretch pizza dough by hand, and while it may appear effortless, there is a bit of a learning curve. The key is to have the right amount of flour on your work surface and work the dough until it gently desired thickness.
The first step is to gather the necessary ingredients, which include flour, water, yeast, and salt. Once you have all your ingredients, mix them in a large bowl until they are well combined.
Next, turn the dough onto a floured surface and knead it. Kneading helps form gluten strands, giving the dough its elasticity.
Using a rolling pin to get an evenly thin crust can be helpful for beginners. Once you’ve stretched the dough, give it a final flouring before adding your toppings. Check our article on how to roll pizza dough for more.
And if you’re feeling ambitious, you can even try tossing the dough in the air for that authentic pizzeria experience.
Another key is to start from the center and work your way out. Use your hands to gently press down and outward, rotating the dough a quarter turn after each press.
Once you’ve reached the desired thickness, use a knife or pizza cutter to trim off any uneven edges.
When it comes to rolling vs stretching pizza dough, rolling with a pin creates a consistently thin and even crust suited for various styles, while stretching by hand results in a lighter, airier crust with texture variations reminiscent of traditional Neapolitan pizzas.
4 Easy Steps on How to Stretch Pizza Dough
This video is brought to you by Ooni
Check Out the Ooni Pizza Ovens
How Long Should Pizza Dough Rest Before Being Stretched?
Once you’ve mixed your pizza dough, it must rest before you can shape and bake it.
This resting period gives the flour time to hydrate and the gluten time to relax, which results in a more springy and stretchy dough. But how long should you let the dough rest?
In general, it’s best to let it rest for at least 30 minutes and up to 12 hours. If you’re short on time, you can let the dough rest for at least 15 minutes, producing a slightly less tender crust.
For the best results, shape the dough into a ball, place it in a greased bowl, and cover it with a damp towel or plastic wrap. Then, let it rise in a warm place until it doubles in size.
Once it has rested, you can shape it into a thin pizza crust and bake it according to your recipe.
Why Does My Pizza Dough Tear When Stretching?
There are several reasons your pizza dough tears when you stretch it. First, the dough may be too dry. When the dough is too dry, it will be crumbly and difficult to stretch.
To solve this problem, add a little water to the dough and knead it until it is soft and pliable.
Second, the dough may be too cold. If the dough is too cold, it will be hard and brittle, making it easy to tear. To solve this problem, let the dough sit at room temperature for 30 minutes before stretching it.
Third, the dough may have been overworked. If the dough has been overworked, it will be challenging to stretch. To solve this problem, knead the dough until it comes together and let it rest for 10 minutes before stretching it. Following these tips can prevent your pizza dough from tearing when you stretch it.
Should You Stretch Pizza Dough in the Air?
Tossing pizza dough in the air is something often seen in movies or at pizza restaurants, and it can be a fun skill to learn. It’s not necessary for home pizza making but can help stretch the dough evenly while adding a bit of showmanship to the process.

If you do want to try it, here’s a basic way to toss pizza dough:
- Prepare Your Dough: Start with a dough that has been rested and is at room temperature. Flatten it into a disk on a floured surface, leaving the edges slightly thicker.
- Make the Dough Disk Larger: Use your hands or your knuckles to stretch the dough further into a larger disk. Be gentle to avoid tearing the dough.
- The Initial Toss: Make a fist and lay the dough on top. Toss the dough into the air with a swift upward and slightly forward motion. The idea is to spin it so that it expands with each toss.
- Catch and Repeat: Catch the dough on the backs of your fists to avoid poking a hole with your fingers. Stretch the dough a bit more if needed, then toss it again.
- Final Stretch: After a few tosses, you should have a nicely stretched piece of dough. You can lay it out and adjust the shape before adding your toppings.
Remember, tossing dough takes practice and isn’t necessary for a delicious pizza. If your dough keeps tearing or isn’t shaping right, it’s totally fine to stick with the hand-stretching method on a floured surface.
Should You Stretch and Fold Pizza Dough?
There are a few different schools of thought regarding pizza dough. Some people believe stretching and folding the dough creates a more tender crust, while others think it’s unnecessary work. So, what’s the verdict?
Some evidence suggests stretching the dough and folding pizza dough produces a more tender crust. This is because the process helps distribute the gluten proteins evenly throughout the dough.
As a result, the dough is less likely to tear when it’s stretched thin for the pizza.
However, it’s important to note that not all pizzas are created equal. If you use a pre-made dough or a thick, fluffy crust, stretching and folding probably won’t make much difference.
On the other hand, if you’re working with a thinner, more delicate dough, taking the extra time to stretch and fold can help to create a better product.
Ultimately, it’s up to you whether or not you want to stretch and fold your pizza dough. If you’re short on time, feel free to skip this step.
However, if you’re looking for extra insurance against a tough crust, take a few more minutes to give your dough some time to rest before stretching.
The Last Slice
When it comes to making homemade pizza dough, the dough is arguably the essential part. A good dough will be light and airy, with a perfect balance of chewiness and crustiness.
Unfortunately, store-bought dough can often be disappointingly bland and dense. However, making your pizza dough is surprisingly easy, and the results are infinitely more rewarding.
The key to success is in stretching. It takes a bit of practice to get the hang of it, but once you’ve mastered the technique, you can make a perfect pizza that is truly out of this world.
So next time you’re in the mood for pizza, ditch the delivery and try homemade. You might be surprised at how much fun it is to stretch it further.
Additional Resources

How to Mix Pizza Dough
the PROs
Do you want to learn how to mix pizza dough? Pizza dough is a staple in most households, but it …

Best Water for Pizza Dough: Temperature, Quality, and Hydration
the PROs
In this article, we are going to dive deep into the mysterious ways of water. In conjunction with flour, yeast, and salt, it can make the most spectacular pizza dough.

Salt in Pizza Dough: The Secret to a Perfectly Seasoned Crust
the PROs
Making homemade pizza is not complicated; see how with just a few ingredients like flour, water, yeast, and salt you can do wonders. In this article, we will discuss the role of salt in homemade pizza and discover four (4) basic rules applicable to salt, that are easy to remember that will make you a better homemade pizza baker.

Poke Test Demystified: Master the Technique for Perfect Pizza Every Time
the PROs
Are you tired of ending up with a pizza crust that’s either too thick or still raw in some parts, …
How to Proof Pizza Dough Fast
the PROs
How to Proof Pizza Dough Fast Behind every tasty pizza dough is a secret. Secrets behind its fantastic flavor and …

Windowpane Test: (Tips, How-to, and Everything You Need to Know)
the PROs
Pizza Dough Windowpane Test Kneading the dough is probably one of the most complex parts of baking a pizza. You …
Enjoy!
Not a PRO? Not a Problem!
Take a pizza class to bring your pizza skills to the next level,
so you can be a PRO!
Related Posts

Costco Pizza Delivery: Find How You Can Get It Now!
the PROs
People go to Costco’s food court for many different reasons, but the cheesy slice of pizza they serve is among …

Pizza for Beginners: Don’t Buy Pizza, Make It! Here’s How to Get Started!
the PROs
You have this idea that you want to make pizza at home as opposed to ordering it, but where do you start? Don’t worry! Here you will find answers and directions to all your questions.

Pizza Toppings Under Cheese or Over Cheese? [Why the Order Matters]
the PROs
Is Pizza Cheese on Top or Bottom? Hey pizza lovers, are you wondering if you should layer pizza toppings under …
Newsletter
Subscribe to our Recipe of the Week newsletter and receive our partners’ latest recipes, tips, and discount offers.
Keep in Touch!
