Welcome to our comprehensive guide on how to roll pizza dough like a PRO! If you’ve ever wondered why your homemade pizza doesn’t quite have the same texture or taste as your favorite pizzeria’s, the secret might be how you handle your dough. Rolling pizza dough properly is a crucial step in achieving that perfect pie, and it’s a skill that every pizza lover should master.
In this guide, we’ll start from the basics and work our way up to more advanced techniques. We’ll explain why the rolling process is so important and take you through the steps individually, so you can make your pizza dough just right every time. And believe us, once you get the hang of it, you’ll taste the difference.
From the ideal consistency of your dough to the precise rolling technique, we’re here to help you unlock the secrets to that tantalizingly crisp yet chewy crust. So grab your apron, dust off that rolling pin, and join us as we delve into the art of rolling pizza dough.
Trust us; your taste buds will thank you.
Let’s get started!
Here’s What You Will Find:
Before diving into the process of rolling pizza dough, gathering all the necessary materials and ensuring you have the right dough consistency is essential.
Let’s take a look at what you’ll need:
Here’s What You Need to Roll Pizza Dough
- Dough roller: A rolling pin is the most common tool used for rolling pizza dough. Choose one made of wood, marble, or stainless steel, depending on your preference.
- Clean surface: A large, flat, and clean surface, such as a countertop or cutting board, is necessary for rolling out your dough.
- Flour: All-purpose or bread flour is needed for dusting your work surface and rolling pin to prevent the dough from sticking.
- Bench scraper (optional): A bench scraper can help lift and turn the dough while rolling, but it’s not mandatory.
- Baking sheet or pizza stone: You’ll need a baking sheet or pizza stone to bake your pizza once the dough is rolled out.
Ideal Pizza Dough Consistency
- Elasticity: The dough should be elastic and easy to stretch without tearing. A well-kneaded and rested dough will achieve this consistency.
- Moisture: The dough should be slightly tacky to the touch but not wet or overly sticky. Adjust the flour and water ratio as needed to achieve this consistency.
- Gluten development: Proper gluten development is key for a dough that holds its shape and creates a delicious, chewy crust. Kneading and resting your dough appropriately will help develop the gluten structure.
With these materials and the right dough consistency, you’re now ready to embark on the journey of rolling perfect pizza dough.
Preparing the Pizza Dough
Before the rolling can start, we need to first prepare the dough.
Creating or Buying Pizza Dough
If you’re up for the challenge, making your own pizza dough at home can be a rewarding experience. Basic ingredients include flour, water, yeast, salt, and a bit of olive oil. Various recipes exist online that can guide you through the process. However, if time is not on your side, you can also purchase ready-made pizza dough from your local grocery store or bakery.
Room Temperature and Dough Elasticity
The temperature of your dough plays a crucial role in how easy it will be to roll. The cold dough can be stiff and resistant to rolling. Allow your dough to reach room temperature before you begin rolling. This will help the dough relax and become more pliable, making it easier to stretch and shape.
Kneading and Resting the Dough
Kneading develops the gluten in the dough, giving the pizza a chewy texture. To knead, press the dough with the heel of your hand, fold it in half, turn slightly, and repeat. Once kneaded, it’s equally important to let the dough rest. Resting relaxes the gluten and makes the dough easier to roll out.
A good rule of thumb is to let it rest for at least 15 minutes after kneading.
Preparing the Workspace
Before you begin rolling, it’s essential to prepare your workspace.
Cleaning and Sanitizing the Workspace
Always start with a clean and sanitized workspace. This reduces the risk of food contamination and creates a safer cooking environment. Wipe down your countertops or cutting board with a mild disinfectant, then rinse with water and dry.
Flouring the Surface
Dust your clean workspace and your rolling pin with a light layer of flour. This prevents the dough from sticking to the surface or the rolling pin. However, be cautious not to use too much flour, as it can dry and tough your dough. A light dusting is usually sufficient. If your dough continues to stick, add flour gradually.
How to Roll Pizza Dough
Now that your dough and workspace are ready, it’s time to roll the dough.
Beginning the Rolling Process
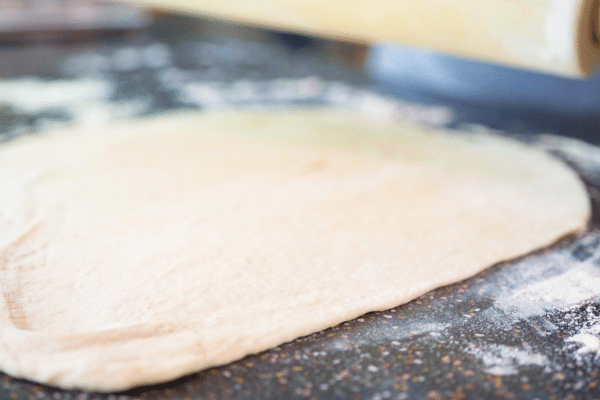
Start with the dough in the center of your floured surface. Using your floured rolling pin, gently press down on the dough and start rolling from the center outwards. Always roll in one direction at a time (i.e., either vertically or horizontally) rather than rolling in all directions. This helps maintain the circular shape of your pizza.
Steps to roll pizza:
- Preparation: Let your dough rest at room temperature for about an hour before you begin. This will make it easier to work with. Dust a clean surface with flour to prevent the dough from sticking.
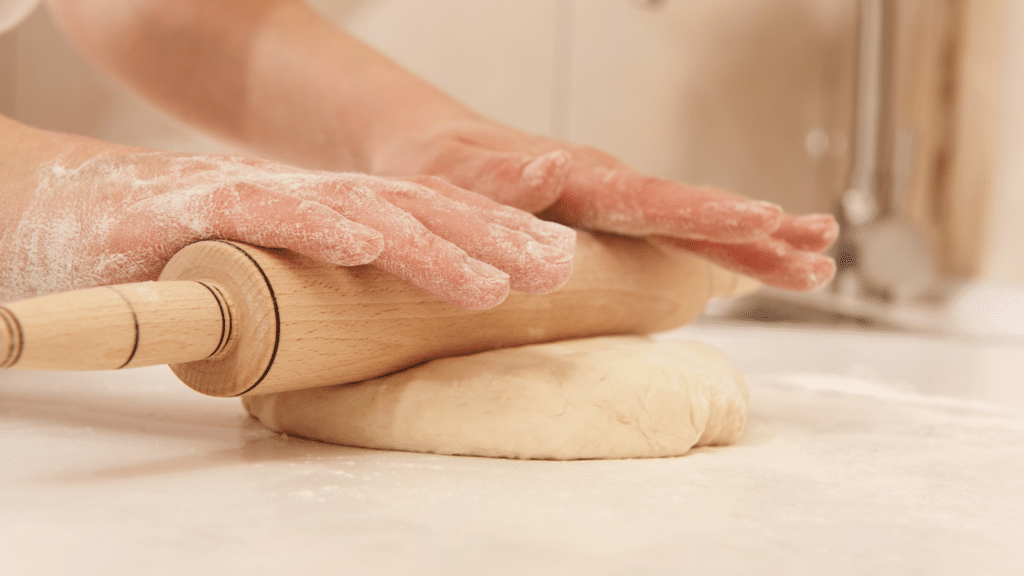
- Begin Rolling: Place the dough on the floured surface. Start by flattening the dough ball into a disk using the heel of your hand. This initial flattening makes it easier to start rolling.
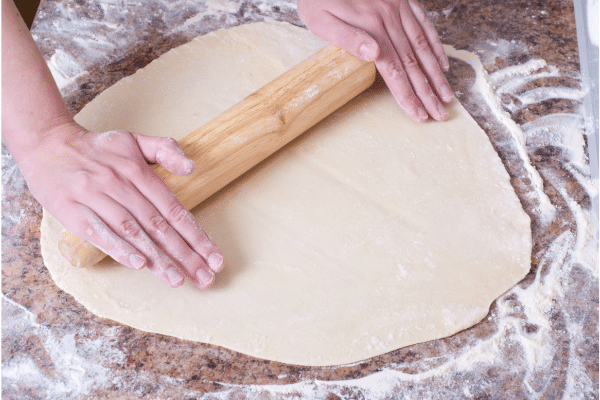
- Use a Rolling Pin: Dust your rolling pin with flour to prevent sticking. Start from the center of the dough and roll outwards, applying even pressure. Rotate the dough or change your rolling direction to help achieve a circular shape.
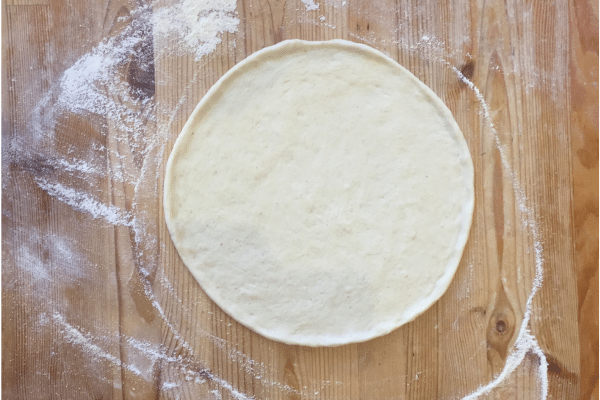
- Roll to Desired Thickness: Continue rolling until the dough reaches your desired thickness. For thin-crust pizza, you’ll want to roll it quite thin. For a thicker crust, leave it a bit thicker.
- Check for Evenness: Run your hand over the surface of the dough to feel for any areas that are thicker or thinner than others. Use the rolling pin to even out these areas.
- Rest the Dough: If the dough is springing back and not maintaining its shape, let it rest for a few minutes. This allows the gluten to relax, making the dough more pliable.
- Transfer to Baking Sheet or Stone: Once your dough is rolled to the desired thickness and size, carefully transfer it to your prepared baking sheet or pizza stone. Add your desired toppings, and it’s ready to bake.
Remember, when rolling pizza dough, work gently and patiently to avoid tearing the dough. You can roll out pizza dough like a pro with a little practice.
When it comes to rolling vs stretching pizza dough, rolling with a pin creates a consistently thin and even crust suited for various styles, while stretching by hand results in a lighter, airier crust with texture variations reminiscent of traditional Neapolitan pizzas.
Maintaining Even Thickness
Keeping an even thickness in your pizza dough is important for even cooking. As you roll, regularly rotate the dough a quarter turn to ensure it’s not sticking to the surface and to help maintain an even thickness. If the dough springs back and doesn’t hold its shape, it may need to rest a little more to relax the gluten.
Remember, the center of the pizza should be thin but not transparent, while it can be slightly thicker towards the edges.
Creating a Crust Edge
To form a crust or “lip,” leave about 1 inch of dough around the edge slightly thicker. You can also create a crust by rolling out the entire piece of dough to an even thickness and then pinching around the edges to raise them slightly. The raised edge will give a nice puffy crust once baked.
Remember, practice makes perfect. With time, you’ll develop a feel for the dough and be able to roll out a beautiful pizza base every time.
Shaping the Dough
Once you’ve rolled out your dough, it’s time to shape it according to your desired pizza shape.
Achieving Desired Pizza Shapes
Circular
This is the traditional shape for most pizzas. If you’ve rolled from the center out, rotating the dough as you go, you should already have a roughly circular shape. You can refine the edges by using a pizza cutter or a sharp knife.
Rectangular
If you prefer a rectangular pizza, use your rolling pin to create an even rectangle, and then trim the edges with a pizza cutter or sharp knife for straight sides.
Fixing Common Dough Shaping Issues
Holes
If you accidentally create a hole in your dough, don’t panic. Simply pinch the dough together around the hole to repair it.
Uneven Edges
If your pizza edges are uneven, you can fold them over slightly and press down to create a thicker crust edge, or you can trim any excess with a sharp knife or pizza cutter.
Pre-Baking the Pizza Dough
Once your dough is shaped, you’re almost ready for the oven.
Transferring the Rolled Dough
Carefully transfer your shaped dough to a floured or cornmeal-dusted baking sheet or preheated pizza stone. You can do this by gently folding the dough in half, lifting it onto the sheet or stone, and then unfolding it.
Pre-Baking the Dough
Some pizza recipes call for pre-baking the dough, especially if you’re adding toppings with high moisture content, like fresh tomatoes or certain cheeses.
To pre-bake, put your shaped dough in a preheated oven (typically around 475-500°F or 245-260°C) for about 5-7 minutes until it begins lightly brown. Then remove it, add your toppings, and return it to the oven to finish baking. This can help prevent a soggy crust.
Best Rolling Pin for Pizza Dough
When it comes to rolling pizza dough, a good rolling pin will determine how good your crust will end up.
The fundamental criterion for deciding which kind of rolling to use for pizza dough is the material the rolling pin is made of.
Rolling pins are wood, stainless steel, plastic, and silicone.
Which is the best rolling pin for pizza dough?
The wood rolling pin will be the best because temperatures like stainless steel or marble pin will not affect it.
Depending on the kitchen’s temperature, a stainless steel rolling pin will get either cold or hot. It will do the job. You may use wood, aluminum, or plastic rolling pin.
The plastic rolling pin may not be as heavy as it needs to deflate your pizza dough properly.
Other characteristics are weight and shape; you want a heavy rolling pin that is long enough to handle the size of your pizza.
A French rolling pin is not recommended for pizza dough because it is not symmetrical in shape. The center of the pin will be in contact with the dough, but the corners of the pin will not.
You will want even distribution of weight through the rolling process.
Always dust your rolling pin with flour before you start rolling.
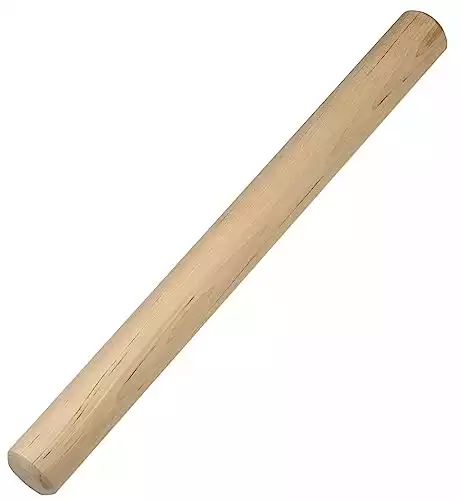
Ateco's Dowel Maple Wood Rolling Pin is ideal for rolling out pizza dough. Easier to maneuver, the no-handle construction gives you more control over the pressure when pressing down to roll out and flatten doughs. Made in Canada of maple wood, this rolling pin is durable and made to last! Each rolling pin is 19 inches long with a 1.35 inch diameter. The smooth surface makes cleaning up a breeze, simply hand wash with warm, soapy water. Soaking is not recommended. Four generations of the August Thompson family have provided quality baking and decorating tools to professional pastry chefs and discerning home bakers for over 100 years.
Crust Results When Rolling the Dough
Rolling your pizza dough correctly sets the foundation for a great crust – the hallmark of any outstanding pizza. You should expect an evenly cooked crust with the right balance of chewiness and crispness. The center should be thin and crispy, while the outer edge, or the “cornicione,” should puff up in the oven, giving you a beautifully airy and slightly chewy crust.
This contrast between the thin center and the thicker edge makes a pizza delightful. Remember that the exact results can vary based on your specific recipe, oven, and preference. But with proper rolling technique, you’re on your way to a crust that would make any pizzaiolo proud!
Rolling Pizza Dough FAQs
Here are some practical rolling troubleshooting guidelines for beginners.
How to roll out pizza dough without it shrinking?
If you’re struggling with your pizza dough shrinking back after you’ve rolled it out, it’s likely due to the gluten in the dough being too tight. Here are a few tips to prevent your pizza dough from shrinking:
- Let the Dough Rest: After kneading the dough, it’s important to let it rest for at least 15-30 minutes, or even up to an hour or two if you have time. Resting allows the dough’s gluten to relax, making it easier to roll out without shrinking back.
- Bring to Room Temperature: If your dough has been refrigerated, bring it to room temperature before rolling it out. The cold dough tends to shrink more than the dough that is at room temperature.
- Roll Out Gradually: Instead of trying to roll the dough out to its full size all at once, roll it out a bit, then let it rest for a few minutes, then roll some more. This gives the gluten additional opportunities to relax.
- Avoid Overworking the Dough: The more you work the dough, the tighter the gluten network becomes, which can cause the dough to shrink back when rolled out. Try to handle the dough as little as possible once it has been kneaded.
- Use a Combination of Rolling and Stretching: Some pizzaiolos prefer to stretch the dough using their hands or draping it over their knuckles instead of rolling. This can reduce the likelihood of the dough shrinking back.
Remember, practice makes perfect. Don’t be discouraged if your pizza dough doesn’t come out perfectly the first few times. With patience and practice, you can roll out a perfect pizza crust.
How to roll pizza dough without a rolling pin?
Rolling out pizza dough is essential in crafting the perfect homemade pizza. Most people reach for a rolling pin, but what if you don’t have one handy?
Don’t worry!
There are several household items you can use as an effective substitute. The key is to find a smooth cylindrical object that can apply even pressure to the dough. Here are a few innovative alternatives to a rolling pin that you can use to roll out your pizza dough:
- Wine Bottle: As mentioned, an unopened bottle of wine can work just as well as a rolling pin. Make sure it’s clean and dry before use.
- Water Bottle: A full, sealed plastic water bottle can also do the trick. It’s lightweight and easy to handle.
- Dowel Rod: A clean wooden dowel rod, like the type used for crafts or home projects, can be used as a makeshift rolling pin.
- Glass Jar: A tall, cylindrical glass jar (like a pickle jar) can also work, provided it’s clean and dry.
Remember to flour these alternatives just like a rolling pin to prevent the dough from sticking.
The Last Slice
We’ve covered a lot of ground in this guide, but now you should understand how to roll and shape pizza dough like a professional.
The main steps for rolling pizza dough are preparing it, allowing it to reach room temperature, and then kneading and resting it. Next, prepare your workspace by cleaning it and dusting it with flour. Begin rolling the dough from the center, maintaining an even thickness and creating a thicker edge for the crust.
Shape the dough according to your desired pizza shape, and don’t worry if you encounter any issues – they can often be easily fixed. Lastly, transfer your rolled and shaped dough to a baking sheet or pizza stone, and consider pre-baking the dough depending on your toppings.
Final Tips and Tricks
Remember to let the dough rest if it’s resisting being rolled out, and always keep your workspace and rolling pin lightly floured to prevent sticking. Don’t be afraid to use your hands to shape and smooth out the dough, especially when forming the crust edge.
Personal Touches
Pizza making is a personal process, and it’s always open to experimentation. Try different dough recipes, play around with the thickness of your crust, or experiment with unique shapes and sizes. Each pizza you make expresses your creativity, so let your imagination run wild and make the process your own.
You are now equipped with the knowledge and skills to roll pizza dough like a pro. So roll up your sleeves and get ready to impress your family and friends with your perfect homemade pizzas.
Enjoy the journey, and most importantly, have fun!
Related Articles
How to Mix Pizza Dough
the PROs
Do you want to learn how to mix pizza dough? Pizza dough is a staple in most households, but it …

Best Water for Pizza Dough: Temperature, Quality, and Hydration
the PROs
In this article, we are going to dive deep into the mysterious ways of water. In conjunction with flour, yeast, and salt, it can make the most spectacular pizza dough.

Salt in Pizza Dough: The Secret to a Perfectly Seasoned Crust
the PROs
Making homemade pizza is not complicated; see how with just a few ingredients like flour, water, yeast, and salt you can do wonders. In this article, we will discuss the role of salt in homemade pizza and discover four (4) basic rules applicable to salt, that are easy to remember that will make you a better homemade pizza baker.
Poke Test Demystified: Master the Technique for Perfect Pizza Every Time
the PROs
Are you tired of ending up with a pizza crust that’s either too thick or still raw in some parts, …
How to Stretch Pizza Dough Like a PRO: Tips and Tricks to Elevate Your Homemade Pizza Game!
the PROs
So you’ve decided to make your pizza but are unsure how to stretch pizza dough to perfection. Well, fear not! …
How to Proof Pizza Dough Fast
the PROs
How to Proof Pizza Dough Fast Behind every tasty pizza dough is a secret. Secrets behind its fantastic flavor and …
Enjoy!
Not a PRO? Not a Problem!
Take a pizza class to bring your pizza skills to the next level,
so you can be a PRO!
Related Posts

Costco Pizza Delivery: Find How You Can Get It Now!
the PROs
People go to Costco’s food court for many different reasons, but the cheesy slice of pizza they serve is among …
Pizza for Beginners: Don’t Buy Pizza, Make It! Here’s How to Get Started!
the PROs
You have this idea that you want to make pizza at home as opposed to ordering it, but where do you start? Don’t worry! Here you will find answers and directions to all your questions.

Pizza Toppings Under Cheese or Over Cheese? [Why the Order Matters]
the PROs
Is Pizza Cheese on Top or Bottom? Hey pizza lovers, are you wondering if you should layer pizza toppings under …

Newsletter
Subscribe to our Recipe of the Week newsletter and receive our partners’ latest recipes, tips, and discount offers.
Keep in Touch!