
How to Proof Pizza Dough Fast
Behind every tasty pizza dough is a secret.
Secrets behind its fantastic flavor and robust texture.
The secret is that it’s not just the ingredients but the techniques and skills involved that made it great.
If you have ever wondered how pizzerias and master home cooks do it, then you have found the right article.
This will be an all-out guide on everything on how to proof pizza dough fast.
So let’s get started!
Here’s What You Will Find:
How to Proof Pizza Dough Fast
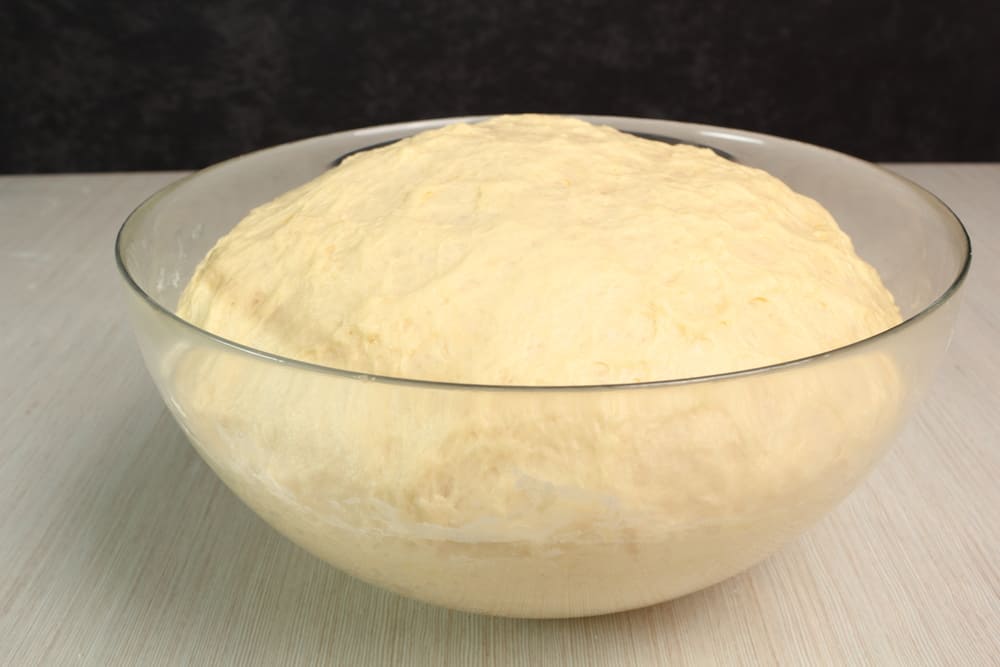
Proofing a pizza dough involves two processes, bulk fermentation, and individual fermentation.
Bulk fermentation is after you’ve kneaded or mixed all your dough’s ingredients and formed one big mass of dough. And depending on the bulk and type of dough, you leave it for 2-24 hours.
Your dough will rise faster when the surrounding temperature is warm.
For instance, you can put the dough on a tray near the oven to get warm.
The higher temperature activates the yeast, producing gas quickly, or you can add a pinch of sugar as you knead.
If you want complex flavors and textures with your pizza dough, a slower rising or proofing gives better quality.
Individual fermentation is your single massive dough cut into specific shapes and sizes. And you leave it, again.
For 4-12 hours, it depends on the type of dough.
If you’re making one for Neapolitan-style pizza, that’s about 8-12 hours of “final proofing.”
The properly proofed dough has a cream, not white or gray. The under-proofed dough is white. The over-proofed dough turns grey; the cream color is washed out.
How to Proof Pizza Dough Fast
Ways to Proof Pizza Dough Faster
Learning how to proof pizza dough fast is essential to get the desired results. When you proof the dough, the yeast in it produces gas.
This aeration creates the height you want in a crust, so as the dough bakes, it becomes airy, light, and crispy.
Don’t underestimate this step. If you don’t proof the dough or do it incorrectly, this can lead to a dense texture and unpleasant flavor.
- Adding more yeast and more sugar for even more fermentation.
- When proofing dough, use a sheet pan and baking rack. The sheet pan and speed rack help to even out airflow.
- When preparing, place the dough in a warmer place – 75 to 80 degrees F
- You can set the dough in the oven with a temperature not higher than 100F (38C)
- You can also put the dough in a microwave oven with a boiling cup of water.
Additional Factors to Consider on How to Proof Pizza Dough Fast
Speeding up the fermentation process is not always recommended, as it could adversely affect your final pizza crust.
However, sometimes, you might need to boost things a little bit due to unexpected circumstances.
Here are some alternatives you can do to accelerate the proofing process.
You can control the following factors to reduce the fermentation rate and proof your dough faster:
Yeast
- Use instant yeast instead of active dry.
- Add more yeast to your flour.
- Add sugar or honey to the yeast mixture.
Temperature
- Set the dough in a warmer place in your kitchen.
Humidity
- Moisture will accelerate the proofing process.
Dough Handling
- Lightly coat your dough with vegetable oil
- Tightly cover the bowl or container with a lid or cling film.
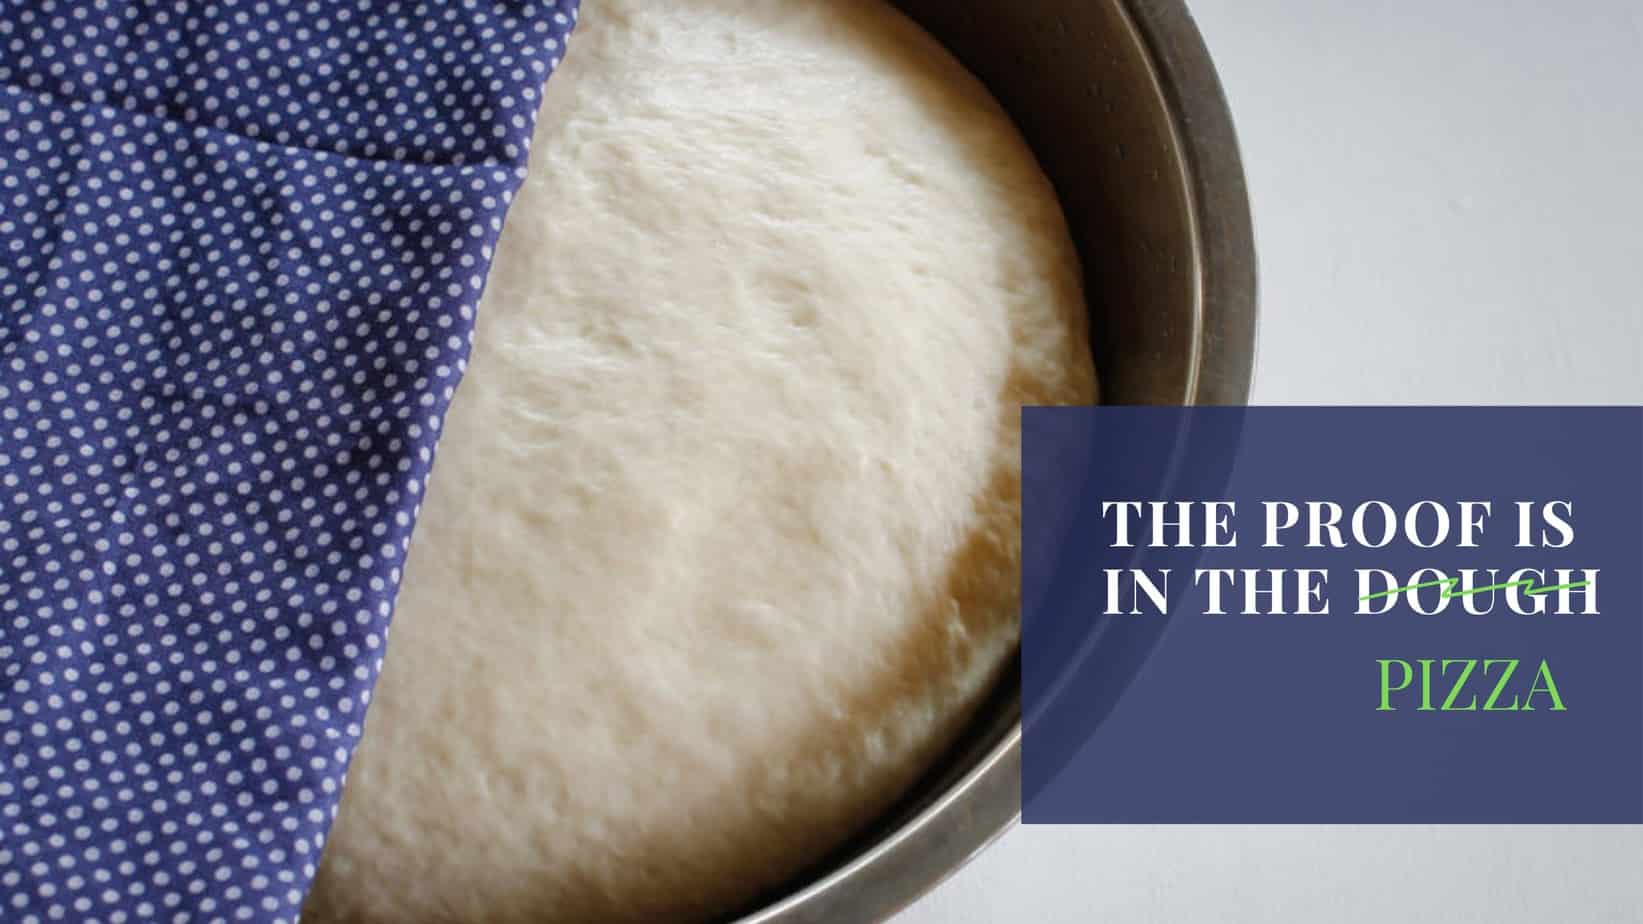
How Long Does It Take to Proof Pizza Dough?
In the final proofing stage, place each dough ball in airtight containers. Seal each container with plastic wrap.
Let the dough proof as a final step to let both texture and flavor develop inside the dough. Brush each container with olive oil so as not to let the dough stick.
Final proofing is the longest part of the process as we let the dough develop its flavor correctly. The minimum time is 8 to 12 hours.
Or we proof pizza dough overnight or 24 hours.
By then, the pizza dough will be double in size.
Leave the dough to proof at room temperature or even in the refrigerator to slow down the proofing. This process must not be rushed, like if you leave the dough at hot temperatures. This will ruin the dough.
How Do You Know When Your Pizza Dough is Proofed?
The simplest and most effective way is the “Poke Test.” Press the dough gently with a knuckle or finger to check if it is adequately proofed and ready to bake.
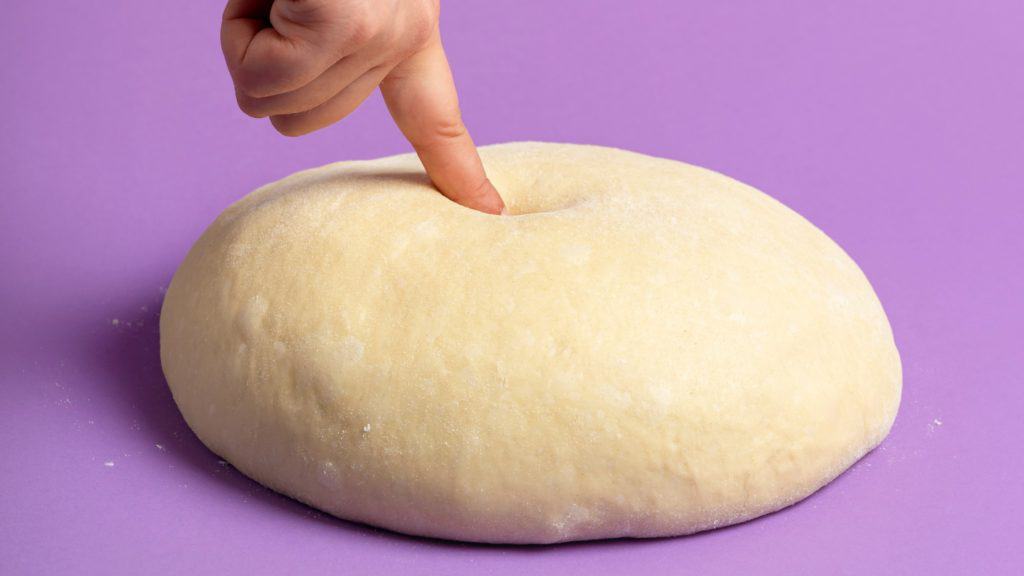
The pizza dough is proofed when the dough springs back slowly, and the indentation does not spring back. Dough that springs back quickly needs more proofing.
The second way to see if the dough is proofed is to check the increase in its volume. Most doughs double in volume. So if your dough has not increased much in volume, it needs to be proven longer.
Frequently Asked Questions on How to Proof Pizza Dough Fast
Can You Proof a Dough in a Microwave?
Yes. We can proof pizza dough in a microwave.
Can You Proof a Pizza Dough in an Oven?
Professional bakers put their dough in a proofing box for the dough to rise consistently. A home oven’s temperature is too high to be traditionally used as a proofing box.
This chamber has a set temperature and humidity level for the perfect proofing of dough every time.
To proof pizza dough in the oven, turn the oven on high for a minute to remove the chill from the surrounding air.
Ensure to keep the light on in the oven for extra heat, the temperature is below the advised temperature of 100 degrees F (38 degrees C) because a higher temperature will begin killing the yeast.
- Fill a glass baking dish with boiling water.
- Place it on the bottom rack of the oven.
- Place the dough on a baking sheet above the top or middle shelf.
- Close the oven door.
The heat and humidity of the boiling water create a warm, steamy condition, giving perfect proofing conditions for a good rise.
How Do You Proof a Pizza Dought in a Microwave?
The chamber in a microwave can be turned into a warm area.
- Fill a microwaveable cup with water.
- Heat this until it boils.
- Place the pizza dough in the microwave and the cup of water inside. The heat and steam from the boiling water create a warm temperature, but not too hot.
The extra humidity lets the yeast activate. If you need to reheat the microwave, remove the dough and repeat the process with the water.
Don’t turn on the microwave with the dough inside. This will cook the dough.
Can I Use a Pizza Dough Straight from the Fridge?
Pizza dough kept in the fridge needs to come to room temperature.
Place it on a countertop or a lightly floured bowl, and loosely cover the dough until it reaches room temperature. Ideally, the pizza dough can be left out for 24 to 48 hours.
Gluten, the protein that makes pizza dough chewy, is tighter in cold conditions like the fridge, which is why cold pizza dough stretches out and snaps back like a rubber band.
This step will loosen up the dough and make it easier to shape.
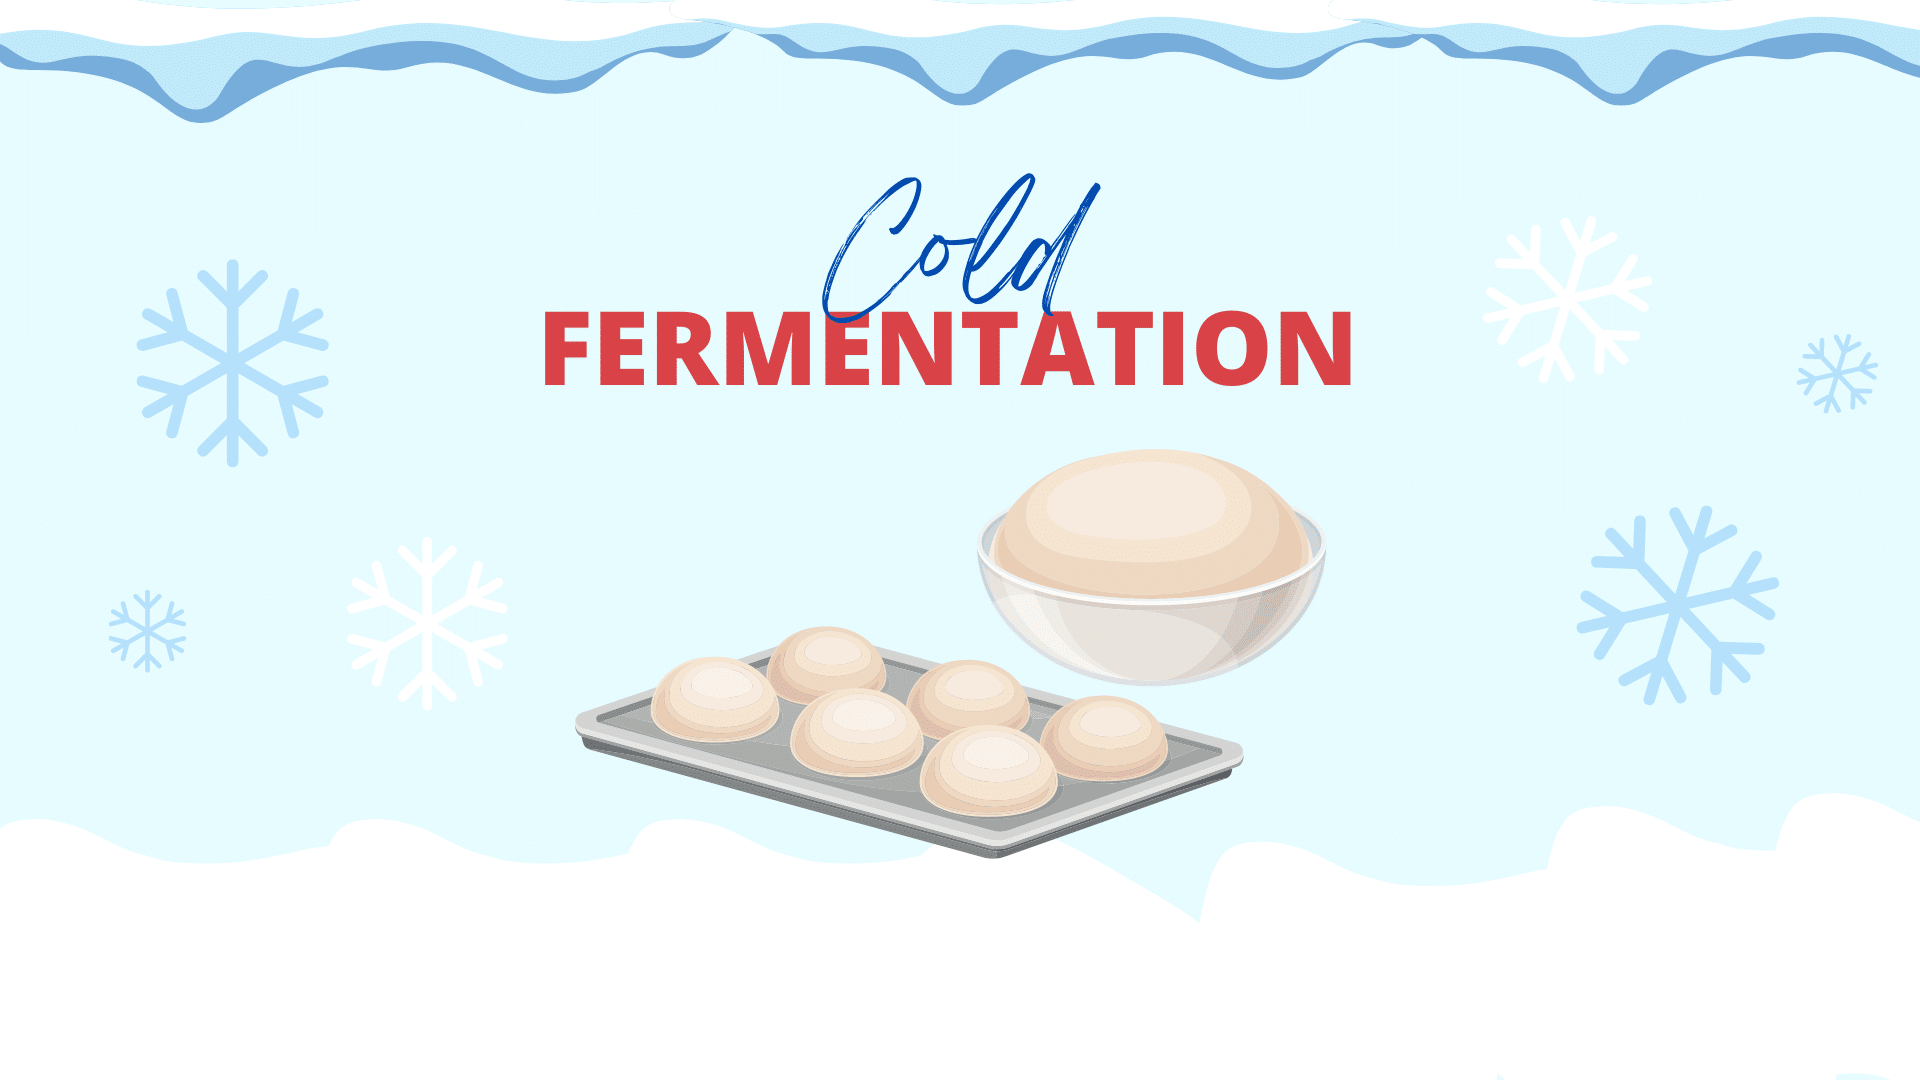
Is Cold-Proofing a Pizza Dough Better?
Advantages of a slower, colder rise
- Cold-proofing is slowing down the fermentation process. As the dough ferments, it is put inside a refrigerator to let the yeast work on the sugar in the flour for a longer time.
- Flavor develops over a few days. When the yeast is warm, it ferments quickly and runs out of sugars to consume. The dough becomes over-proofed and floppy and full of gas. And the dough will not bake well.
- To slow down the proofing, reduce the temperature. After kneading, put the dough in the fridge in one piece. Leave the dough overnight. Put it out the next day when you need to use it. Push the gas out of the dough. Shape into individual balls. Allow the dough to be proof at room temperature for one hour before baking.
- It’ll be easier to stretch the dough. And the pizza is baked light and crispy, full of flavor.
Colder temperature leads to a slower rise, with complex flavors and textures:
- When pizza dough rises at a lower temperature, the chemical reactions happen more slowly. Fermentation occurs more slowly. But at too-cold temperatures, the chemical reactions will not happen at all.
- When pizza dough rises at lower temperatures, the yeast feeds slowly. So this produces C02 and alcohol more slowly. This way, the dough will bake into a nicely browned, firm crust that’s soft and flavorful in the middle.
- Why is this so? Because at lower temperatures, the yeast consumes less sugar from flour since it does not produce much carbon dioxide as quickly as at higher temperatures. Less alcohol is created, which helps to prevent the alcoholic taste of pizza dough that rise too fast or too long.
What’s the Best Temperature to Proof Pizza Dough?
The ideal temperature range is 75 to 80 degrees F. Anything less is not proofing.
Do I Have to Rise my Pizza Dough Twice?
Making the pizza dough rise twice gives a more refined gluten structure, unlike when causing it to rise only once.
Making the dough rise twice is needed because the kneading of the dough gives a gluten structure that forces air out. This stops the dough from developing large air holes.
Imagine biting into a pizza and feeling this smooth, soft texture. It’s hard to describe, but there’s something special about this pizza.
There’s a secret behind this incredible texture. . . that, my friend, is what your family, loved ones, or customers will imagine when you proof twice.
Should You Punch Down a Pizza Dough
There are two stages of proofing. After the first proofing or bulk fermentation, punch down or degas the pizza dough to prevent it from over-proofing.
When the dough is over-proofed, it can’t retain the gas bubbles needed for the structure of the dough. The over-proofed dough is dense.
Punching down or degassing the pizza dough will deflate the dough and control the rate of proofing.
How Do You Proof Dough Without a Proofer?
A proofer (this can be a proofing oven, a proofing cabinet, a dough proofer, or proof box) gives a warm area of 70-115 degrees F.
The warm temperature and controlled humidity encourage fermentation of the dough and maximize proofing.
A DIY proofing box can be used by putting a loaf pan at the bottom of the oven and pouring 3 cups of boiling water into the pan.
Put the bread on the rack above, and keep the oven door closed. Do not turn on or heat the oven at all-the; hot water will keep the closed oven warm and moist.
Alternatives can be using an area in the kitchen with a consistent temperature. When the kitchen is below 70 degrees F, you can set it on top of a stove or inside an oven.
Or a draft-free spot. Or a DIY-proofing box with a light bulb and a styrofoam cooler.
A practical way is to:
- Put the dough in a lightly greased bowl.
- Cover with plastic wrap or a damp cloth.
- If the room is warm, let the dough be proof on the counter.
- If the room is cool, put the bowl with the dough over a bowl of warm or hot water. Leave this on a countertop.
Here’s What the PROs at Homemade Pizza Pro Use and Recommend
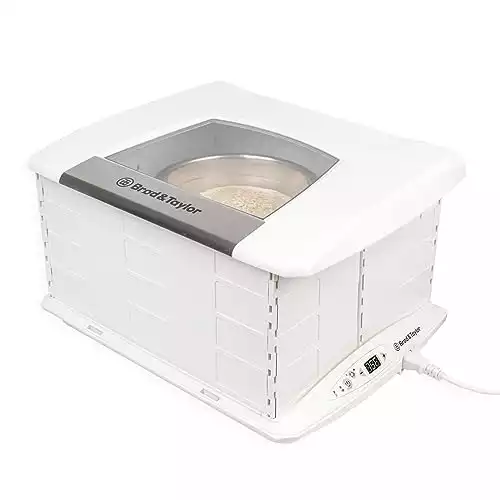
Enjoy accurate temperature control and consistent humidity. The Brod & Taylor Folding Dough Proofer creates an environment of consistent low-temperature warmth that is vital for many kitchen processes.
Ideal for pizza dough and yeast bread. Whether you’re a novice bread maker or an experienced enthusiast, this is the tool that helps ensure a flavorful, open-textured bread that is ready when you want it to be.
What’s a Good Warm Place for Dough Fermentation?
Ideally, a place where a mix of warm and cool air goes in and out.
Often, it’s in the kitchen or near a window. Studies show that the optimum temperature for yeast growth and flavor development is 78 to 80 degrees F.
A combination of being sufficiently warm to rise appropriately and cool enough to develop flavor.
If you live in a cold area, place your dough in a container, and seal it tight. This will help protect your dough from the environment and prevent any moisture from escaping.
What’s the Ideal Temperature for Dough Rising?
The dough rises in both cool and warm temperatures. To rise dough quickly and adequately, what temperature is best?
The dough rises best and efficiently at 78 to 80 degrees F without slowing the proofing.
Higher temperatures can stop the fermentation process and kill the yeast in dough. In contrast, lower temperatures can slow down the activity of the yeast and increase the rising time.
Adjustments can be made, though, with benefits from higher temperatures and a faster rise. And from lower temperatures and a slower rise.
Do You Cover the Dough to Let It Rise?
Bread and pizza dough are covered when proofing to prevent the surface of the dough from drying out.
The dough is covered to keep contaminants such as dust and debris away from the dough. A dry surface becomes tough to stretch. This can ruin the texture of the crust.
Adequately cover the dough before allowing it to sit and rise. Use any material that puts a sound barrier between the dough and the air surrounding the proofing container.
To cover the dough, use plastic wrap, dinner plates, a plastic bag, damp kitchen towel. food safe ziplock bag, lidded containers, plastic shower cap
What Temperature is the Proof Setting on an Oven?
The temperature range reached when the oven is set for the Proof Mode is from 80 to 95 degrees F.
A pro tip is to cover the dough tightly with a cloth or greased plastic wrap. To avoid lowering the temperature in the oven while proofing, ensure the door is closed well.
The Last Slice
We hope that you learned how to proof pizza dough fast.
Don’t forget that if you have questions or need clarification at any point.
We are here; contact us.
Additional Resources on Pizza Dough Fermentation
Pizza Dough Fermentation: Unlocking the Secret to the Perfect Crust
the PROs
Learn the correct process of pizza dough fermentation and why this is so important in the pizza-making process.
Cold Fermentation: Unlocking the Magic of Slow-Risen Pizza Dough
the PROs
As an ardent pizza lover knows, the journey to creating the perfect pie is a lot more complex than merely …

Poke Test Demystified: Master the Technique for Perfect Pizza Every Time
the PROs
Are you tired of ending up with a pizza crust that’s either too thick or still raw in some parts, …

How to Control Temperature, Time, and Hydration for Pizza Dough
the PROs
Learn how temperature, time and hydration affect pizza dough and how you can control them.

Dough Degassing: The Key to a Crispy, Airy Pizza Crust
the PROs
Discover what pizza dough degassing is and why so important in the pizza-making process. See how it works and check the best practices.
Retarding Pizza Dough: The Timeless Technique for a Perfect Crust
the PROs
In this article, you will learn what retarding dough is and why it is the key to your homemade pizza success. When you decide to make pizza at home, the most challenging but most important part of the process is making the pizza dough.

Pizza Dough Proofing Like a Pro! – Get Your Dough Right!
the PROs
Have you ever heard the phrase the proof is in the pudding? In this guide, you will learn that the …
Enjoy!
Not a PRO? Not a Problem!
Take a pizza class to bring your pizza skills to the next level,
so you can be a PRO!
Related Posts

Costco Pizza Delivery: Find How You Can Get It Now!
the PROs
People go to Costco’s food court for many different reasons, but the cheesy slice of pizza they serve is among …

Pizza for Beginners: Don’t Buy Pizza, Make It! Here’s How to Get Started!
the PROs
You have this idea that you want to make pizza at home as opposed to ordering it, but where do you start? Don’t worry! Here you will find answers and directions to all your questions.

Pizza Toppings Under Cheese or Over Cheese? [Why the Order Matters]
the PROs
Is Pizza Cheese on Top or Bottom? Hey pizza lovers, are you wondering if you should layer pizza toppings under …

Newsletter
Subscribe to our Recipe of the Week newsletter and receive our partners’ latest recipes, tips, and discount offers.
Keep in Touch!