
How to Adjust Pizza Dough Hydration
Making good pizza dough is an art form and one of the most important skills to master when baking pizza. Adjusting the hydration level of your dough is a key part of this; it can determine the texture, flavor, and overall look of your pizza.
This article will show how to adjust pizza dough hydration for a perfect crust.
Let’s get started!
Here’s What You Will Find:
Pizza Dough Hydration
Making the perfect pizza dough requires precision and exact measurements. One of the most important factors to consider when making pizza dough is hydration, which is the ratio of water to flour in the recipe.
Knowing how to calculate pizza dough hydration will ensure that your pizza crust turns out light, airy, and chewy every time.
With just a few simple steps, you’ll be able to measure your ingredients for a delicious homemade pizza perfectly.
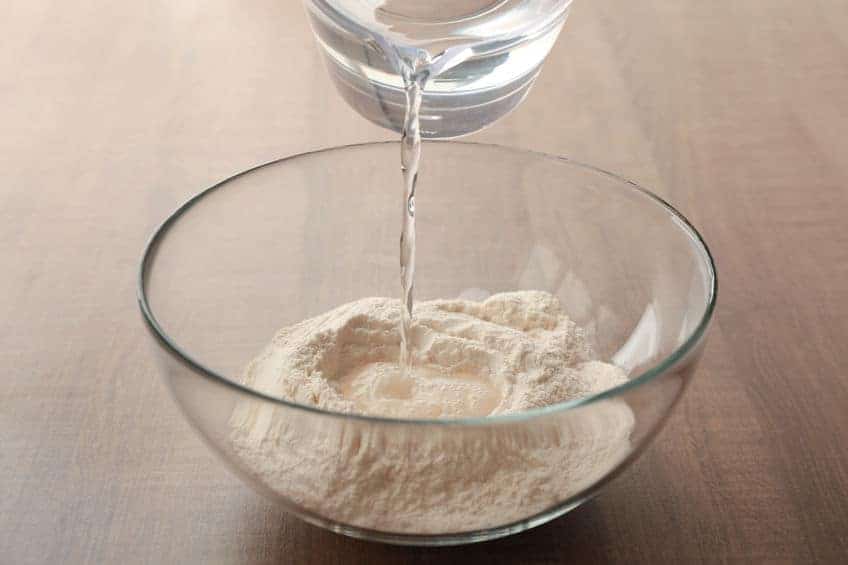
To accurately compute the hydration percentage of your pizza dough, start by measuring out 400 grams of pizza flour and 268 grams of room-temperature water.
Once measured, enter the numbers into our online hydration calculator or use a simple formula.
The equation is (water/flour) x 100 = %hydration. In this example, 268 divided by 400 would equal 67%.
How Do You Know When to Adjust Pizza Dough Hydration?
The hydration level of pizza dough determines its texture and final result. A dough with a high hydration level will produce a more tender, delicate crust, while a dough with a low hydration level will produce a denser, chewier crust.
If you don’t like the result of your pizza crust, then you should consider adjusting the dough’s hydration.
The ideal hydration level for pizza dough depends on personal preference, but a common range is between 60-65%.
To adjust your pizza dough’s hydration level, add more water or flour, depending on whether you want to increase or decrease the hydration level. It’s important to remember that changes to the dough recipe can also affect other factors, such as yeast activity, proofing time, and baking results.
A simple way to determine the hydration level of your dough is to measure its weight and calculate the percentage of water in the dough. Divide the total water weight in the recipe by the flour weight and multiply by 100 to get the hydration percentage.
For example:
650g water ÷ 1000g of flour multiplied by 100 = 65% hydration (650÷1000=.65 x 100=65%)
Now that we understand how to calculate a recipe’s hydration, let’s adjust the recipe by either increasing or decreasing the pizza dough hydration level.
Here’s a step-by-step guide on how to adjust pizza dough hydration and adapt your recipe:
Step 1 – Calculate by weighing the total amount of flour in your recipe or converting it from cups to either grams or ounces.
Step 2 – Multiply the desired pizza dough hydration percentage by the total amount of flour. This method will give you the required amount of water.
Using the previous example, here are your base numbers:
Recipe:
- Flour 100% = 400g
- Water 67% = 400 x .67 = 268g
- Yeast 1% = 400 x .01 = 4g
- Salt 2.5% = 400 x .025 = 10g
Hydration Percentage: (268/400 x 100 = 67) 67 percent hydration level.
Increasing the Pizza Dough Hydration Percentage of a Pizza Dough Recipe
Let’s take the same sample recipe from the above example (calculated at 67% hydration).
Here is what you need to do to increase the hydration by 2% and test the recipe at 69%.
Step 1
You already have the flour that you need at 400 grams. So, want to know how much water you need to bring that recipe at 69% hydration?
The total amount of flour is 400 grams which is 100%. Since you only want to adjust the pizza dough hydration, you don’t need to change the flour or the dry ingredients.
Step 2
We want to increase to 69% hydration.
To calculate the increase, multiply the new percentage by the flour or 0.69 x 400 grams = 276 grams. This result means we need 276 grams of water in our recipe instead of the original 268.
If you’re baking pizza dough at a high altitude, it is important to increase the hydration of your dough, as flour is generally drier at higher altitudes; it will absorb more water.
Decreasing the Pizza Dough Hydration Percentage of a Pizza Dough Recipe
We use the same sample recipe from the above example (calculated at 67% hydration). Here is what you need to do to decrease the hydration by 2% and test the recipe at 65%.
Step 1
You already have the flour that you need at 400 grams. So, want to know how much water you need to bring that recipe at 65% hydration? The total amount of flour is 400 grams which is 100%. Since you only want to adjust the hydration, you don’t need to change the flour or the ingredients.
Step 2
We want to decrease to 65% hydration.
To calculate the decrease, multiply the new percentage by the flour or 0.65 x 400 grams = 260 grams. This result means we need 260 grams of water in our recipe instead of 268g.
Don’t worry; you don’t need to start a new recipe if the hydration is too high and you want to lower it.
Take the original 268g of water and divide by .65; that will give how much flour you need to reach 65% hydration (268 ÷ .65 = 412). So you need to add 12g (412-400=12) of flour to your dough to reach 65% (400 + 12= 412 x .65 = 267.8 or 268 rounded.
However, you now will have more finished dough than before. Here are the numbers:
| Finished Dough at 400g of flour |
|---|
| Flour 400g |
| + Water 268g |
| + Yeast 4g |
| + Salt 10g |
| = Finished Dough = 682g |
| Finished Dough at 412g of flour |
|---|
| Flour 412g |
| +Water 268g |
| +Yeast 4g |
| +Salt 10g |
| = Finished Dough = 694g |
There you have it; you decreased the recipe from 67% to 65%.
When you add more flour to the dough, you end up with more finished dough, so more pizza!
You can check our finished dough calculator if you don’t want to do the math.
Try different pizza dough hydration levels and check which one you prefer.
How to Determine if You Achieved the Right Pizza Dough Hydration
As always, take note of your percentages, so you know what your starting point is. You can either mix the dough by hand or use a stand mixer.
How Do You Know when the Dough is Hydrated?
The best way to know if you added the right amount of water is by performing a visual and physical inspection of your dough.
Visual Inspection
Look at it and see if the ingredients have been thoroughly combined and if there is no unmixed flour at the bottom of the bowl or edges.
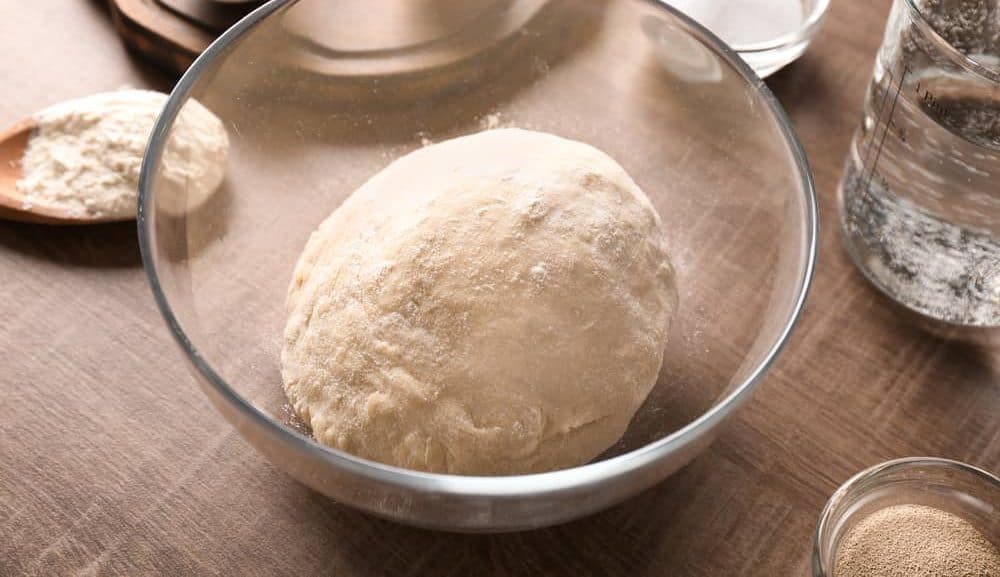
When all the ingredients are fully incorporated, the dough should form into a ball that doesn’t stick to the bowl.
Physical Inspection
Physically touch the dough, and check whether it is supple, sticky, or tacky.
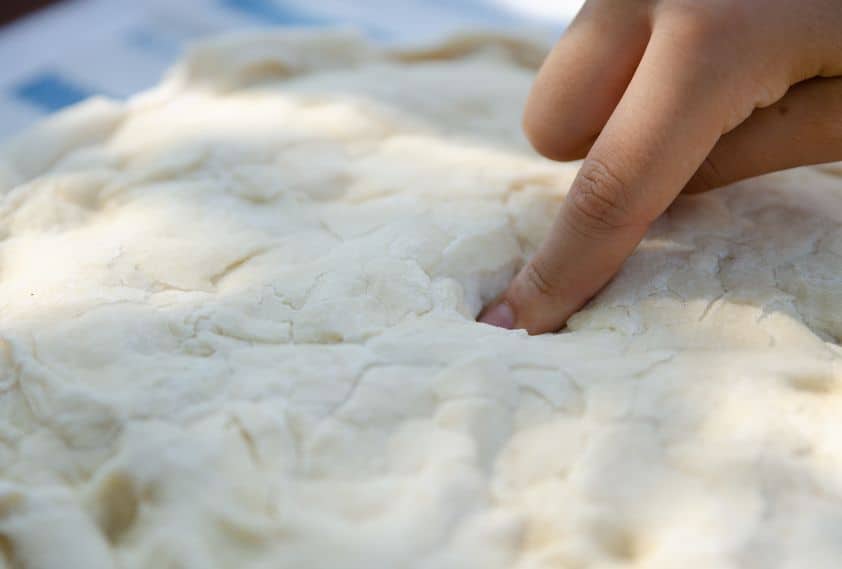
Hydrated pizza dough should be fluffy, supple, and slightly tacky.
Tips on Pizza Dough Hydration
What Do You Need to Do to Achieve the Desired Pizza Dough Hydration?
Measure ingredients correctly
When measuring all of your ingredients, you need two critical things.
Use a Scale
The first is a measuring scale. It can be a digital scale but is not limited to a standard spring-loaded scale.
Use a Measuring Cup
The second item you want is a good measuring cup for getting a rounded amount for visuals. This will let you see how measuring out flour gets you closer to your target amount.
It still needs to be measured with a digital scale so you don’t make any mistakes. Your flour should go into a bowl that has the tare-off weight of the bowl removed. Also, make sure that your flour is broken up with no clumps.
Control the amount of additional flour while kneading
Not everyone knows what these buzzwords mean when they describe in cookbooks that you dust or add a dash of something.
So when adding extra flour to your working area, you must be careful. A light dusting is taking a small handful of flour and sprinkling it over your counter or table.
Alternatively, you can use a wire mesh strainer and dust it like powdered toast.
We advise adding only as much flour to keep your hands from sticking.
Your table should have enough so your dough doesn’t instantly stick to the surface. Have a small bowl with flour nearby so you can add small amounts when you need to.
Consider the temperature of the dough and the kitchen
Depending on where you live, you’ll need to consider the temperature in your kitchen.
Pizza dough doesn’t like cold places, so when you want to proof your dough, it needs to be in a warm spot but not too warm.
This temperature can cause your dough to rise too much and require more kneading. For ideal working conditions, you’ll need a kitchen with a room temperature of around 68 – 72 degrees Fahrenheit.
If your kitchen is colder, move your dough to be proofed to an area of the kitchen that’s warmer.
You can also cover the bowl with a towel to reduce airflow, so the heat generated from the proofing will make your dough rise more naturally.
Consider the overall humidity.
Humidity is also a problem with making pizza dough since it increases the heat level in your kitchen. For this reason, hotter days that have higher humidity would require cold water to be used to dissolve your yeast.
This is so the rate of fermentation is slowed down. You don’t want to have yeast that will proof your dough faster than usual. This won’t change your dough much since it will adjust to the room temperature the longer your pizza dough sits.
The dough is usually coated with oil or has oil in the mix so that humidity won’t affect the proofing of the dough afterward. You may need to adjust your water ratio if humidity levels are very high.
Use the correct flour according to the flour’s characteristics and your oven.
Choose flour that works best with your pizza recipe. Some professional pizza chefs like to use quality flour that is often used for making bread.
This flour is milled finer, so you don’t have problems with absorption. But it also comes down to preference and the source where you buy your flour.
Some flour brands offer pizza-grade flour, which is similar to bread-making flour. Usually, this type of flour is pricier as a result.
Just find a quality brand that’s finely ground and powdery so it will readily hydrate when you add your water.
If you have clumps, these need to be broken up, and this will make the mixing process more of a headache.
Considerations when Adjusting your Pizza Dough Hydration
Let’s say that you added water at 65% but find that it was too dry, and you would like to increase the amount of water.
It’s recommended that you make adjustments in increments of 2 to 3%, recalculate your recipe, and test again.
It’s also recommended that you start at a lower percentage level because you can always add more water, even during the mixing process, but you can’t remove the water once combined.
Caution!
You could add more flour if the dough is too sticky, but then your recipe will be off as a change in flour changes the proportions of the rest of the ingredients.
The Secret to Making a Crispy Crust
Let’s say you want to make the crust crispier. We are going to reveal the secret to making a crispy crust. How to make a crispy pizza crust is a very common question.
So here is the answer: Add more water to the dough formula!
Increasing the hydration percentage in your recipe allows the dough to be hydrated, so it will expand rapidly once it gets in contact with the oven’s heat. The increased heat produces a greater oven spring. Oven spring is essentially the amount the dough rises when baking.
The additional water adds weight to the dough, and it will evaporate immediately, creating steam that will be trapped underneath the crust of the pizza, making a crispier texture.
In general, if your recipe is anywhere from 70% to 80%, you should be able to get a crispy crust. Some exceptions exist, but they are related to specific pizza styles that contain additional ingredients.
To calculate how much water you need, weigh the flour and multiply it by your desired pizza dough hydration (anywhere from .70 to .80), and the result is your water content for a crispy crust.
Increasing the dough’s hydration will get more elastic, resulting in a stretchy dough. It will also get softer, making it harder to open and form the pizza.
The drawback is that you could handle a sticky dough that might stick to the pizza peel when transferring it to the oven.
Higher hydration pizza doughs are very sticky and need extra flour dusting to stick to you or your working area. But be careful not to add too much flour as it will change your hydration percentage.
How Pizza Dough Hydration Determines your Pizza Style
Understanding what kind of pizza you’re making depends on personal preference.
The hydration ratio will determine the correct type of dough for your pizza.
Yet, many specific types of crust apply to select pizza styles. In an Authentic Neapolitan pizza, you will have an airy crust, while in a New York-style pizza, the crust is thinner and less airy.
So, if you aim for a New York-style pizza, always stick to the percentage of water that will give that result; otherwise, you may end up with a different pizza style.
Pizza Dough Hydration per Pizza Style
| Hydration Level | Effect on Dough | Effect on Final Pizza | Recommended Pizza Style |
|---|---|---|---|
| 50% – 60% |
– Firm – Not Sticky – Easy to Handle |
– Tight Crumb – Crust – Soft Texture | Neapolitan Pizza |
| 60% – 70% |
-Slightly sticky -Supple -Tacky |
– Medium Crumb – Crust- Moderate Firm Texture | New York Style |
| 70% or More |
– Loose – Sticky – Slack – Harder to handle (Shape) | – Very open crumbs (Large Holes) – Crust- Firm Texture | Sicilian Chicago Deep Dish |
Adjusting Pizza Dough Recipes for High Altitude
The crust can turn out too dense when making pizza at high altitudes or become overcooked due to the water’s lower atmospheric pressure and boiling point.
To compensate for these changes, you can adjust your pizza recipe by using less yeast, reducing the oven temperature by 25°F, rolling out the dough to a thinner thickness, and increasing the dough’s hydration level by adding more water.
You may also need to increase the baking time slightly to allow for the slower baking process at high altitudes. Experimenting with these adjustments can help you achieve the perfect crust consistency at high altitudes.
FAQs
How to make 60% hydration pizza dough?
To make a 60% hydration pizza dough, you’ll need to start by weighing out your flour and water in exact proportions. For every 100 grams of high-gluten or all-purpose flour, use 60 grams of cold water. For example, 500g of flour multiplied by .60 = 300g of water. You may also want to add some salt (1/2 teaspoon per 100g flour) or olive oil (1 tablespoon per 100g flour) if you like. Then mix together until everything is combined before kneading the mixture into a smooth ball on a lightly floured surface.
What is the typical hydration of pizza dough?
The typical hydration of pizza dough is 65%. You can easily increase or decrease hydration by adding or reducing water in your dough formula.
What is the best hydration for 00 flour?
With 00 flour, start at 60% hydration and gradually work it up to 65% as you become more comfortable with the dough.
What is the hydration percentage of Neapolitan pizza dough?
Neapolitan pizza dough’s hydration percentage ranges from 50 to 60%.
The Last Slice
We hope that you now know how to adjust pizza dough hydration. Adjusting the hydration of pizza dough is a crucial step in achieving the desired texture of the crust.
Neapolitan pizza dough is traditionally made with a lower hydration dough, resulting in a tender, light crust.
Lower hydration dough results in a denser, chewier crust. The dough’s hydration directly impacts the fermentation process and can affect the final product.
Higher hydration dough produces a soft and airy texture for the pizza crust.
To make a consistent dough, bakers often use baker’s percentage to determine the precise amount of water needed in the recipe. If the dough is too sticky, additional flour can be added to decrease the hydration.
Adjusting the dough’s hydration is key to creating the perfect, crispier, or softer crust for your homemade pizzas.
Related Articles

Best Water for Pizza Dough: Temperature, Quality, and Hydration
the PROs
In this article, we are going to dive deep into the mysterious ways of water. In conjunction with flour, yeast, and salt, it can make the most spectacular pizza dough.

High Hydration Pizza Dough – Secret Ingredient to Perfectly Crispy Pizza
the PROs
Are you looking for a delicious, crunchy high hydration pizza dough recipe? This type of dough is very popular among …
Low Hydration Pizza Dough: No More Soggy Pizza!
the PROs
Are you wondering what low-hydration pizza dough is? A pizza dough’s hydration is one of the most important factors when …
Flour Absorption 101: The Key to Crafting the Perfect Pizza Crust
the PROs
Ah, pizza. The one food that unites us all! What would we do without our delicious, cheesy slices of heaven? …

Pizza Dough Hydration Calculator
the PROs
Making the perfect pizza dough can be difficult, especially for novice bakers. But with the right tools, anyone can master …

7 Hydration Percentages by Pizza Style that Actually Make the Best Pizza
the PROs
Making a pizza is all about getting your pizza dough to have just the right amount of hydration. If you’re looking to get the best results this guide can help you find the specific pizza dough hydration according to your desired pizza style. Let’s check it out!
Enjoy!
Not a PRO? Not a Problem!
Take a pizza class to bring your pizza skills to the next level,
so you can be a PRO!
Related Posts

Costco Pizza Delivery: Find How You Can Get It Now!
the PROs
People go to Costco’s food court for many different reasons, but the cheesy slice of pizza they serve is among …

Pizza for Beginners: Don’t Buy Pizza, Make It! Here’s How to Get Started!
the PROs
You have this idea that you want to make pizza at home as opposed to ordering it, but where do you start? Don’t worry! Here you will find answers and directions to all your questions.

Pizza Toppings Under Cheese or Over Cheese? [Why the Order Matters]
the PROs
Is Pizza Cheese on Top or Bottom? Hey pizza lovers, are you wondering if you should layer pizza toppings under …

Newsletter
Subscribe to our Recipe of the Week newsletter and receive our partners’ latest recipes, tips, and discount offers.
Keep in Touch!